
Crispy Chickpeas with Sea Salt | Healthy, Easy Snack Recipe
1. Introduction
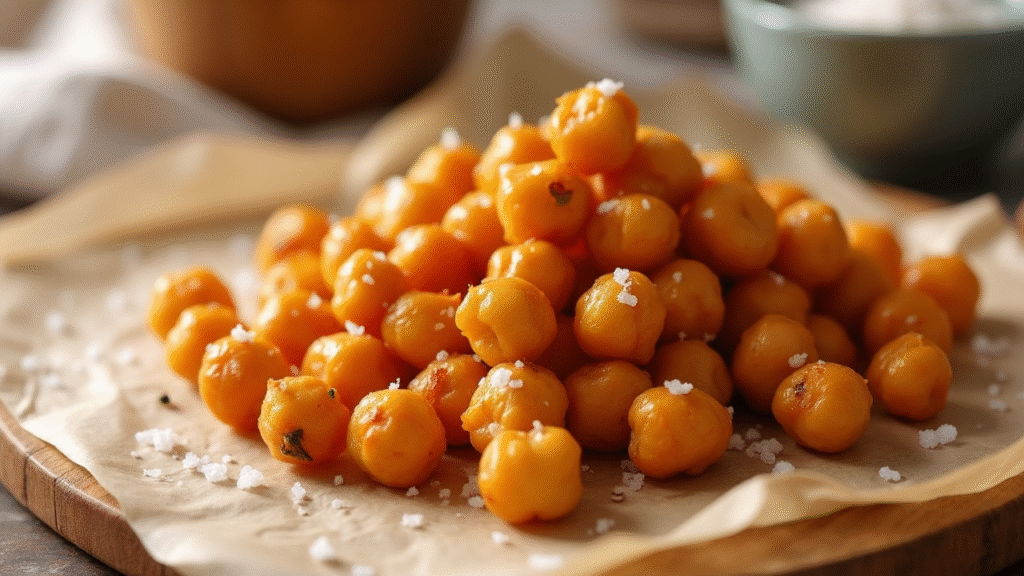
There’s something incredibly satisfying about a crunchy snack, and when you can make it at home with minimal effort, it’s even better. Crispy Chickpeas with Sea Salt are one of those snacks that are easy to prepare, healthy, and irresistibly delicious. Imagine a crunchy bite packed with flavor, perfect for snacking, adding to salads, or tossing into your favorite bowls. Whether you’re looking for a healthier alternative to chips or simply craving something savory, this recipe is a must-try.
Not only are these chickpeas crispy and full of flavor, but they’re also packed with nutrients like fiber, protein, and healthy fats. The best part? They’re highly customizable! You can easily tweak the seasoning to your liking—add spices like paprika, garlic powder, or cayenne pepper for extra kick, or keep it simple with just sea salt for a minimalist snack.
In this post, you’ll learn how to make these crispy chickpeas at home from scratch. I’ll walk you through the ingredients, step-by-step instructions, tips, and variations to make this recipe fit your personal taste. By the end, you’ll have a satisfying, homemade snack that you can enjoy at any time.
2. Ingredients Breakdown
Here’s a breakdown of the simple ingredients you’ll need for Crispy Chickpeas with Sea Salt:
Main Ingredients:
- Chickpeas (2 cups):
The star of the recipe! Chickpeas, also known as garbanzo beans, are a fantastic base for this crunchy snack. They’re naturally high in protein and fiber, making them a great option for a nutritious snack. Be sure to rinse and drain the chickpeas well before cooking to remove any excess sodium or preservatives. - Olive oil (1-2 tbsp):
Olive oil helps to give the chickpeas their crispiness and a light, smooth flavor. You can also substitute with avocado oil or coconut oil if you prefer. - Sea salt (1 tsp, or to taste):
A sprinkle of sea salt is all you need to elevate the flavor of these crispy chickpeas. You can add more or less depending on your preference, but start with a pinch and adjust to taste.
Optional Ingredients for Flavor:
- Garlic powder (1/2 tsp):
Garlic powder adds a savory, aromatic flavor to the chickpeas. It’s a great addition, but if you’re not a fan of garlic, feel free to leave it out. - Paprika (1/2 tsp):
For a touch of smokiness and color, add a bit of paprika. You can use smoked paprika for extra depth or sweet paprika for a milder taste. - Cayenne pepper (1/4 tsp, optional):
If you like a little heat, cayenne pepper is a great addition. It pairs beautifully with the salt and garlic, giving the chickpeas a spicy kick. - Cumin (1/2 tsp):
For an earthy, slightly citrusy flavor, cumin is a great option. It adds depth to the overall taste, but again, it’s optional depending on your flavor preference.
3. Step-by-Step Instructions
Step 1: Preheat the Oven
Preheat your oven to 400°F (200°C). This high temperature ensures the chickpeas get crispy without drying out or burning.
Step 2: Prepare the Chickpeas
- Drain and rinse the chickpeas:
Drain the canned chickpeas and rinse them well under cold water. This removes any excess salt or canning liquid. - Dry the chickpeas thoroughly:
Spread the rinsed chickpeas onto a clean kitchen towel or paper towels. Pat them dry to ensure they become extra crispy when roasted. This step is crucial, as excess moisture can prevent the chickpeas from crisping up properly. - Remove the skins (optional):
If you’re looking for extra crispiness, you can gently rub the chickpeas with the towel to remove the skins. This is optional but can help achieve a more uniform, crunchy texture.
Step 3: Season the Chickpeas
- Toss chickpeas in olive oil and seasonings:
In a large mixing bowl, toss the chickpeas with olive oil, sea salt, and any optional seasonings like garlic powder, paprika, cayenne, or cumin. Stir well to ensure all the chickpeas are evenly coated with the oil and spices.
Step 4: Roast the Chickpeas
- Spread chickpeas on a baking sheet:
Lay the seasoned chickpeas in a single layer on a baking sheet lined with parchment paper. Make sure they’re spread out evenly for optimal roasting. - Roast for 25-30 minutes:
Place the baking sheet in the preheated oven and roast for about 25-30 minutes, stirring once or twice during the process to ensure even roasting. The chickpeas should be golden and crispy when done.
Step 5: Cool and Serve
- Cool the chickpeas:
Once they’re crispy and golden, remove the chickpeas from the oven and let them cool on the baking sheet for a few minutes. As they cool, they’ll crisp up even more. - Serve and enjoy:
Serve your Crispy Chickpeas with Sea Salt as a snack on their own or toss them into salads, grain bowls, or even soups. They’re also perfect for topping off hummus or yogurt.
4. Tips and Variations
- For extra crispy chickpeas:
If you prefer your chickpeas extra crispy, try roasting them a little longer (up to 40 minutes), but be sure to check every 5 minutes toward the end to prevent burning. - Flavor variations:
- Herb-infused: Add dried oregano, thyme, or rosemary to the seasoning mix for an herbal flavor.
- Cheesy: Add nutritional yeast for a vegan cheesy flavor or sprinkle with Parmesan after roasting for a savory twist.
- Sweet option: Try swapping the sea salt for cinnamon and a drizzle of honey for a sweet version of roasted chickpeas.
- Herb-infused: Add dried oregano, thyme, or rosemary to the seasoning mix for an herbal flavor.
- Make it spicy:
Add extra cayenne pepper or some chili powder for a spicier kick. If you love heat, this is a perfect way to kick up the flavor. - Gluten-free:
This recipe is naturally gluten-free, so you can enjoy it without any concerns. Make sure to check your seasonings and oils to ensure they are gluten-free if you’re sensitive.
5. Serving Suggestions
- Perfect as a snack:
These crispy chickpeas are great on their own as a healthy, satisfying snack. Enjoy them while watching a movie or as a midday pick-me-up. - In salads:
Add a crunchy topping to salads. The chickpeas pair well with green salads, quinoa bowls, or even couscous. - With dips:
Serve them alongside your favorite dips, such as hummus, guacamole, or a yogurt-based dip. The crispiness complements creamy dips beautifully. - As a topping for soups:
Sprinkle these chickpeas over soups like tomato soup, lentil soup, or butternut squash soup for added texture.
6. Storage and Reheating Instructions
Storage:
Store your Crispy Chickpeas with Sea Salt in an airtight container at room temperature for up to 1 week. The crispiness will be preserved if stored properly.
Reheating:
While roasted chickpeas are best enjoyed fresh, you can reheat them in the oven at 350°F for 5-10 minutes if they’ve lost some of their crunch.
7. Recipe Notes
- Prep ahead:
These chickpeas can be made in advance and stored for snacking later in the week. They’re perfect for meal prep or making a batch to have on hand for a quick snack. - Tossing in oil:
Make sure the chickpeas are evenly coated with oil to avoid any dry patches when roasting. The oil helps to create that golden, crispy exterior.
8. Nutrition Information (Per Serving)
| Nutrient | Amount per Serving |
| Calories | 150 |
| Fat | 7g |
| Saturated Fat | 1g |
| Carbohydrates | 18g |
| Sugar | 2g |
| Fiber | 6g |
| Protein | 6g |
| Sodium | 230mg |
| Cholesterol | 0mg |
| Calcium | 40mg |
| Iron | 1.5mg |
Note: Nutrition information is an estimate and may vary based on specific ingredients used.
9. Recipe Card Summary
Course: Snack
Cuisine: American
Servings: 4
Prep Time: 5 minutes
Cook Time: 25-30 minutes
Total Time: 30-35 minutes
Ingredients:
- 2 cups chickpeas
- 1-2 tbsp olive oil
- 1 tsp sea salt
- 1/2 tsp garlic powder (optional)
- 1/2 tsp paprika (optional)
Instructions:
- Preheat the oven to 400°F.
- Drain and rinse chickpeas, pat dry.
- Toss chickpeas in olive oil and seasoning.
- Spread on a baking sheet and roast for 25-30 minutes, stirring halfway through.
- Let cool for 5 minutes and serve.
Notes:
- Can be prepped ahead of time.
- Best stored in an airtight container for up to 1 week.
Nutrition:
- 150 calories per serving.
10. Final Thoughts or CONCLUSION
These Crispy Chickpeas with Sea Salt are a delicious, healthy snack that’s perfect for any occasion. Whether you’re enjoying them as a snack, adding them to a salad, or serving them with a dip, they’re sure to impress. With their crunchiness and savory flavor, you’ll want to make them again and again. I’d love to hear how they turned out for you—share your thoughts in the comments below! Happy cooking!