
Spider Crackers with Cheese: The Ultimate Halloween Appetizer That Everyone Will Devour
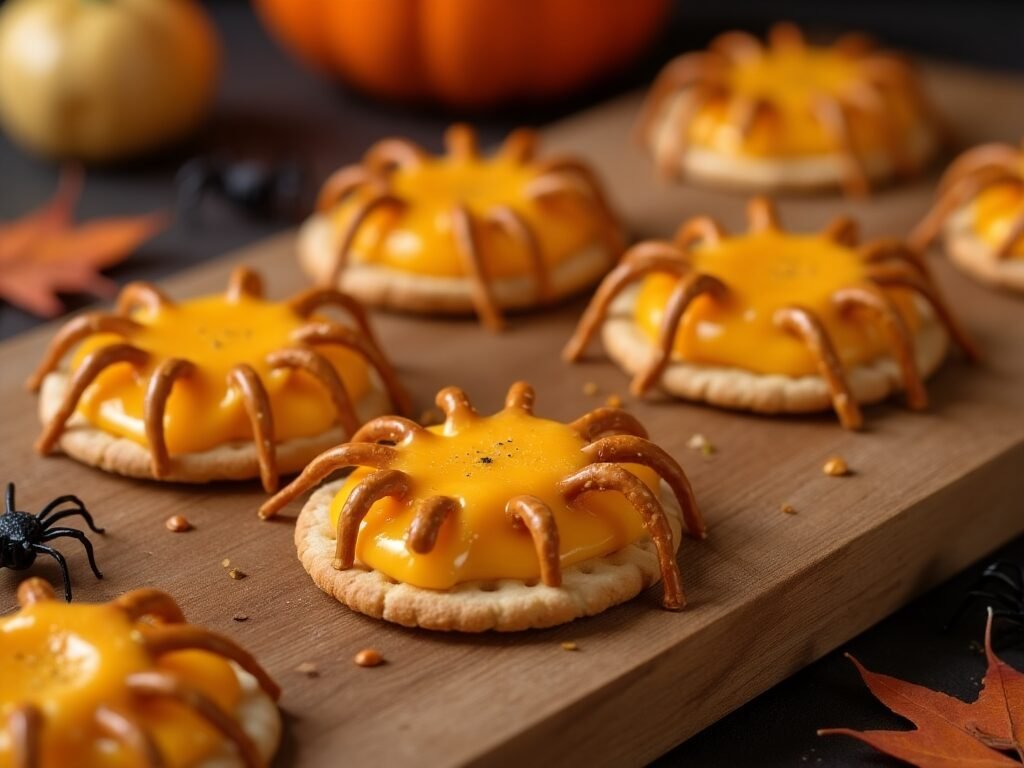
Halloween parties call for treats that are equal parts spooky and delicious, and these Spider Crackers with Cheese deliver on both fronts. Picture this: golden, crispy crackers topped with perfectly melted cheese shaped into creepy crawly spiders, complete with pretzel stick legs that’ll make your guests do a double-take. The best part? You can whip up a whole batch in under 20 minutes using ingredients you probably already have in your pantry.
These little beauties aren’t just about the scare factor though. The combination of buttery crackers, gooey melted cheese, and that satisfying crunch from the pretzel legs creates a flavor and texture experience that’ll have both kids and adults reaching for seconds. They’re incredibly versatile too – perfect for Halloween parties, spooky movie nights, or even as a fun after-school snack that gets the little ones excited about cooking.
What makes this recipe truly special is how simple it is to customize. Want to make them extra cheesy? Go for it. Prefer a spicier kick? Add some jalapeños. Working with dietary restrictions? We’ve got substitutions that’ll work perfectly. By the time you finish reading this guide, you’ll have everything you need to create these show-stopping spider crackers that’ll be the talk of your next gathering.
Ingredients Breakdown
Round Crackers (48 pieces) Your foundation matters here. Ritz crackers are the gold standard because their buttery flavor and sturdy texture hold up beautifully under melted cheese. Town House crackers work wonderfully too. Avoid thin, delicate crackers that might break under the weight of toppings.
Shredded Cheese (2 cups) Sharp cheddar is my go-to choice because it melts smoothly and offers that classic cheese-pull effect everyone loves. Mild cheddar works if you’re serving younger kids who prefer less intense flavors. For extra richness, try mixing cheddar with a bit of cream cheese.
Thin Pretzel Sticks (1 bag) These become your spider legs, so look for the thinnest pretzel sticks you can find. They should be easy to break into 1-inch pieces. If you can only find thick pretzels, break them lengthwise to create thinner pieces that look more realistic.
Black Olives (1 can, pitted) Sliced black olives create perfect spider heads and add a savory contrast to the rich cheese. Make sure they’re well-drained to prevent soggy crackers. Green olives work too if you want a different flavor profile.
Cream Cheese (4 oz, softened) This is your secret weapon for making the cheese mixture extra creamy and helping everything stick together better. Let it sit at room temperature for about 30 minutes before using, or microwave for 15-20 seconds to soften quickly.
Paprika (1 teaspoon) Just a light dusting adds color and a subtle smoky flavor. It also makes the spiders look more realistic by adding that slightly orange tint that real spiders often have.
Garlic Powder (1/2 teaspoon, optional) This adds depth without overpowering the cheese. Skip it if you’re serving very young children who might be sensitive to stronger flavors.
Step-by-Step Instructions
1. Prepare Your Workspace Preheat your oven to 375°F and line two large baking sheets with parchment paper. This prevents sticking and makes cleanup effortless. Arrange your crackers in single layers on the prepared sheets, leaving about an inch between each cracker to allow for cheese spreading.
2. Create the Cheese Mixture In a medium bowl, combine the softened cream cheese, shredded cheddar, and garlic powder if using. Mix thoroughly until you have a smooth, spreadable consistency. If the mixture seems too thick, add a tablespoon of milk. If it’s too thin, add more shredded cheese.
3. Form the Spider Bodies Using a small spoon or your fingers, place about a tablespoon of the cheese mixture in the center of each cracker. Gently press down to create an oval shape that resembles a spider’s body. Don’t worry about making them perfect – slightly irregular shapes actually look more realistic.
4. Add the Legs Break your pretzel sticks into 1-inch pieces. For each spider, you’ll need 8 leg pieces. Gently press 4 pretzel pieces into each side of the cheese body, angling them slightly upward to create that classic spider pose. The cheese mixture should hold them in place, but press gently to ensure they stick.
5. Create the Heads Place one black olive slice at one end of each cheese spider body. This becomes the head and adds that final realistic touch that makes guests look twice. Position them so they slightly overlap the cheese body for the most natural appearance.
6. Bake to Perfection Place the baking sheets in your preheated oven and bake for 8-10 minutes, until the cheese is melted and just starting to bubble around the edges. The crackers should remain golden but not burnt. Keep a close eye on them during the last few minutes as they can go from perfect to overdone quickly.
7. Final Touches Remove from the oven and immediately dust lightly with paprika while the cheese is still hot – this helps the paprika stick and creates that authentic spider coloring. Let them cool for 2-3 minutes before serving so the cheese sets slightly but is still warm and gooey.
Tips and Variations
For Extra Cheesy Spiders Double the cheese mixture recipe and make your spider bodies larger. You can also sprinkle extra shredded cheese around the base of each spider before baking for an extra indulgent treat.
Spicy Spider Variation Mix finely diced jalapeños into your cheese mixture, or use pepper jack cheese instead of cheddar. A tiny dash of hot sauce in the cheese mixture adds heat without overwhelming young taste buds.
Mini Spider Version Use mini round crackers and reduce all topping amounts by half. These bite-sized versions are perfect for younger children and make great party poppers.
Vegetarian-Friendly Options Replace black olives with pieces of roasted red pepper or sun-dried tomatoes for the heads. Both add great color and flavor while keeping the spooky appearance.
Make-Ahead Strategy Assemble the crackers completely but don’t bake them. Cover with plastic wrap and refrigerate for up to 4 hours. Add 2-3 extra minutes to the baking time since they’ll be starting from cold.
Gluten-Free Alternative Use gluten-free crackers and replace pretzel sticks with thin strips of roasted red pepper or carrot sticks. The appearance changes slightly, but the flavor remains delicious.
Adult Party Version Add a small amount of cream cheese mixed with herbs like chives or dill to the base, and use more sophisticated cheeses like gruyere or aged white cheddar.
Serving Suggestions
These spider crackers shine as part of a larger Halloween spread, but they’re versatile enough to work in many settings. Arrange them on a black serving platter for maximum spooky impact, and consider adding some plastic spiders around the edges for decoration.
Perfect Pairings Serve alongside other finger foods like pigs in a blanket, cheese and crackers, or veggie cups with ranch dip. The rich, cheesy flavor balances well with lighter options like fresh fruit or a simple garden salad.
Drink Combinations For adult parties, these pair beautifully with light beers, crisp white wines, or even a spooky punch. For family gatherings, serve with apple cider, orange juice, or simple sodas that match your Halloween theme.
Presentation Ideas Create height variation on your serving table by placing some spider crackers on small elevated plates or cake stands. This creates visual interest and makes it easier for guests to grab their favorites. Consider labeling them with a fun sign like “Creepy Crawly Crackers” or “Spider Bites.”
Themed Dinner Integration These work perfectly as appetizers before a Halloween dinner. Follow them with orange and black themed main dishes like butternut squash soup, roasted chicken with herbs, or even pizza cut into Halloween shapes.
Storage and Reheating Instructions
Refrigerator Storage Store leftover spider crackers in an airtight container in the refrigerator for up to 3 days. Place parchment paper between layers to prevent sticking and maintain their shape. The crackers will soften slightly but remain tasty.
Freezer Storage While possible, freezing isn’t recommended for this recipe because the crackers lose their crispness and the cheese texture changes. If you must freeze them, use within 1 month and expect texture changes upon thawing.
Reheating Instructions For best results, reheat in a 300°F oven for 3-5 minutes until the cheese just begins to melt again. Avoid the microwave if possible, as it can make the crackers soggy and the pretzel legs chewy.
Make-Ahead Storage You can prepare the cheese mixture up to 2 days in advance and store it covered in the refrigerator. Bring to room temperature before assembling the crackers for easier spreading.
Serving Temperature These are best served warm but are still delicious at room temperature. If serving at a party, consider making them in batches so you always have warm ones available.
Recipe Notes
Equipment Recommendations A 6-quart mixing bowl makes combining the cheese mixture easy, and using parchment paper prevents any sticking issues. An offset spatula helps spread the cheese mixture evenly if you want perfectly uniform spider bodies.
Ingredient Quality Matters Freshly shredded cheese melts much better than pre-shredded varieties, which often contain anti-caking agents that can prevent smooth melting. If using pre-shredded cheese, look for brands without added cellulose.
Timing Tips These are best assembled and baked just before serving. The crackers stay crispy longer when they’re baked fresh, and the visual impact is greatest when the cheese is still slightly bubbly.
Kid-Friendly Modifications Let children help by having them place the pretzel legs and olive heads. It’s a great way to get them involved in cooking while developing fine motor skills.
Scaling the Recipe This recipe doubles or triples easily for larger gatherings. Just make sure you have enough baking sheet space, or bake in batches to avoid overcrowding.
Nutrition Information (Per Serving – 2 crackers)
NutrientAmountCalories185Total Fat12gSaturated Fat6gCarbohydrates14gSugar2gFiber1gProtein7gSodium320mgCholesterol25mgCalcium160mgIron1mg
Nutrition information is an estimate and may vary based on specific ingredients used.
Recipe Card Summary
Course: Appetizer Cuisine: American Servings: 24 spider crackers (12 servings) Prep Time: 15 minutes Cook Time: 10 minutes Total Time: 25 minutes
Ingredients:
- 48 round crackers
- 2 cups shredded cheddar cheese
- 4 oz cream cheese, softened
- 1 bag thin pretzel sticks
- 1 can black olives, sliced
- 1 teaspoon paprika
- 1/2 teaspoon garlic powder (optional)
Instructions:
- Preheat oven to 375°F and line baking sheets with parchment
- Mix cream cheese, cheddar, and garlic powder until smooth
- Arrange crackers on prepared sheets
- Spoon cheese mixture onto center of each cracker, shaping into oval bodies
- Insert 8 pretzel stick pieces as legs, 4 on each side
- Top each with black olive slice for head
- Bake 8-10 minutes until cheese melts and bubbles
- Dust with paprika and cool 2-3 minutes before serving
Notes: Best served warm. Can be assembled 4 hours ahead and refrigerated before baking. Use freshly shredded cheese for best melting results.
Diet Tags
Vegetarian, Kid-Friendly, Party Food, Halloween Special, Quick & Easy
Health Benefits
While these are definitely a treat, they do provide some nutritional benefits. The cheese offers protein and calcium for strong bones and teeth. The crackers provide carbohydrates for quick energy, making these a more substantial appetizer than many party snacks.
The olives contribute healthy fats and antioxidants, while the modest portion size helps with portion control. When served as part of a balanced meal with vegetables and fruits, these can fit into a healthy eating pattern.
Frequently Asked Questions
1. Can I make these ahead of time for a party? You can assemble the spider crackers up to 4 hours in advance and store them covered in the refrigerator. Just add 2-3 extra minutes to the baking time since they’ll be cold. For best results, bake them just before your guests arrive so they’re served warm and the crackers stay crispy.
2. What other cheeses work well in this recipe? Sharp cheddar is ideal, but mild cheddar, Monterey Jack, or even cream cheese mixed with shredded mozzarella work beautifully. For adult parties, try gruyere or aged white cheddar for more sophisticated flavor. Avoid very hard cheeses like Parmesan as they don’t melt as smoothly.
3. My pretzel legs keep falling off during baking. How can I prevent this? Make sure your cheese mixture is thick enough to hold the pretzels securely. If it seems too thin, add more shredded cheese. Press the pretzel pieces gently but firmly into the cheese, and avoid opening the oven door during the first 5 minutes of baking, which can cause temperature fluctuations.
4. Can I substitute the black olives with something else? Absolutely! Try pieces of roasted red pepper, sun-dried tomatoes, or even small pieces of pepperoni for the spider heads. Each option adds different flavors while maintaining the visual appeal. For a sweeter version, try small pieces of dried cranberries.
5. How do I prevent the crackers from getting soggy? Use well-drained olives and don’t make the cheese mixture too thin. Serve the crackers within an hour of baking for maximum crispness. If you need to hold them longer, place them on a wire rack so air can circulate underneath, preventing moisture buildup.
Final Thoughts
Whether you’re hosting a Halloween bash, planning a spooky movie night, or just want to surprise the family with something fun and delicious, these Spider Crackers with Cheese are guaranteed to be a hit. The combination of familiar flavors in such a creative presentation makes them approachable for even the pickiest eaters while still delivering that wow factor that makes any gathering memorable.
The beauty of this recipe lies in its simplicity and versatility. You can have them ready in under 30 minutes with ingredients from your regular grocery run, yet they look like you spent hours crafting each tiny spider. Kids love the interactive element of helping to assemble them, and adults appreciate how they perfectly balance fun presentation with genuine deliciousness.
Don’t be surprised if this recipe becomes a regular request in your household. I’ve had readers tell me their families ask for these “spider crackers” year-round, not just during Halloween season. They’re that good, and honestly, who says you can’t enjoy a little spooky fun any time of year?
Give this recipe a try and let me know how your spider invasion turns out in the comments below. I love seeing photos of your creations, and your family’s reactions are always the best part of sharing these recipes. Happy cooking, and may your Halloween be deliciously spooky!