
Spooky Monster Mash Cheese Dip Recipe for Halloween
Introduction
Get ready to cast a delicious spell on your Halloween party guests with this wickedly good Monster Mash Cheese Dip. This crowd-pleasing appetizer combines all the comfort of classic cheese dip with a spooky twist that’s perfect for Halloween entertaining. The “monster mash” comes from the chunky texture created by mixing different cheeses, vegetables, and proteins into one gloriously gooey masterpiece.
What makes this dip truly special is how it transforms ordinary ingredients into something that looks mysteriously monstrous while tasting absolutely divine. The orange color from cheddar and special seasonings creates that perfect Halloween aesthetic, while the varied textures from different add-ins give it that authentic “mashed” appearance that fits the theme perfectly.
This recipe is incredibly forgiving and customizable, making it ideal for both experienced home cooks and kitchen beginners. You can make it as mild or as spicy as your crowd prefers, add different mix-ins based on what you have available, and adjust the consistency to your liking. Best of all, it stays warm and creamy throughout your entire party when served in a slow cooker or warming tray.
The beauty of Monster Mash Cheese Dip lies in its versatility and make-ahead potential. You can prepare most components in advance, then simply combine and heat when party time arrives. It feeds a crowd without breaking the budget, and the presentation possibilities are endless when it comes to spooky serving ideas.
In this comprehensive guide, you’ll learn how to create the perfect Monster Mash Cheese Dip from scratch, discover creative variations to keep things interesting, and master the art of Halloween party presentation that will have your guests talking long after the last ghost and goblin goes home.
Ingredients Breakdown
Base Cheese Foundation:
Cream Cheese (8 oz, softened) – The creamy foundation that creates that smooth, dippable texture. Let it come to room temperature for easier mixing, or soften quickly in the microwave for 30 seconds.
Sharp Cheddar Cheese (2 cups, shredded) – Provides the signature orange color and sharp flavor that defines this dip. Shred your own from a block for the best melting quality and avoid pre-shredded if possible.
Monterey Jack Cheese (1 cup, shredded) – Adds creamy meltability and helps balance the sharpness of the cheddar. Its mild flavor lets other ingredients shine through.
Cream of Mushroom Soup (1 can, 10.75 oz) – Creates the perfect creamy base while adding subtle umami depth. The mushroom pieces contribute to the “monster mash” texture.
The “Monster” Mix-Ins:
Ground Italian Sausage (1/2 pound) – Adds hearty protein and savory flavor. Choose mild, medium, or hot based on your heat preference. Turkey or chicken sausage work as lighter alternatives.
Diced Tomatoes with Green Chilies (1 can, 10 oz, drained) – Rotel or similar products add both vegetable chunks and a slight kick. The tomatoes provide color contrast and acidity to balance the richness.
Black Beans (1 can, 15 oz, drained and rinsed) – These create perfect “monster eyes” when mixed into the orange cheese, plus add protein and fiber.
Corn Kernels (1 cup, frozen or canned) – Adds sweetness and texture variation. Frozen corn works best as it doesn’t add extra liquid to the dip.
Green Bell Pepper (1 medium, diced) – Provides crunch and fresh flavor. The green color adds to the spooky appearance when scattered throughout.
Yellow Onion (1/2 medium, finely diced) – Creates aromatic base flavor and adds to the chunky texture that makes this a true “mash.”
Seasonings and Flavor Boosters:
Garlic Powder (1 teaspoon) – Easier to distribute evenly than fresh garlic and won’t burn during the cooking process.
Cumin (1/2 teaspoon) – Adds warmth and depth that complements the sausage and beans perfectly.
Paprika (1 teaspoon) – Enhances the orange color and adds mild, smoky flavor without heat.
Hot Sauce (1-2 tablespoons) – Adjust to taste preference. Start with less and add more as needed.
Salt and Black Pepper – Essential for bringing all flavors together and enhancing the natural taste of each ingredient.
Optional Halloween Enhancements:
Food Coloring (orange) – A few drops can intensify the Halloween color if your cheese isn’t orange enough naturally.
Worcestershire Sauce (1 teaspoon) – Adds umami depth and complexity to the flavor profile.
Common Substitutions:
- Replace sausage with ground beef, turkey, or plant-based crumbles
- Use Greek yogurt in place of half the cream cheese for lighter option
- Substitute vegetable broth for cream of mushroom soup for lighter base
- Try pepper jack instead of Monterey Jack for extra heat
- Use white beans instead of black beans for different visual effect
Step-by-Step Instructions
1. Prepare Your Ingredients
Start by gathering all ingredients and prepping them completely before you begin cooking. Dice the onion and bell pepper into small, uniform pieces. Drain and rinse the black beans thoroughly. If using frozen corn, no need to thaw it first. Shred your cheeses if you haven’t already, and make sure your cream cheese is at room temperature for smooth mixing.
This preparation step is crucial because once you start cooking, things move quickly and you want everything ready to add at the right moment.
2. Cook the Sausage and Vegetables
Heat a large skillet over medium-high heat. Add the ground sausage and cook, breaking it up with a spoon, until it’s browned and cooked through, about 6-8 minutes. The sausage should be nicely browned with no pink remaining.
Add the diced onion and bell pepper to the skillet with the sausage. Cook for an additional 3-4 minutes until the vegetables are softened but still have a slight crunch. This texture contrast is important for the final “monster mash” effect.
3. Create the Cheese Base
In a large mixing bowl or directly in your slow cooker, combine the softened cream cheese and cream of mushroom soup. Mix thoroughly until completely smooth and no lumps of cream cheese remain. This creates your creamy foundation.
Gradually add the shredded cheddar and Monterey Jack cheeses, mixing well after each addition. The mixture will be quite thick at this point, but don’t worry – it will thin out beautifully when heated.
4. Combine All Ingredients
Add the cooked sausage and vegetable mixture to your cheese base. Stir in the drained diced tomatoes with chilies, black beans, and corn kernels. The mixture should look chunky and colorful – this is exactly what you want for that “monster mash” appearance.
Season with garlic powder, cumin, paprika, salt, and pepper. Start with the suggested amounts, but remember you can always adjust seasoning later after the dip heats and flavors meld together.
5. Heat and Meld Flavors
Transfer everything to your slow cooker if you haven’t mixed directly in it. Set to low heat and cook for 1-2 hours, stirring every 30 minutes to prevent sticking and ensure even heating. The dip is ready when all cheeses are completely melted and the mixture is hot throughout.
Alternatively, you can heat this on the stovetop in a large, heavy-bottomed pot over low heat, stirring constantly to prevent burning. This method takes about 15-20 minutes but requires more attention.
6. Final Seasoning and Consistency Adjustment
Taste your dip and adjust seasonings as needed. Add hot sauce for heat, more salt for flavor enhancement, or additional spices to suit your preferences. If the dip seems too thick, add milk or chicken broth one tablespoon at a time until you reach your desired consistency.
The perfect consistency should coat a chip nicely but still be easy to scoop. It will thicken slightly as it cools, so err on the side of slightly thinner rather than too thick.
7. Serve with Spooky Style
Keep the dip warm in your slow cooker on the warm setting, or transfer to a fondue pot or warming tray. Arrange Halloween-themed dippers around your serving area and add spooky decorations to complete the monster effect.
Tips and Variations
Expert Tips for Perfect Monster Mash:
- Shred cheese from blocks rather than using pre-shredded for better melting
- Don’t skip the vegetable cooking step – raw onions and peppers will release water and make the dip thin
- Stir gently to maintain chunky texture while ensuring even heating
- Taste and adjust seasonings after the dip has heated and flavors have melded
- Keep warm throughout serving to maintain the best texture and consistency
Spice Level Variations:
Mild Monster Mash – Use mild sausage, regular diced tomatoes instead of with chilies, and skip the hot sauce. Perfect for families with small children.
Medium Heat – Stick with the recipe as written, using medium sausage and adding hot sauce to taste.
Fiery Monster – Use hot Italian sausage, add diced jalapeños, include cayenne pepper, and finish with your favorite hot sauce for serious heat lovers.
Protein Alternatives:
Vegetarian Version – Replace sausage with plant-based crumbles or additional beans. Add extra vegetables like diced mushrooms or zucchini for substance.
Chicken Monster Mash – Use cooked, diced chicken breast instead of sausage. Season the chicken with Italian herbs for additional flavor.
Bacon Lover’s Version – Replace sausage with cooked, crumbled bacon and add green onions for a loaded potato skin flavor profile.
Seafood Twist – Add cooked, chopped shrimp and crab meat for a monster from the deep version.
Creative Add-In Ideas:
- Diced jalapeños or poblano peppers for heat and texture
- Roasted red peppers for sweetness and color
- Mushrooms for extra umami and “monster” texture
- Artichoke hearts for Mediterranean flair
- Sun-dried tomatoes for intense flavor bursts
Make-Ahead Strategies:
Prepare the entire dip up to 2 days in advance and store covered in the refrigerator. Reheat gently in the slow cooker or on the stovetop, adding liquid as needed to restore consistency. You can also freeze the cooled dip for up to 3 months, though the texture may change slightly upon thawing.
Serving Suggestions
Perfect Dippers:
Tortilla Chips – The classic choice that holds up well to thick, chunky dip. Choose restaurant-style chips for extra sturdiness.
Halloween-Colored Chips – Orange, black, and purple tortilla chips are available seasonally and add to the spooky presentation.
Crusty Bread – Slice baguettes or sourdough bread for a more substantial dipper that works well with the hearty nature of this dip.
Fresh Vegetables – Orange bell pepper strips, baby carrots, and celery sticks continue the Halloween color theme while adding fresh crunch.
Pretzel Crisps – Their sturdiness and slight saltiness complement the rich, cheesy dip perfectly.
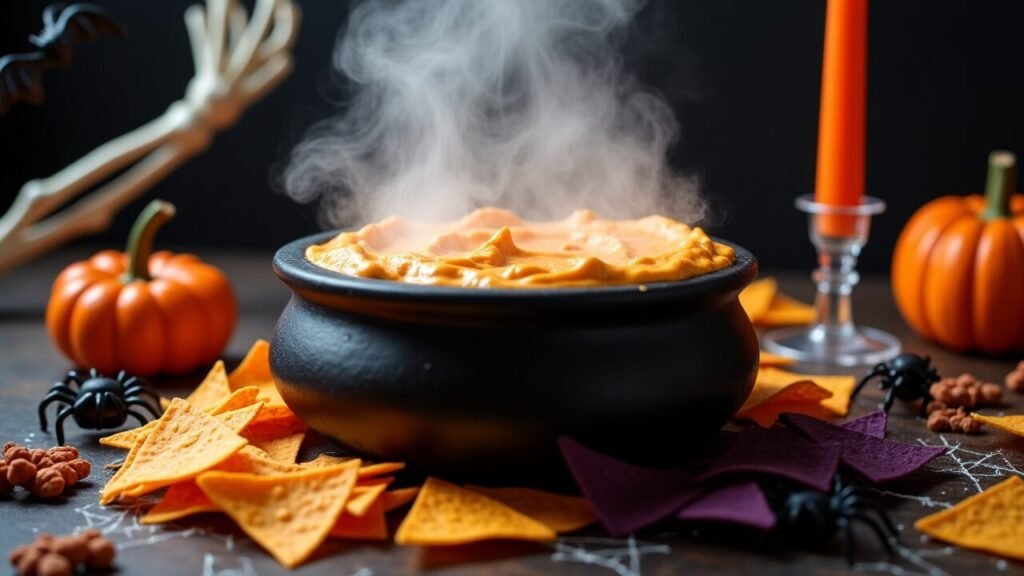
Spooky Presentation Ideas:
Cauldron Serving – Serve in a black cauldron or Halloween-themed serving bowl surrounded by dry ice for dramatic effect (keep dry ice away from food).
Monster Eyes – Place plastic spiders around the serving area and use black olive halves as “monster eyes” on top of the dip.
Graveyard Scene – Arrange broken tortilla chips to look like tombstones emerging from the dip, with herb sprigs as grass.
Spider Web Effect – Drizzle sour cream in concentric circles, then drag a toothpick from center to edge to create web patterns.
Party Setup Ideas:
Create a Halloween snack station with your Monster Mash Cheese Dip as the centerpiece. Include other Halloween-themed appetizers like “mummy” jalapeño poppers, “witch hat” tortilla cups, and “graveyard” brownies for a complete spooky spread.
Use Halloween tableware, dim lighting with orange and purple bulbs, and add plastic Halloween decorations around the food table to create atmosphere. Consider playing spooky sound effects or Halloween music to complete the experience.
Beverage Pairings:
This rich, savory dip pairs beautifully with crisp beers like lagers or wheat beers. For wine lovers, try a light red like Pinot Noir or a crisp white like Sauvignon Blanc. Halloween-themed cocktails like orange punch, witches’ brew, or spiked cider also complement the festive atmosphere.
Storage and Reheating Instructions
Refrigerator Storage:
Store leftover Monster Mash Cheese Dip in the refrigerator for up to 4 days in a covered container. The dip will thicken considerably when cold, so don’t worry if it looks much thicker than when you first made it.
Let the dip cool completely before refrigerating to prevent condensation from forming and thinning the mixture.
Freezer Storage:
This dip can be frozen for up to 3 months, though the texture may change slightly upon thawing due to the dairy content. Freeze in individual portions for easier reheating, or freeze the entire batch in a freezer-safe container.
To freeze, let the dip cool completely, then transfer to freezer containers leaving some headspace for expansion. Label with contents and date for easy identification.
Reheating Methods:
Slow Cooker Method – Transfer cold dip to slow cooker and heat on low for 1-2 hours, stirring every 30 minutes. Add milk or broth as needed to restore consistency.
Stovetop Method – Heat gently over low heat in a heavy-bottomed pan, stirring constantly to prevent burning. Add liquid gradually to restore proper consistency.
Microwave Method – Heat in 30-second intervals, stirring between each interval. This method works best for small portions and requires careful attention to prevent overheating.
Oven Method – Transfer to an oven-safe dish, cover with foil, and heat at 325°F for 20-30 minutes, stirring halfway through.
Consistency Restoration:
Cold or reheated dip often becomes thicker than desired. Add warm milk, chicken broth, or even cream one tablespoon at a time while stirring until you achieve the perfect consistency. Start with less liquid than you think you need – it’s easier to thin than to thicken.
Recipe Notes
Timing and Temperature Tips:
- Allow cream cheese to reach room temperature for smoothest mixing
- Don’t rush the heating process – low and slow prevents separation and burning
- Stir regularly during heating to ensure even temperature distribution
- Test temperature before serving to ensure it’s hot throughout
Equipment Recommendations:
Slow Cooker – A 4-6 quart slow cooker works perfectly for this recipe and keeps the dip warm during serving.
Heavy-Bottomed Pot – If using stovetop method, use a heavy pot to prevent hot spots and burning.
Good Wooden Spoon – Essential for stirring without scratching your cookware.
Sharp Knife – For clean, uniform vegetable dicing that ensures even cooking and professional appearance.
Troubleshooting Common Issues:
Grainy Texture – Usually caused by overheating or using pre-shredded cheese. Heat gently and use block cheese for smoothest results.
Too Thin – Add more shredded cheese or simmer uncovered to reduce liquid. Cold cream cheese mixed in can also help thicken.
Too Thick – Add warm liquid gradually while stirring until desired consistency is reached.
Separated Appearance – Often caused by too high heat. Remove from heat, let cool slightly, then whisk vigorously to re-emulsify.
Ingredient Quality Matters:
Use the best quality ingredients you can afford, especially when it comes to cheese and sausage. The flavor difference is noticeable in the final product. Fresh vegetables will provide better texture and flavor than frozen or canned when possible.
Nutrition Information (Per Serving)
| Nutrient | Amount |
|---|---|
| Calories | 285 |
| Total Fat | 18g |
| Saturated Fat | 10g |
| Carbohydrates | 12g |
| Sugar | 4g |
| Fiber | 3g |
| Protein | 18g |
| Sodium | 745mg |
| Cholesterol | 55mg |
| Calcium | 275mg |
| Iron | 2mg |
Nutrition information is an estimate based on 12 servings and may vary based on specific ingredients used.
Recipe Card Summary
Course: Appetizer/Snack
Cuisine: American/Tex-Mex
Servings: 12
Prep Time: 15 minutes
Cook Time: 1.5 hours
Total Time: 1 hour 45 minutes
Ingredients:
Base:
- 8 oz cream cheese, softened
- 2 cups sharp cheddar cheese, shredded
- 1 cup Monterey Jack cheese, shredded
- 1 can (10.75 oz) cream of mushroom soup
Monster Mix-Ins:
- 1/2 pound ground Italian sausage
- 1 can (10 oz) diced tomatoes with chilies, drained
- 1 can (15 oz) black beans, drained and rinsed
- 1 cup corn kernels
- 1 medium green bell pepper, diced
- 1/2 medium yellow onion, diced
Seasonings:
- 1 teaspoon garlic powder
- 1/2 teaspoon cumin
- 1 teaspoon paprika
- 1-2 tablespoons hot sauce
- Salt and pepper to taste
Instructions:
- Dice vegetables and prepare all ingredients before cooking.
- Cook sausage in large skillet until browned, about 6-8 minutes.
- Add onion and bell pepper, cook 3-4 minutes until softened.
- Mix cream cheese and soup until smooth, then add shredded cheeses.
- Combine sausage mixture with cheese base, add beans, corn, and tomatoes.
- Season with spices and transfer to slow cooker.
- Heat on low 1-2 hours, stirring every 30 minutes until hot and bubbly.
Notes:
- Can be made up to 2 days ahead and reheated
- Adjust consistency with milk or broth as needed
- Keep warm in slow cooker for serving
- Freezes well for up to 3 months
Diet Tags
High-Protein: With 18g protein per serving from cheese, sausage, and beans
Gluten-Free: Naturally gluten-free when served with appropriate dippers
Crowd-Pleaser: Perfect for parties, feeds 12+ people generously
Make-Ahead Friendly: Can be prepared completely in advance
Customizable Heat Level: Easily adjusted from mild to spicy based on preferences
Health Benefits
Protein Power: The combination of cheese, sausage, and beans provides complete proteins essential for muscle maintenance and satiety.
Calcium Source: Multiple cheese varieties contribute significantly to daily calcium needs for strong bones and teeth.
Fiber Content: Black beans and vegetables add dietary fiber that supports digestive health and helps maintain steady blood sugar levels.
Vegetable Nutrition: Bell peppers provide vitamin C and antioxidants, while tomatoes contribute lycopene and additional vitamins.
Iron Content: Sausage and beans provide iron necessary for healthy blood and energy levels.
Customizable Nutrition: Easy to make lighter by using reduced-fat cheese and turkey sausage, or add more vegetables for extra nutrients.
Frequently Asked Questions
1. Can I make this dip without a slow cooker?
Absolutely! You can make this entirely on the stovetop using a large, heavy-bottomed pot over low heat. Stir constantly to prevent burning and scorching. The process takes about 15-20 minutes once all ingredients are combined. You can also bake it in the oven at 350°F for 25-30 minutes, stirring every 10 minutes.
2. How do I prevent the cheese from getting grainy or separated?
The key is gentle, low heat and using freshly shredded cheese rather than pre-shredded. Pre-shredded cheese contains anti-caking agents that can cause texture issues. Also, make sure your cream cheese is at room temperature before mixing, and stir regularly during heating to ensure even temperature distribution.
3. Can I make this dip vegetarian?
Yes! Replace the Italian sausage with plant-based crumbles, extra beans, or diced mushrooms for substance. You might want to add extra seasonings like smoked paprika or liquid smoke to replicate some of the savory depth that the sausage provides. The result is just as delicious and hearty.
4. How far in advance can I prepare this dip?
You can make the entire dip up to 2 days before your party. Store it covered in the refrigerator and reheat gently when ready to serve. You can also prep all ingredients (cook sausage, dice vegetables, shred cheese) the day before and assemble and heat the day of your event.
5. What’s the best way to transport this dip to a party?
If transporting to another location, let the dip cool completely, then transport in a sealed container. Reheat at your destination using their slow cooker, or transfer to a disposable aluminum pan and heat in their oven. Bring extension cords if you plan to keep it warm in a slow cooker during the party.
Final Thoughts
This Monster Mash Cheese Dip represents everything wonderful about Halloween entertaining – it’s fun, delicious, and brings people together around the snack table. The combination of creamy, melted cheese with chunky mix-ins creates a texture that’s both comforting and exciting, while the orange color and “monster” theme make it perfect for spooky celebrations.
What makes this recipe truly special is how it manages to be both impressive and approachable. Your guests will think you spent hours creating this elaborate appetizer, when in reality, it comes together with simple ingredients and straightforward techniques. The chunky texture and vibrant color create visual interest that fits perfectly with Halloween themes, while the flavor profile appeals to both kids and adults.
The versatility of this dip means you can adapt it to your family’s preferences and dietary needs without sacrificing the fun factor. Whether you make it mild for little monsters or spicy for adult Halloween parties, the base recipe provides a solid foundation for creativity and customization.
Don’t be surprised if this becomes your signature Halloween appetizer that guests request year after year. The combination of comfort food appeal and festive presentation makes it memorable in all the best ways. Plus, the make-ahead potential means you can focus on other party preparations without stress.
Whether you’re hosting a Halloween party, attending a potluck, or just want to make dinner a little more festive during spooky season, this Monster Mash Cheese Dip is sure to cast a delicious spell on everyone who tries it. Give this recipe a try and let me know how your own monster mash turns out – I’d love to hear about any creative variations or spooky serving ideas you come up with!