
Spooky Blood Drip Cupcakes Recipe for Halloween
Introduction
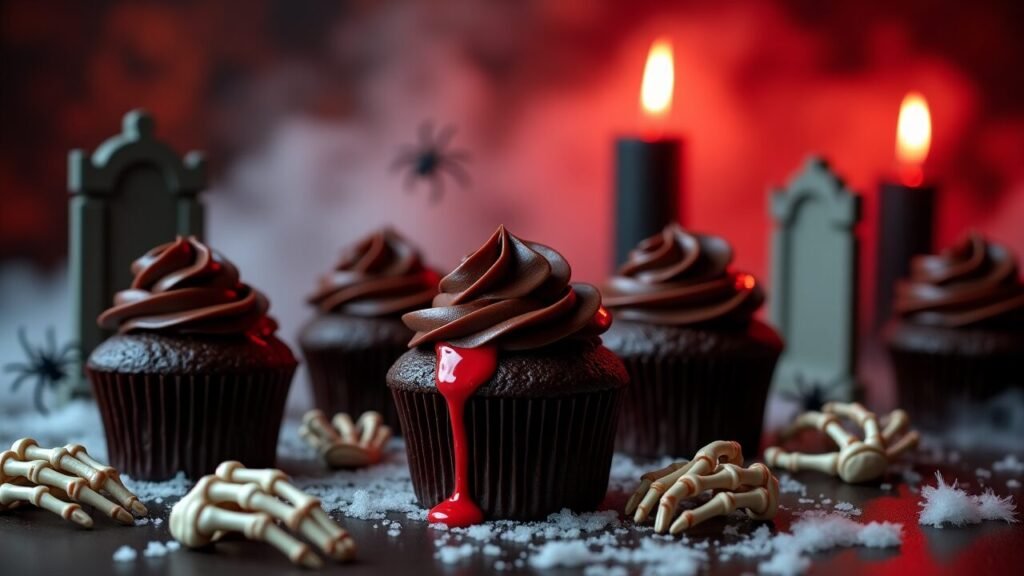
Nothing says Halloween quite like desserts that look deliciously terrifying, and these Blood Drip Cupcakes deliver spine-chilling presentation with incredible flavor. These decadent chocolate cupcakes topped with rich, dark frosting and realistic “blood” drips create the perfect combination of spooky and scrumptious that will have your Halloween party guests both thrilled and satisfied.
The magic behind these cupcakes lies in the contrast between the dark, moody chocolate base and the vibrant red “blood” sauce that creates such a striking visual impact. What appears to be something from a horror movie is actually a sophisticated dessert featuring moist chocolate cake, velvety chocolate buttercream, and a glossy strawberry or raspberry sauce that mimics blood drips with startling realism.
These cupcakes are surprisingly easy to make, despite their dramatic appearance. The “blood” effect comes from a simple fruit-based sauce that’s both delicious and safe for all ages. The technique for creating perfect drips is straightforward once you understand the consistency needed, and the results are consistently impressive whether you’re a baking novice or experienced baker.
What makes Blood Drip Cupcakes particularly appealing is their versatility. They work beautifully for adult Halloween parties where you want sophisticated spooky treats, but they’re also perfect for family celebrations where kids will be delighted by the theatrical presentation. The rich chocolate flavor appeals to all ages, while the visual drama makes them Instagram-worthy party centerpieces.
In this comprehensive guide, you’ll master the art of creating perfectly moist chocolate cupcakes, learn the secrets of smooth buttercream frosting, and discover professional techniques for achieving those realistic blood drips that make these treats truly memorable. We’ll also explore variations, presentation ideas, and troubleshooting tips to ensure your Halloween baking success.
Ingredients Breakdown
For the Chocolate Cupcakes:
All-Purpose Flour (1 3/4 cups) – The foundation of your cupcake structure. Measure accurately for the right texture – too much creates dense cupcakes, too little makes them fragile.
Unsweetened Cocoa Powder (3/4 cup) – Use high-quality Dutch-process cocoa for the deepest, darkest chocolate flavor and color. This creates that perfect dark base that makes the red blood drips pop visually.
Granulated Sugar (2 cups) – Provides sweetness and helps create the tender, moist crumb. Don’t reduce this amount as sugar also contributes to the cupcake’s structure and moisture retention.
Baking Powder (1 1/2 teaspoons) – Essential for proper rise and light texture. Check the expiration date as old baking powder won’t give you the lift you need.
Baking Soda (1 1/2 teaspoons) – Works with the acidic ingredients to create additional lift and helps neutralize the cocoa’s natural acidity.
Salt (1 teaspoon) – Enhances the chocolate flavor and balances the sweetness. Don’t skip this crucial ingredient.
Large Eggs (2) – Room temperature eggs incorporate better and create a more uniform batter. They add structure and richness to the final cupcakes.
Buttermilk (1 cup) – The acidity creates incredibly tender cupcakes and reacts with the leavening agents for perfect rise. If you don’t have buttermilk, make your own by adding 1 tablespoon lemon juice to regular milk.
Vegetable Oil (1/2 cup) – Creates moist cupcakes that stay fresh longer than those made with butter alone. The neutral flavor won’t compete with the chocolate.
Hot Coffee (1 cup) – This secret ingredient intensifies the chocolate flavor without making the cupcakes taste like coffee. You can substitute hot water if needed, but coffee creates superior flavor depth.
Vanilla Extract (2 teaspoons) – Pure vanilla extract complements the chocolate and adds aromatic complexity to the overall flavor profile.
For the Dark Chocolate Buttercream:
Unsalted Butter (1 cup, room temperature) – Must be properly softened for smooth buttercream. It should give slightly when pressed but not be melty or greasy.
Powdered Sugar (4 cups) – Sift this for the smoothest frosting texture. The fine texture of powdered sugar creates that perfect buttercream consistency.
Unsweetened Cocoa Powder (3/4 cup) – Additional cocoa creates that deep, dark color that provides perfect contrast for the blood drips.
Heavy Cream (1/4 cup) – Adds richness and helps achieve the perfect piping consistency. Start with less and add more as needed.
Vanilla Extract (1 teaspoon) – Enhances the overall flavor without competing with the chocolate intensity.
Salt (1/4 teaspoon) – A small amount brings out the chocolate flavor and balances the sweetness.
For the “Blood” Drip Sauce:
Strawberry Preserves (1/2 cup) – Choose high-quality preserves with good color and flavor. The natural red color and glossy texture create the most realistic blood effect.
Corn Syrup (2 tablespoons) – Creates the perfect consistency for dripping and adds glossy shine that makes the “blood” look wet and realistic.
Red Food Coloring (1-2 drops) – Use sparingly to deepen the red color if needed. Gel food coloring works better than liquid for color intensity.
Water (1-2 teaspoons) – For adjusting consistency. Add tiny amounts until you achieve the perfect dripping texture.
Alternative “Blood” Options:
Raspberry Sauce – Puree fresh or frozen raspberries, strain out seeds, then add corn syrup for consistency.
Cherry Sauce – Made from cherry preserves using the same method as strawberry.
Pomegranate Molasses – Mix with corn syrup for a more sophisticated, less sweet option with natural deep red color.
Step-by-Step Instructions
1. Prepare for Baking Success
Preheat your oven to 350°F and line a 12-cup muffin tin with paper liners. Choose dark-colored liners to enhance the spooky theme, or use regular liners that will showcase the dark cupcakes beautifully.
Gather all your ingredients and bring eggs and buttermilk to room temperature. This ensures even mixing and better incorporation, leading to more tender cupcakes with uniform texture.
2. Create the Chocolate Cupcake Batter
In a large mixing bowl, whisk together flour, cocoa powder, sugar, baking powder, baking soda, and salt until completely combined. Make sure there are no cocoa lumps by sifting the cocoa powder if necessary.
In a separate bowl, whisk together eggs, buttermilk, oil, and vanilla extract until smooth. The mixture should be well combined with no streaks of egg visible.
Add the wet ingredients to the dry ingredients and stir just until combined. The batter will be thick at this point, but don’t overmix as this can create tough cupcakes.
3. Add the Secret Ingredient
Gradually stir in the hot coffee, mixing until the batter is smooth. The batter will be quite thin, which is exactly what you want. This thin consistency creates incredibly moist cupcakes with perfect crumb structure.
Don’t worry about the coffee flavor – it will completely disappear during baking, leaving behind only intensified chocolate flavor that makes these cupcakes extraordinary.
4. Bake to Perfection
Divide the batter evenly among the prepared muffin cups, filling each about 2/3 full. Use an ice cream scoop or large spoon for even distribution, which ensures uniform baking and professional appearance.
Bake for 18-22 minutes, or until a toothpick inserted in the center comes out with just a few moist crumbs. Don’t overbake as this creates dry cupcakes that won’t hold up well under frosting.
Cool in the pan for 5 minutes, then turn out onto a wire rack to cool completely before frosting. Attempting to frost warm cupcakes will result in melted buttercream disaster.
5. Master the Dark Chocolate Buttercream
While cupcakes cool, make your buttercream. In a large bowl, beat softened butter with an electric mixer until light and fluffy, about 3-4 minutes. Proper beating creates the foundation for smooth, pipeable frosting.
Gradually add powdered sugar and cocoa powder, alternating between the two while beating on low speed to prevent sugar clouds. Once incorporated, increase speed to medium-high and beat until fluffy.
Add vanilla, salt, and 2 tablespoons of heavy cream. Beat for another 2-3 minutes until the frosting is smooth, pipeable, and holds its shape. Add more cream if needed for consistency, but do so gradually.
6. Create the Perfect “Blood” Drip Sauce
In a small bowl, combine strawberry preserves and corn syrup. Mix thoroughly until completely smooth. The mixture should flow easily but not be too thin.
Test the consistency by lifting a spoon and letting the mixture drip. Perfect “blood” should drip slowly and steadily, creating realistic drip patterns. Add water drop by drop if too thick, or more corn syrup if too thin.
Add red food coloring sparingly if you want a deeper, more blood-like color. Remember, a little goes a long way, and natural strawberry color is often sufficient.
7. Assemble Your Spooky Masterpieces
Once cupcakes are completely cool, pipe or spread the dark chocolate buttercream generously on top. Create peaks and swirls for texture that will catch and hold the blood drips attractively.
Using a spoon or squeeze bottle, carefully drizzle the “blood” sauce around the edges of each cupcake, allowing it to drip down the sides naturally. Work with one cupcake at a time for the best control over drip placement.
Add additional drops on top of the frosting for pooled blood effects. The contrast between the dark frosting and bright red sauce creates the perfect horror movie aesthetic that makes these cupcakes so striking.
Tips and Variations
Professional Blood Drip Techniques:
Consistency is Key – The sauce should coat the back of a spoon but still drip freely. Too thick and it won’t drip; too thin and it will run too fast and look unrealistic.
Temperature Matters – Slightly warm sauce drips better than cold, but don’t make it hot or it will melt your frosting.
Strategic Placement – Start drips at different points around each cupcake for natural, random appearance rather than symmetrical patterns.
Layering Effect – Add some drips, let them set for a few minutes, then add more for layered, dried blood effects.
Flavor Variations:
Red Velvet Blood Drips – Make red velvet cupcakes instead of chocolate for a color surprise when bitten, maintaining the blood theme throughout.
Mint Chocolate Horror – Add peppermint extract to the buttercream for a refreshing contrast to the rich chocolate and sweet blood sauce.
Salted Caramel Blood – Create “blood” using caramel sauce mixed with red food coloring for a different flavor profile while maintaining the visual impact.
Espresso Intensified – Replace hot coffee with strong espresso for more intense chocolate flavor that appeals to adult palates.
Creative “Blood” Alternatives:
Multiple Blood Types – Use different colored sauces (raspberry for purple-red, cherry for bright red) to create varied blood colors on different cupcakes.
Blackberry “Blood” – Creates darker, more realistic blood color with complex flavor that pairs beautifully with chocolate.
Pomegranate “Blood” – Offers sophisticated flavor and natural deep red color that’s perfect for adult Halloween parties.
Decoration Enhancements:
- Add plastic spiders on top before the blood drips set
- Create “bite marks” using white chocolate chips arranged like teeth marks
- Dust with edible black glitter for an otherworldly effect
- Add dry ice nearby (not touching food) for spooky smoke effects during serving
Make-Ahead Strategies:
Cupcakes can be baked and frozen unfrosted for up to 3 months. Buttercream can be made up to one week ahead and stored in the refrigerator, then re-whipped before use. The blood sauce keeps for several days refrigerated and actually improves in consistency over time.
Serving Suggestions
Spooky Presentation Ideas:
Gothic Display – Arrange cupcakes on black cake stands or dark wooden boards surrounded by plastic ravens, skeleton hands, and flickering LED candles for dramatic effect.
Graveyard Scene – Create a dessert graveyard using chocolate cookie crumb “dirt,” chocolate wafer tombstones, and your blood drip cupcakes as the spooky centerpiece.
Laboratory Theme – Serve on metal trays with beakers filled with colored water, plastic test tubes, and scientific equipment for a mad scientist’s laboratory effect.
Haunted Forest – Use bare branches, moss, and dim lighting to create a haunted forest setting where these bloody treats would naturally belong.
Party Integration Ideas:
These cupcakes work beautifully as part of a larger Halloween dessert table. Pair them with other spooky treats like spider brownies, ghost cookies, or pumpkin cheesecake for variety while maintaining the Halloween theme.
Consider creating a “blood bar” where guests can add their own blood drips to cupcakes, making the experience interactive and fun for both kids and adults.
Photography Tips:
The dramatic contrast of these cupcakes makes them incredibly photogenic. Use natural lighting when possible, or supplement with warm LED lights to avoid harsh shadows. The glossy blood drips catch light beautifully and create stunning visual effects in photos.
Age-Appropriate Serving:
While these look scary, they’re completely appropriate for all ages. The “blood” is just fruit sauce, and kids often find the dramatic presentation more exciting than frightening. For very young children, you might tone down the blood effect or explain that it’s strawberry sauce.
Storage and Reheating Instructions
Room Temperature Storage:
Frosted cupcakes can be stored at room temperature for up to 2 days in a covered container. The blood sauce may lose some of its glossy appearance but will still taste delicious. Avoid stacking to prevent disturbing the decorative drips.
Refrigerator Storage:
For longer storage, refrigerate frosted cupcakes for up to 5 days. The buttercream will firm up in the refrigerator, so let cupcakes come to room temperature for about 30 minutes before serving for the best texture and flavor.
The blood sauce actually improves during refrigeration, becoming more vibrant in color and developing better consistency for future use.
Freezer Storage:
Unfrosted cupcakes freeze excellently for up to 3 months when wrapped individually in plastic wrap and stored in freezer bags. Thaw at room temperature before frosting.
Frosted cupcakes can be frozen, but the texture of the buttercream may change slightly. Freeze uncovered until firm, then wrap carefully to protect decorations.
Component Storage:
Buttercream – Can be made up to one week ahead and refrigerated. Re-whip before using to restore proper texture and consistency.
Blood Sauce – Keeps refrigerated for up to one week and can be gently rewarmed to restore dripping consistency if it becomes too thick.
Unfrosted Cupcakes – Store covered at room temperature for 2 days or freeze for longer storage.
Refreshing Tips:
If blood drips lose their glossy appearance, gently brush with a tiny amount of corn syrup to restore shine. If buttercream becomes too soft in warm conditions, refrigerate cupcakes for 15-20 minutes to firm up before serving.
Recipe Notes
Altitude Adjustments:
For high altitude baking (over 3,000 feet), reduce baking powder and baking soda by 1/4 teaspoon each, increase flour by 2 tablespoons, and reduce sugar by 2 tablespoons. Bake at 375°F for slightly shorter time.
Substitution Guidelines:
Egg Substitutes – Replace each egg with 1/4 cup unsweetened applesauce or commercial egg replacer for lighter texture.
Dairy-Free Options – Use non-dairy milk with vinegar instead of buttermilk, and substitute vegan butter for regular butter in frosting.
Gluten-Free Version – Replace all-purpose flour with gluten-free flour blend designed for baking, adding 1/2 teaspoon xanthan gum if not included in blend.
Troubleshooting Common Issues:
Dense Cupcakes – Usually caused by overmixing or too much flour. Measure accurately and mix just until combined.
Dry Cupcakes – Often from overbaking or old leavening agents. Check doneness early and replace baking powder/soda every 6 months.
Grainy Buttercream – Caused by butter that’s too cold or powdered sugar that needs sifting. Ensure proper butter temperature and sift dry ingredients.
Blood Sauce Too Thick – Add water drop by drop until proper consistency is achieved. Warm sauce slightly if needed.
Blood Sauce Too Thin – Add more corn syrup or preserves to thicken. Let it sit for a few minutes to reach proper consistency.
Professional Tips:
- Use an ice cream scoop for evenly sized cupcakes
- Tap filled muffin tins on counter to release air bubbles
- Don’t open oven door during first 15 minutes of baking
- Test one cupcake for doneness before removing entire batch
Nutrition Information (Per Serving)
| Nutrient | Amount |
|---|---|
| Calories | 485 |
| Total Fat | 16g |
| Saturated Fat | 9g |
| Carbohydrates | 82g |
| Sugar | 75g |
| Fiber | 4g |
| Protein | 5g |
| Sodium | 380mg |
| Cholesterol | 65mg |
| Calcium | 85mg |
| Iron | 2mg |
Nutrition information is an estimate based on 12 cupcakes and may vary based on specific ingredients used.
Recipe Card Summary
Course: Dessert
Cuisine: American
Servings: 12 cupcakes
Prep Time: 30 minutes
Cook Time: 20 minutes
Total Time: 50 minutes (plus cooling time)
Ingredients:
Cupcakes:
- 1 3/4 cups all-purpose flour
- 3/4 cup unsweetened cocoa powder
- 2 cups granulated sugar
- 1 1/2 teaspoons baking powder
- 1 1/2 teaspoons baking soda
- 1 teaspoon salt
- 2 large eggs
- 1 cup buttermilk
- 1/2 cup vegetable oil
- 1 cup hot coffee
- 2 teaspoons vanilla extract
Buttercream:
- 1 cup unsalted butter, softened
- 4 cups powdered sugar
- 3/4 cup unsweetened cocoa powder
- 1/4 cup heavy cream
- 1 teaspoon vanilla extract
- 1/4 teaspoon salt
Blood Sauce:
- 1/2 cup strawberry preserves
- 2 tablespoons corn syrup
- 1-2 drops red food coloring (optional)
- 1-2 teaspoons water as needed
Instructions:
- Preheat oven to 350°F and line muffin tin with papers.
- Whisk together all dry ingredients for cupcakes.
- Combine wet ingredients except coffee, then mix into dry ingredients.
- Stir in hot coffee gradually until smooth.
- Fill liners 2/3 full and bake 18-22 minutes.
- Cool completely before frosting.
- Beat butter until fluffy, add powdered sugar, cocoa, cream, vanilla, and salt.
- Mix preserves, corn syrup, and food coloring for blood sauce.
- Frost cupcakes and add blood drip effects.
Notes:
- Hot coffee intensifies chocolate flavor without coffee taste
- Blood sauce consistency should drip slowly but steadily
- Cupcakes can be made ahead and frozen unfrosted
- Adjust blood sauce consistency with water or corn syrup
Diet Tags
Vegetarian: Suitable for vegetarians when made with standard ingredients
Nut-Free: Contains no tree nuts or peanuts, making it safe for most nut allergies
Halloween Special: Perfect themed dessert for Halloween parties and celebrations
Crowd-Pleaser: Appeals to both kids and adults with dramatic presentation and delicious flavor
Make-Ahead Friendly: Components can be prepared in advance for easier party planning
Photo-Worthy: Instagram-ready presentation that’s perfect for social media sharing
Health Benefits
Antioxidant Power: Dark cocoa powder provides flavonoids and antioxidants that may support heart health and cognitive function.
Mood Booster: Chocolate naturally contains compounds that can improve mood and provide feelings of pleasure and satisfaction.
Energy Source: The combination of carbohydrates and sugars provides quick energy, making these perfect for active Halloween celebrations.
Fruit Content: The strawberry preserves in the blood sauce contribute vitamin C and natural fruit sugars.
Calcium Contribution: Buttermilk and butter provide calcium essential for bone health.
Iron Content: Cocoa powder is a good source of iron, important for healthy blood and energy levels.
Frequently Asked Questions
1. Can I make these cupcakes without the coffee?
Yes, you can substitute hot water for the coffee, though the chocolate flavor won’t be quite as intense. The coffee doesn’t make the cupcakes taste like coffee – it actually enhances and deepens the chocolate flavor. If you prefer to avoid coffee entirely, use the same amount of hot water and consider adding an extra tablespoon of cocoa powder to maintain flavor depth.
2. How do I get the blood drips to look realistic?
The key is achieving the right consistency in your blood sauce. It should be thick enough to cling to the cupcake but thin enough to drip naturally. Test it by lifting a spoon and watching how it falls – perfect “blood” drips slowly and steadily. Start drips at different points around each cupcake for a natural, random appearance rather than symmetrical patterns.
3. Can I make these cupcakes ahead of time?
Absolutely! The unfrosted cupcakes can be baked up to 2 days ahead and stored covered at room temperature, or frozen for up to 3 months. The buttercream can be made up to a week ahead and refrigerated, then re-whipped before use. However, assemble the final cupcakes with blood drips on the day of serving for the best appearance and texture.
4. What if my buttercream is too thick or too thin?
If your buttercream is too thick, add heavy cream one tablespoon at a time until you reach the desired consistency. If it’s too thin, refrigerate for 15-20 minutes, then re-whip, or add more powdered sugar gradually. The butter temperature is crucial – it should be softened but not melted for the best texture.
5. Are there any alternatives to strawberry preserves for the blood effect?
Yes! You can use raspberry preserves for a darker red color, cherry preserves for a bright red effect, or even pomegranate molasses mixed with corn syrup for a more sophisticated flavor. You can also make fresh berry sauce by pureeing berries, straining out seeds, and mixing with corn syrup to achieve the right consistency.
Final Thoughts
These Blood Drip Cupcakes represent the perfect marriage of theatrical presentation and exceptional flavor that makes Halloween baking so rewarding. The dramatic visual impact never fails to impress guests, while the rich chocolate cake and creamy buttercream ensure that these treats taste every bit as good as they look terrifying.
What makes these cupcakes particularly special is how they manage to be both sophisticated and playful at the same time. Adults appreciate the quality of the chocolate flavor and the artistry of the presentation, while kids are delighted by the spooky appearance and the sweet strawberry “blood” that tastes nothing like the scary visual suggests.
The beauty of this recipe lies in its flexibility and forgiving nature. Whether you’re an experienced baker or just starting your Halloween baking adventures, these cupcakes are achievable and impressive. The techniques for creating the blood drips are simple once you understand the consistency needed, and the results are consistently stunning.
Don’t be surprised if these become your signature Halloween dessert that friends and family request year after year. The combination of moist chocolate cake, rich buttercream, and that show-stopping blood drip effect creates memories that last long after the Halloween decorations are put away.
The make-ahead potential of these cupcakes makes them perfect for busy Halloween schedules, while the dramatic presentation ensures they’ll be the star of any dessert table. Whether you’re hosting a Halloween party, contributing to a school celebration, or just making the holiday special for your family, these Blood Drip Cupcakes deliver both thrills and delicious satisfaction.
Give this recipe a try and watch as your guests’ faces light up with both delight and amazement at your spooky baking skills. Let me know how your blood drip creations turn out – I’d love to hear about any creative variations or presentation ideas you discover along the way!