
Peanut Butter Cup Milkshake Recipe | Rich & Indulgent Dessert
Introduction
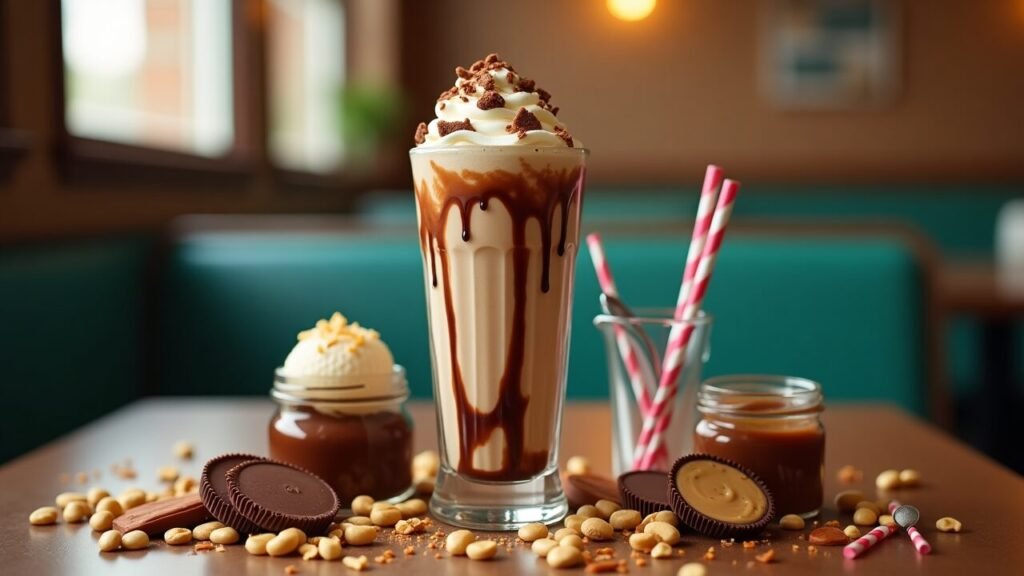
When you’re craving the ultimate indulgent treat that combines two of the world’s most beloved flavors, a peanut butter cup milkshake delivers pure dessert heaven in a glass. This thick, creamy concoction blends rich chocolate ice cream with creamy peanut butter and actual peanut butter cups, creating layers of flavor that will satisfy your sweetest cravings. Each sip offers the perfect balance of chocolate and peanut butter – that irresistible combination that makes peanut butter cups so addictive.
What makes this milkshake so extraordinarily satisfying? It captures the essence of your favorite candy in a drinkable form while amplifying everything you love about it. The cold, creamy ice cream base provides richness, while the peanut butter adds nutty depth and the peanut butter cups contribute chunks of chocolate-peanut butter perfection throughout. It’s not just a milkshake – it’s a full dessert experience that feels like a special treat every single time.
The beauty of this recipe lies in its perfect balance of simplicity and decadence. While it looks and tastes like something you’d order at an upscale ice cream parlor or retro diner, it comes together in just minutes using a blender and ingredients you can find at any grocery store. The result is a milkshake so thick you’ll need a spoon, so rich you’ll want to savor every drop, and so delicious you’ll be making it again and again.
Whether you’re treating yourself after a long week, creating a special dessert for date night, celebrating a birthday or achievement, or simply indulging your sweet tooth, this peanut butter cup milkshake delivers the kind of over-the-top deliciousness that makes life a little sweeter. It’s proof that sometimes the best pleasures come from embracing pure, unabashed indulgence.
In this comprehensive guide, you’ll discover the secrets to achieving the perfect thick milkshake consistency, creating beautiful swirls and layers, balancing chocolate and peanut butter flavors, and crafting toppings that make this milkshake as Instagram-worthy as it is delicious.
Ingredients Breakdown
For the Milkshake Base:
Chocolate ice cream (3 cups, premium quality): The foundation of richness and creaminess. Choose high-quality chocolate ice cream with a high butterfat content for the thickest, most luxurious texture. The better the ice cream, the better your milkshake will be.
Creamy peanut butter (1/2 cup): Use full-fat, conventional creamy peanut butter rather than natural varieties. Natural peanut butter can separate and create an oily texture. Brands like Jif or Skippy work perfectly for smooth, consistent results.
Whole milk (1/2 cup, adjust for thickness): Provides the liquid needed to blend everything smoothly. Start with less and add more as needed – you want thick, not thin. Whole milk creates the richest texture.
Peanut butter cups (4-6 regular size, chopped): The star ingredient that makes this a true peanut butter cup milkshake. Reese’s are the classic choice, but any peanut butter cup works. Reserve a few pieces for topping.
Vanilla extract (1 teaspoon): Enhances all the other flavors and adds depth. Pure vanilla extract provides better flavor than artificial.
For the Toppings:
Whipped cream (1 cup, homemade or store-bought): Essential for creating that classic milkshake crown. Heavy cream whipped to stiff peaks provides the best texture and flavor.
Chocolate sauce (1/4 cup, for drizzling): Adds visual appeal and extra chocolate flavor. Use hot fudge for thicker texture or chocolate syrup for easier drizzling.
Peanut butter sauce (2 tablespoons, warmed): Creates beautiful swirls and adds extra peanut butter flavor. Thin regular peanut butter with a little milk or cream to drizzling consistency.
Additional peanut butter cups (2-3, chopped): For garnishing and adding textural interest to each spoonful.
Chopped peanuts (2 tablespoons): Add crunch and reinforce the peanut butter flavor. Use roasted, salted peanuts for the best taste.
Optional Enhancements:
- Mini chocolate chips for extra chocolate texture
- Crushed graham crackers for additional crunch
- Caramel sauce for sweet complexity
- Sea salt flakes for sophisticated sweet-salty contrast
- Brownie chunks for ultimate indulgence
- Oreo cookies for cookies and cream variation
Equipment Needed:
- High-powered blender
- Tall glasses (16 oz or larger)
- Long spoons or straws
- Ice cream scoop
- Measuring cups and spoons
Dietary Modifications:
- Lower sugar: Use sugar-free ice cream and sugar-free peanut butter cups
- Dairy-free: Substitute with non-dairy ice cream and plant-based milk
- Nut-free: Use sunflower seed butter and sun cups instead of peanut products
- Lighter version: Use frozen yogurt instead of ice cream, reduce peanut butter
- Vegan: Use plant-based ice cream, dairy-free chocolate, and vegan whipped cream
Step-by-Step Instructions
Prepare Your Ingredients:
1. Soften the Ice Cream Remove ice cream from the freezer and let it soften at room temperature for 5-10 minutes. Slightly softened ice cream blends more easily and creates a smoother texture. It should be soft enough to scoop easily but not melted.
2. Prepare the Mix-Ins Roughly chop 4-6 peanut butter cups into chunks, reserving 2-3 for topping. The chunks should be bite-sized – not too small or they’ll disappear, not too large or they won’t blend well. If using frozen peanut butter cups, they’ll chop more cleanly.
3. Chill Your Glasses Place your serving glasses in the freezer for 10-15 minutes while you prepare the milkshake. Cold glasses keep the milkshake thicker longer and add to the professional presentation.
Blend the Milkshake:
4. Add Base Ingredients Add the softened chocolate ice cream, peanut butter, and vanilla extract to your blender. Start with just 1/4 cup of milk – you can always add more, but you can’t take it out.
5. Initial Blend Blend on low speed initially to break up the ice cream, then increase to medium speed. Blend for 15-20 seconds, stopping to scrape down the sides as needed. The mixture should be thick and just barely pourable.
6. Adjust Consistency Check the thickness. If it’s too thick to blend, add milk 1-2 tablespoons at a time and blend briefly. If it’s too thin, add more ice cream. The ideal consistency should be thick enough to eat with a spoon but pourable.
7. Add Peanut Butter Cup Chunks Add the chopped peanut butter cups to the blender and pulse 2-3 times just to incorporate them. Don’t over-blend – you want chunks throughout, not a completely smooth texture.
Assemble and Serve:
8. Create Decorative Swirls Drizzle chocolate sauce and warmed peanut butter around the inside of your chilled glasses, creating swirls. Tilt the glass and rotate as you drizzle for the best effect.
9. Pour the Milkshake Carefully pour the milkshake into the prepared glasses, filling them about 3/4 full to leave room for toppings. Pour slowly to maintain the sauce swirls on the glass sides.
10. Add Extravagant Toppings Top with generous amounts of whipped cream, creating a tall crown. Drizzle with more chocolate and peanut butter sauce. Sprinkle with chopped peanut butter cups and peanuts. Add any additional garnishes like chocolate shavings or mini chips.
11. Serve Immediately Serve with both a straw and a long spoon. The milkshake should be thick enough that it’s initially difficult to drink through a straw – that’s perfect! As it slowly melts, it becomes easier to drink.
Tips and Variations
Expert Tips for Perfect Results:
- Quality matters: Use premium ice cream with high butterfat content for the best texture
- Temperature control: Slightly softened ice cream blends better than rock-hard ice cream
- Less is more with milk: Start with minimal liquid and add gradually – too much makes it thin
- Pulse for chunks: Don’t over-blend the peanut butter cups – chunks are desirable
- Serve immediately: Milkshakes are best enjoyed right away before they melt
Achieving Perfect Thickness:
Ice cream temperature: Let soften slightly but not melt for optimal blending
Milk ratio: Use minimal milk – just enough to get the blender moving
Blender technique: Start on low, scrape sides, avoid over-blending
Quick fix: If too thin, add more ice cream or freeze for 10 minutes
Professional thickness: Should stand up a spoon or require effort to sip through a straw
Flavor Variations:
Double Chocolate Peanut Butter: Use chocolate peanut butter and add chocolate chunks
Peanut Butter Banana: Add 1 frozen banana for natural sweetness and creaminess
Salted Caramel Peanut Butter: Add caramel sauce and sea salt flakes
Cookies and Cream Peanut Butter: Blend in crushed Oreos with the peanut butter cups
Mint Chocolate Peanut Butter: Add 1/4 teaspoon peppermint extract
Coffee Peanut Butter Cup: Add 1 shot of espresso or 2 tablespoons cold brew
Marshmallow Peanut Butter: Top with toasted marshmallow fluff
Elvis Style: Add bacon bits and honey drizzle for sweet-salty indulgence
Serving Suggestions
Peanut butter cup milkshakes deserve presentation that matches their indulgent nature.
Classic Diner Style:
- Serve in tall glasses with red and white striped straws for retro appeal
- Present on checkered placemats or vintage diner plates
- Include both a straw and long spoon for maximum enjoyment
- Offer extra napkins – this is a gloriously messy treat
Over-the-Top Presentations:
- Extreme milkshake style: Top with full-sized candy bars, cookies, and brownies
- Drip effect: Let sauces drip down the outside of the glass for dramatic effect
- Rim decoration: Roll glass rim in crushed peanuts or mini chocolate chips
- Sparkler finish: Add sparkler candles for birthday or celebration versions
Elegant Dessert Service:
- Sophisticated garnish: Use chocolate curls, gold leaf, and fresh mint
- Martini glasses: Serve in chilled martini glasses for adult elegance
- Dessert flights: Offer small portions in shot glasses for tasting experiences
- Paired treats: Serve with complementary cookies or brownies on the side
Occasions and Events:
- Birthday celebrations: Perfect centerpiece for birthday desserts
- Date nights: Romantic treat to share with two straws
- Movie nights: Ultimate indulgent snack for home theaters
- Summer treats: Refreshing yet indulgent hot weather dessert
Party Presentation Ideas:
- Milkshake bar: Set up DIY station with various toppings and mix-ins
- Make-ahead prep: Blend base and store in freezer, assemble when serving
- Individual portions: Make smaller versions for party guests
- Theme coordination: Match glass decorations to party colors or themes
Storage and Reheating Instructions
Immediate Storage: Milkshakes are best enjoyed immediately after preparation when they’re at perfect consistency. However, if you have leftovers or need to make ahead, there are ways to preserve quality.
Refrigerator Storage: Pour leftover milkshake into an airtight container and refrigerate for up to 24 hours. The mixture will separate and become less thick. Before serving, re-blend briefly or stir vigorously to recombine.
Freezer Storage: For longer storage, pour the blended milkshake base (without toppings) into freezer-safe containers. Freeze for up to 1 month. Thaw slightly before serving and re-blend if needed to restore smooth texture.
Make-Ahead Strategies:
- Pre-portion ingredients: Measure ice cream and add-ins into containers, freeze until ready to blend
- Sauce prep: Make chocolate and peanut butter sauces ahead and store refrigerated
- Glass decoration: Drizzle sauces in glasses and freeze until ready to fill
- Topping prep: Pre-chop peanut butter cups and prepare whipped cream ahead
Serving Stored Milkshakes:
- Let frozen milkshake soften for 5-10 minutes before re-blending
- Add a splash of milk if needed to restore proper consistency
- Freshly whip cream for topping rather than using stored whipped cream
- Add fresh garnishes even if using stored base
Quality Considerations:
- Texture changes are normal after storage due to ice crystal formation
- Flavors may intensify slightly over time as they meld
- Whipped cream doesn’t store well – always prepare fresh
- Some separation is normal – simply re-blend or stir vigorously
Recipe Notes
Ice Cream Quality and Selection: The quality of your ice cream directly impacts the final milkshake quality. Premium ice creams with higher butterfat content (14-16%) create thicker, richer milkshakes. Super-premium brands like Häagen-Dazs or Ben & Jerry’s work beautifully, though mid-range brands can also produce excellent results.
Peanut Butter Type: Conventional creamy peanut butter (like Jif or Skippy) works best because it’s emulsified and blends smoothly without separating. Natural peanut butter can create an oily texture and doesn’t incorporate as seamlessly. If you prefer natural peanut butter, blend it very thoroughly.
Consistency Control: The biggest challenge in milkshake making is achieving the perfect thickness. Start with minimal liquid and add gradually. Remember that the milkshake will thin slightly as it sits, so make it slightly thicker than your desired final consistency.
Blender Power: A high-powered blender makes this recipe much easier. If using a less powerful blender, let the ice cream soften more and be patient with the blending process. You may need to stop and stir manually to help incorporate everything.
Troubleshooting Common Issues:
- Too thin: Add more ice cream, freeze for 10 minutes, or add ice cubes
- Too thick: Add milk 1 tablespoon at a time and blend briefly
- Won’t blend: Ice cream is too hard – let soften more before blending
- Separated: Not enough liquid or overblending – adjust liquid and pulse gently
- Melting too fast: Glasses weren’t chilled or room temperature is too warm
Nutrition Information (Per Serving)
Based on 2 large servings with full toppings
| Nutrient | Amount |
|---|---|
| Calories | 785 |
| Total Fat | 42g |
| Saturated Fat | 18g |
| Carbohydrates | 88g |
| Sugar | 72g |
| Dietary Fiber | 4g |
| Protein | 18g |
| Sodium | 385mg |
| Cholesterol | 65mg |
| Calcium | 285mg |
| Iron | 2.8mg |
| Potassium | 585mg |
| Vitamin A | 485 IU |
| Vitamin C | 2mg |
| Vitamin E | 4mg |
| Thiamin | 0.2mg |
| Niacin | 4.2mg |
| Magnesium | 85mg |
Nutrition information is an estimate and may vary based on specific brands and portion sizes used.
Recipe Card Summary
Course: Dessert, Drink
Cuisine: American
Servings: 2 large milkshakes
Prep Time: 10 minutes
Total Time: 10 minutes
Ingredients:
- 3 cups premium chocolate ice cream
- 1/2 cup creamy peanut butter
- 1/2 cup whole milk (adjust for thickness)
- 4-6 peanut butter cups, chopped
- 1 tsp vanilla extract
- 1 cup whipped cream
- 1/4 cup chocolate sauce
- 2 tbsp peanut butter sauce
- 2-3 additional peanut butter cups for topping
- 2 tbsp chopped peanuts
Instructions:
- Let ice cream soften 5-10 minutes, chill glasses in freezer
- Chop peanut butter cups, reserving some for topping
- Add ice cream, peanut butter, vanilla, and 1/4 cup milk to blender
- Blend until smooth and thick, adding more milk if needed
- Pulse in chopped peanut butter cups just to incorporate
- Drizzle chocolate and peanut butter sauce inside chilled glasses
- Pour milkshake into glasses
- Top with whipped cream, sauces, peanut butter cups, and peanuts
- Serve immediately with straw and spoon
Notes: Start with less milk – you can always add more. Use premium ice cream for best results. Serve immediately for optimal thickness. Can be made without dairy using substitutes.
Nutrition: See detailed nutrition table above
Diet Tags
- Vegetarian
- Gluten-Free (check candy labels)
- High-Protein
- Indulgent Treat
- Special Occasion
- Kid-Friendly
- Dessert Drink
- Ice Cream Based
- Quick & Easy
- No-Bake
Health Benefits
Protein Content: Each serving provides 18 grams of protein from peanut butter, milk, and ice cream, supporting muscle maintenance and satiety.
Calcium Source: Dairy ingredients contribute significant calcium for bone health and muscle function.
Healthy Fats: Peanut butter provides monounsaturated fats that support heart health when consumed in moderation.
Energy Boost: The combination of carbohydrates and fats provides quick energy, making this an excellent post-workout treat.
Mood Enhancement: The combination of chocolate and peanut butter triggers endorphin release and provides comfort food satisfaction.
Vitamin E: Peanut butter contributes vitamin E, an antioxidant that supports skin and immune health.
Niacin Content: Peanuts provide niacin (vitamin B3), important for energy metabolism and skin health.
Occasional Indulgence: Enjoying special treats in moderation supports a balanced, sustainable approach to eating.
FAQs
1. How do I make my milkshake thicker like restaurant milkshakes? The key is using minimal milk and premium ice cream. Start with just 1/4 cup milk and add more only if absolutely necessary to get the blender moving. Use ice cream with high butterfat content, let it soften slightly before blending, and serve in chilled glasses immediately. If it’s still too thin, add more ice cream or freeze the mixture for 10 minutes.
2. Can I make this milkshake without a high-powered blender? Yes, but you’ll need to let the ice cream soften more and be patient. Break the ice cream into smaller chunks before adding to the blender, use a bit more milk to help it blend, and stop frequently to stir with a spoon. A hand mixer can work in a pinch if you really soften the ice cream first.
3. What’s the best way to create those beautiful sauce swirls in the glass? Drizzle the sauce in a thin stream while slowly rotating the glass. Tilt the glass at an angle so the sauce clings to the sides as it drips down. For peanut butter, warm it slightly with a little milk or cream to make it more fluid and easier to drizzle. Do this before adding the milkshake so the sauces stay visible.
4. Can I make this dairy-free or vegan? Absolutely! Use high-quality dairy-free ice cream (coconut or cashew-based work best), plant-based milk, and ensure your peanut butter cups are vegan. Many brands now make excellent dairy-free versions of all these ingredients. The texture and flavor will be slightly different but still delicious.
5. How can I prevent my milkshake from melting too quickly? Chill your glasses in the freezer before making the milkshake, use premium ice cream with higher butterfat content, minimize the amount of milk used, and serve in a cool environment. Using frozen peanut butter cups also helps keep things colder longer. Make the shake as thick as possible and serve immediately.
Final Thoughts
Peanut butter cup milkshakes represent the pinnacle of dessert indulgence – a treat that celebrates the joy of pure, unabashed sweetness and the perfect pairing of chocolate and peanut butter. This isn’t everyday food, and that’s exactly what makes it special. It’s the kind of dessert that turns ordinary moments into celebrations and creates the kind of happy memories that last long after the last sip.
What makes this milkshake truly special is how it captures everything we love about peanut butter cups – that irresistible combination of creamy peanut butter and rich chocolate – and amplifies it into an experience that engages all your senses. The cold, thick texture, the layers of flavor, the textural contrast between smooth milkshake and crunchy candy chunks all work together to create pure dessert bliss.
From a practical standpoint, this recipe proves that spectacular desserts don’t require hours in the kitchen or advanced pastry skills. In just minutes, you can create something that looks and tastes like it came from an upscale ice cream parlor or trendy dessert bar. It’s impressive enough for special occasions yet simple enough to whip up whenever the craving strikes.
The beauty of this milkshake lies in its unapologetic indulgence. In a world that often asks us to moderate and compromise, sometimes the best treat is one that holds nothing back. This milkshake doesn’t pretend to be healthy or virtuous – it’s pure pleasure in a glass, and that’s exactly what makes it perfect for those moments when you want to truly treat yourself.
So grab your blender, stock up on ice cream and peanut butter cups, and prepare to create a dessert experience that will make you smile from the first sip to the last spoonful. Life is short – enjoy the sweet moments!
