
Sweet Cream Milkshake Recipe – Thick & Creamy Classic Diner Style
Introduction
When you’re craving something that delivers pure nostalgic comfort and creamy indulgence in every sip, nothing compares to a perfectly made Sweet Cream Milkshake. This isn’t just any milkshake – it’s that iconic diner classic with thick, velvety texture and pure, sweet vanilla flavor that reminds you of simpler times and creates instant happiness with every spoonful.
What makes this Sweet Cream Milkshake absolutely irresistible is its perfect balance of richness and sweetness combined with that ideal thick-yet-drinkable consistency that defines a great milkshake. We’re talking about a shake so creamy and smooth it coats your spoon beautifully, yet still flows through a straw with that satisfying resistance that makes you work just a little for each delicious sip.
The beauty of making your own milkshakes at home lies in the control you have over every element – from the quality of ice cream to the exact thickness and sweetness level that suits your taste. Plus, once you master the basic technique and proportions, you can customize with endless flavor variations while always having this classic sweet cream version as your reliable foundation.
In this comprehensive guide, you’ll discover how to create the perfect Sweet Cream Milkshake that rivals anything from classic diners or modern shake shops. I’ll share my secrets for achieving that ideal thickness, the key ingredients that create authentic sweet cream flavor, and professional techniques for creating milkshakes that look as good as they taste. Whether you’re satisfying a sudden craving or creating a special treat for family, this recipe delivers pure milkshake perfection every time.
Ingredients Breakdown
Creating the perfect Sweet Cream Milkshake requires understanding how each ingredient contributes to the ideal texture, flavor, and overall experience that makes this classic treat so satisfying.
For the Basic Milkshake:
- 3 cups premium vanilla ice cream – The foundation that determines your milkshake’s entire character. Use high-quality ice cream with good vanilla flavor and creamy texture for best results.
- 1/2 cup whole milk – Thins the ice cream to perfect drinkable consistency while maintaining richness. Whole milk provides the best flavor and texture.
- 2 tablespoons heavy cream – The secret ingredient that adds extra richness and creates that signature velvety texture.
- 1 tablespoon granulated sugar – Enhances sweetness and helps achieve the perfect sweet cream flavor profile.
- 1 teaspoon vanilla extract – Intensifies the vanilla flavor and adds depth that makes this more than just vanilla.
- Pinch of salt – Enhances all flavors and balances the sweetness perfectly.
For the Whipped Cream Topping:
- 1/2 cup heavy whipping cream – For homemade whipped cream that’s fresher and better than store-bought.
- 1 tablespoon powdered sugar – Sweetens the whipped cream without grittiness.
- 1/2 teaspoon vanilla extract – Flavors the topping to complement the milkshake.
Optional Enhancements:
- 1 tablespoon sweetened condensed milk – Adds extra sweetness and richness for ultra-indulgent version
- 1 tablespoon malted milk powder – Creates classic malted milkshake variation
- 1 teaspoon almond extract – Subtle almond notes that complement vanilla beautifully
- White chocolate sauce – Drizzle inside the glass before adding shake for extra sweetness
Classic Toppings and Garnishes:
- Maraschino cherry – The iconic finishing touch for nostalgic presentation
- Caramel or vanilla sauce drizzle – Adds visual appeal and extra sweetness
- Crushed cookies or wafers – For texture contrast and decorative appeal
- Colorful sprinkles – Fun addition for celebrations or kid-friendly presentations
Ice Cream Selection Guide:
- Premium vanilla: Provides the richest, creamiest base with pure vanilla flavor
- French vanilla: Adds custardy richness with egg yolks for deeper flavor
- Vanilla bean: Visible vanilla bean specks create authentic appearance
- Super premium brands: Higher butterfat content creates thicker, richer shakes
Step-by-Step Instructions
Step 1: Chill Your Equipment
Place your blender jar or mixing container in the freezer for 10-15 minutes before starting. Also chill your serving glasses – this keeps the milkshake cold longer and creates that appealing condensation on the outside of the glass. These small steps make a noticeable difference in the final experience.
Cold equipment prevents the ice cream from melting too quickly, allowing you to achieve the perfect thick consistency without adding too much liquid.
Step 2: Prepare Your Ice Cream
Remove the ice cream from the freezer and let it soften slightly for 5-10 minutes. It should be soft enough to scoop easily but still quite firm. Ice cream that’s too hard won’t blend smoothly, while ice cream that’s too soft will create a thin, runny shake.
Scoop the ice cream into your chilled container, breaking it into chunks if necessary to help it blend more easily.
Step 3: Add Liquids and Flavorings
Pour the whole milk and heavy cream over the ice cream. Add the sugar, vanilla extract, and pinch of salt. These liquid ingredients help the ice cream blend smoothly while the flavorings enhance the overall taste profile.
The combination of milk and cream creates the perfect balance of drinkability and richness that defines a great milkshake.
Step 4: Blend to Perfect Consistency
Blend on low speed initially, then gradually increase to medium. Use short pulses rather than continuous blending to prevent over-mixing, which can make the shake too thin. The goal is to blend just until smooth and thick, with no ice cream chunks remaining.
Stop blending as soon as the mixture is homogeneous – over-blending introduces too much air and creates a thinner consistency. The shake should be thick enough to coat a spoon heavily.
Step 5: Test and Adjust Consistency
Stick a spoon into the shake – it should stand upright or nearly upright, and the shake should coat the spoon thickly. If too thick to drink through a straw, add milk one tablespoon at a time and pulse briefly. If too thin, add a bit more ice cream and blend again.
The perfect milkshake consistency requires a straw with some effort but isn’t frustratingly thick. It should flow slowly and coat your mouth richly with each sip.
Step 6: Prepare Fresh Whipped Cream
While you can use store-bought whipped cream, homemade takes just minutes and tastes noticeably better. In a chilled bowl, whip the heavy cream with powdered sugar and vanilla until soft peaks form. Don’t over-whip – it should be billowy and smooth, not stiff or grainy.
Fresh whipped cream adds a light, airy contrast to the rich, dense milkshake.
Step 7: Assemble and Serve with Style
Pour the milkshake into your chilled glasses, leaving room at the top for whipped cream. Top generously with whipped cream, creating an attractive swirl or peak. Add your chosen garnishes – a drizzle of sauce, a cherry, or sprinkles.
Serve immediately with both a straw and a long spoon. The spoon is essential for enjoying the whipped cream and getting every last bit of shake from the glass.
Tips and Variations
Expert Tips for Perfect Results:
- Use premium ice cream with high butterfat content for the creamiest texture
- Chill all equipment and glasses before starting for longer-lasting coldness
- Blend in short pulses to control consistency and prevent over-thinning
- Start with less liquid and add more as needed – it’s easier than fixing a too-thin shake
- Serve immediately as milkshakes continue to thin as they sit
Delicious Flavor Variations:
- Malted Milk: Add 2 tablespoons malted milk powder for classic malt shop flavor
- Butterscotch Cream: Swirl in butterscotch sauce and add butterscotch chips on top
- Salted Caramel: Add caramel sauce and a pinch of sea salt for sophisticated twist
- Cookie Cream: Blend in crushed cookies and add cookie pieces on top
- Cake Batter: Add cake mix (just 2 tablespoons) and rainbow sprinkles
- Coffee Cream: Add a shot of espresso or coffee liqueur for adult version
Serving Suggestions
This classic Sweet Cream Milkshake deserves presentation that enhances its nostalgic appeal and creamy indulgence:
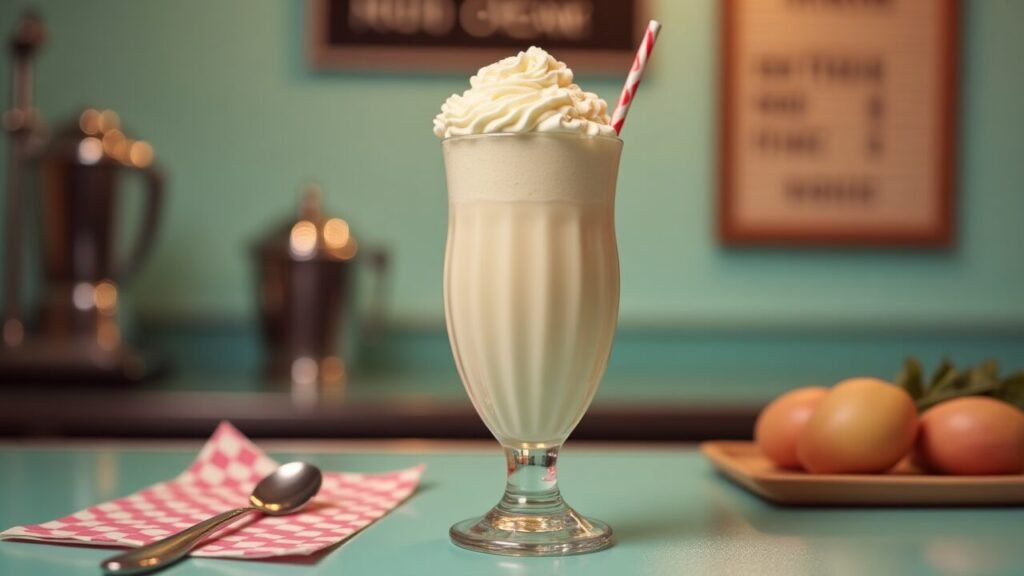
Classic Diner Presentation:
- Serve in tall glasses with red-and-white striped paper straws
- Top with generous whipped cream swirl and maraschino cherry
- Place on classic diner-style plates with checkered paper liners
- Accompany with long spoons for getting every last drop
Modern Shake Shop Style:
- Create elaborate garnishes with cookies, brownies, or candy
- Drizzle the inside of the glass with sauce before adding shake
- Top with full-size cookies or candy bars for over-the-top presentation
- Use mason jars for rustic, Instagram-worthy service
Special Occasion Ideas:
- Create a milkshake bar with various syrups and toppings for customization
- Serve in champagne flutes for elegant party presentations
- Make mini milkshakes in shot glasses for sampling different flavors
- Use themed decorations and colors for birthday or holiday celebrations
Summer Entertaining:
- Serve at backyard barbecues as the perfect cooling dessert
- Create adult versions with liqueur additions for evening gatherings
- Pair with classic summer foods like burgers and fries
- Set up a DIY milkshake station for interactive party fun
Storage and Reheating Instructions
Immediate Consumption Best: Milkshakes are always best enjoyed immediately after making, when the texture is perfect and the temperature is ideal. However, if you need to store leftovers or prepare slightly ahead, here are some tips.
Short-Term Storage: If you must store a milkshake, pour it into an airtight container and freeze for up to 24 hours. It will become more solid but can be re-blended with a splash of milk to restore drinkable consistency. The texture won’t be quite as perfect as fresh, but it’s still delicious.
Leftover Management: Rather than storing finished milkshakes, it’s better to store the components separately. Keep unused ice cream in the freezer and prepare fresh shakes as needed. Made-to-order ensures the best texture and temperature every time.
Make-Ahead Tips: You can prepare toppings and garnishes ahead of time. Make whipped cream up to 2 hours ahead and refrigerate. Chill glasses and have all ingredients measured and ready for quick assembly when the craving hits.
Preventing Ice Crystals: If you do freeze leftover shake, cover the surface with plastic wrap pressed directly against the shake to prevent ice crystals from forming. Thaw slightly before re-blending for best results.
Recipe Notes
Ice Cream Quality: The quality of ice cream you use directly impacts the final result. Premium brands with higher butterfat content create richer, creamier shakes that stay thick longer. Avoid low-fat or diet ice creams as they won’t create the right texture.
Liquid Ratios: Start with less liquid than you think you need – you can always add more, but you can’t take it away. The perfect ratio depends on your ice cream’s consistency and personal preference for thickness.
Blending Technique: Short pulses give you control over consistency. Continuous blending introduces too much air and can quickly turn your thick shake into a thin one. Stop as soon as it’s smooth.
Temperature Matters: Serve milkshakes very cold in chilled glasses. Warm glasses cause rapid melting, and the shake will thin out before you finish drinking it.
Straw Selection: Use thick, sturdy straws designed for milkshakes. Regular drinking straws can collapse under the pressure needed to drink a properly thick shake.
Nutrition Information (Per Serving)
Serves: 2
| Nutrient | Amount per Serving |
|---|---|
| Calories | 485 |
| Total Fat | 28g |
| Saturated Fat | 18g |
| Cholesterol | 95mg |
| Sodium | 185mg |
| Total Carbohydrates | 52g |
| Dietary Fiber | 0g |
| Total Sugars | 48g |
| Added Sugars | 38g |
| Protein | 8g |
| Calcium | 285mg |
| Vitamin A | 285mcg |
| Vitamin D | 2.5mcg |
Nutrition information is an estimate and may vary based on specific ice cream brand and toppings used.
Recipe Card Summary
Course: Dessert/Beverage
Cuisine: American
Servings: 2
Prep Time: 5 minutes
Total Time: 5 minutes
Ingredients:
- 3 cups premium vanilla ice cream
- 1/2 cup whole milk
- 2 tablespoons heavy cream
- 1 tablespoon granulated sugar
- 1 teaspoon vanilla extract
- Pinch of salt
- Whipped cream and cherry for topping
Instructions:
- Chill blender container and serving glasses
- Let ice cream soften slightly, 5-10 minutes
- Add ice cream, milk, cream, sugar, vanilla, and salt to blender
- Blend in short pulses until smooth and thick
- Test consistency and adjust if needed
- Pour into chilled glasses
- Top with whipped cream and cherry, serve immediately
Notes: Use premium ice cream for best texture. Start with less liquid and add more if needed. Serve immediately.
Diet Tags: Vegetarian, Gluten-Free
Health Benefits:
- Good source of calcium from dairy
- Provides protein from milk and ice cream
- Contains vitamin A and D
- Offers quick energy from natural sugars
- Can be portion-controlled for mindful indulgence
Frequently Asked Questions
1. How do I make my milkshake thicker? Use less liquid and more ice cream. Start with just 1/3 cup milk and add more only if needed. You can also add a tablespoon of instant vanilla pudding mix or freeze the shake for 10 minutes to thicken it up.
2. Can I make this without a blender? Yes, though it’s more challenging. Use very soft ice cream and a sturdy whisk or electric mixer. Mash the ice cream first, then gradually whisk in the liquid ingredients until smooth. The texture won’t be quite as perfect but still delicious.
3. Why is my milkshake too thin? This usually happens from too much liquid, over-blending, or ice cream that was too soft to start. Use less liquid next time, blend in short pulses, and make sure ice cream is still quite firm when you begin.
4. Can I use low-fat or non-dairy ice cream? You can, but the texture and flavor will be different. Low-fat ice cream creates thinner, less creamy shakes. Non-dairy ice cream works well but choose full-fat versions for best results. You may need to adjust liquid ratios.
5. How do I create that classic diner-style thickness? Use premium ice cream with high butterfat content, minimize liquid (start with 1/3 cup milk), and blend just until smooth. Some diners also add a small amount of instant pudding mix or sweetened condensed milk for extra thickness.
Final Thoughts
There’s something absolutely magical about a perfectly made Sweet Cream Milkshake that goes beyond its obvious deliciousness – it’s edible nostalgia that transports you back to simpler times of diner counters, soda fountains, and the pure joy of that first thick, creamy sip through a straw. This classic treat represents everything I love about comfort food: how simple ingredients, when combined with proper technique, can create moments of pure happiness.
What makes this recipe particularly wonderful is how it empowers you to create diner-quality milkshakes in your own kitchen, controlling every element from thickness to sweetness to achieve your personal idea of perfection. No more settling for thin, disappointing shakes or paying premium prices for something you can easily make better at home.
This Sweet Cream Milkshake has become a treasured recipe in my kitchen, equally perfect for satisfying sudden cravings and creating special moments with family. There’s something about sharing milkshakes that brings people together – whether it’s treating kids to a special after-school snack or enjoying adult versions with friends on a summer evening.
I’d love to hear about your milkshake adventures! What’s your perfect thickness level? Did you try any of the creative variations? What nostalgic memories did this shake bring back, or what new memories did you create? Share your photos and stories in the comments below – there’s nothing I enjoy more than seeing how you make these classic recipes your own and hearing about the smiles they create. Here’s to the simple pleasure of a perfect milkshake and the joy it brings to any moment!