
Adorable Black Cat Pretzels Recipe for Halloween
Introduction
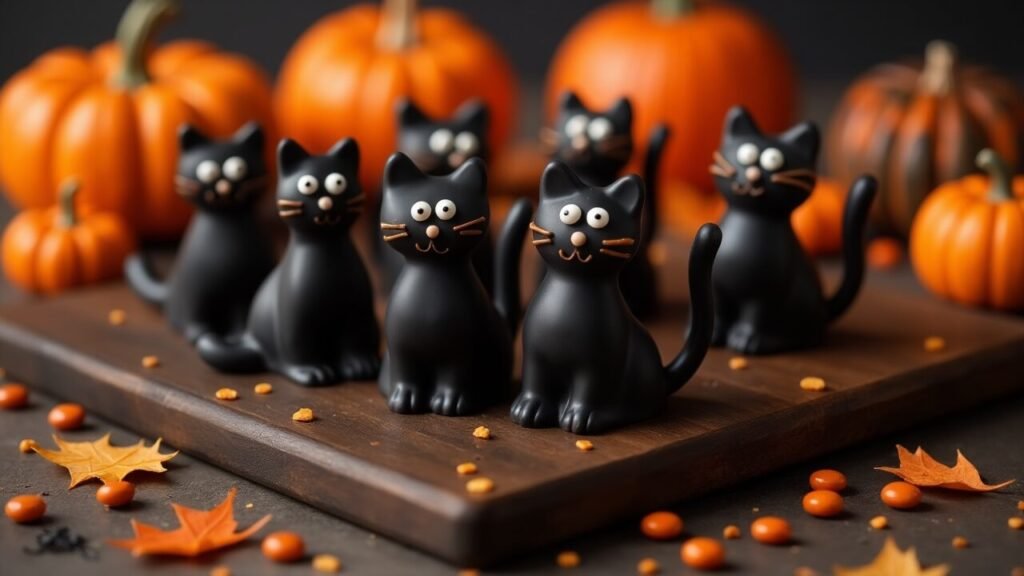
Transform ordinary pretzels into the most adorable Halloween treats with these irresistibly cute Black Cat Pretzels that perfectly capture the mysterious charm of our feline friends. These delightful snacks combine the satisfying crunch of pretzels with rich chocolate coating and whimsical cat shapes that will enchant both children and adults at your Halloween celebrations.
What makes Black Cat Pretzels so appealing is their perfect balance of cute and spooky – they’re Halloween-themed enough to fit your spooky decorations, yet charming enough that even the most cat-loving guests will find them endearing rather than frightening. The contrast between the glossy black chocolate coating and bright candy eyes creates an irresistible visual appeal that makes these treats as photogenic as they are delicious.
These pretzel cats are surprisingly simple to make, requiring no special molds or complicated techniques. The basic pretzel shape naturally lends itself to creating cat silhouettes with just a few strategic additions and creative positioning. The chocolate coating not only provides the essential black cat color but also adds a layer of sweetness that perfectly complements the salty pretzel base.
What sets these treats apart from other Halloween snacks is their incredible versatility and make-ahead potential. You can create them in various sizes using different pretzel shapes, customize them with different coatings and decorations, and prepare them days in advance without losing their appeal. They’re perfect for Halloween parties, school treats, office celebrations, or as special surprises for trick-or-treaters.
In this comprehensive guide, you’ll master the art of creating perfect pretzel cat shapes, learn professional chocolate coating techniques that ensure smooth, glossy finishes, and discover creative variations that will keep this recipe exciting season after season. We’ll also cover presentation ideas that showcase these adorable cats to their best advantage and storage methods that keep them fresh and appealing.
Ingredients Breakdown
Pretzel Foundation:
Mini Pretzel Twists (4 cups) – The perfect size and shape for creating cat bodies. Their natural twisted form provides texture interest while being easy to coat evenly with chocolate.
Pretzel Sticks (2 cups) – Essential for creating realistic cat tails that can be positioned at various angles. Choose uniform, straight sticks for the most professional-looking results.
Pretzel Rods (1 cup) – Use broken into smaller pieces for creating cat ears or longer tails on larger cat variations. Break by hand for natural, varied shapes.
Black Cat Coating:
Dark Chocolate Chips (3 cups) – High-quality dark chocolate provides rich flavor and natural dark color. Choose chips with at least 60% cocoa content for the best coating consistency and taste.
Black Candy Melts (2 cups) – Alternative to chocolate that melts more easily and sets with a glossy finish. Specifically designed for coating and creates uniform black color every time.
Coconut Oil (2 tablespoons) – Added to chocolate or candy melts creates smoother consistency for easier coating and adds subtle coconut flavor that complements the chocolate.
Black Food Coloring (gel) – If using regular chocolate, a small amount of black gel coloring deepens the color for more authentic black cat appearance.
Cat Feature Details:
White Chocolate Chips (1/2 cup) – Perfect size for cat eyes that stand out against the black coating. Mini chips work well for smaller pretzel cats.
Candy Eyes (1/4 cup) – Pre-made candy eyes save time and provide consistent, professional-looking results. Choose appropriate sizes for your pretzel cat proportions.
Orange Mini Chocolate Chips (1/4 cup) – Create Halloween-themed orange eyes that tie into traditional Halloween color schemes while maintaining cat authenticity.
Yellow Candy-Coated Chocolates (1/4 cup) – Cut in half to create realistic cat eyes with that distinctive feline almond shape and bright color.
Optional Enhancement Elements:
Pink Candy Melts (1/4 cup) – Melted and used sparingly to create tiny pink noses and inner ear details that add realistic touches.
White Chocolate (1/4 cup) – Melted and used with toothpick to create whiskers, chest markings, or paw details that enhance the cat appearance.
Pretzel Salt – Extra coarse salt for sprinkling on some cats before coating sets, creating texture variation and enhanced salty-sweet flavor contrast.
Creative Variation Ingredients:
Orange Candy Melts (1 cup) – For creating orange tabby cats or calico variations that add color variety to your Halloween cat collection.
Brown Chocolate Chips (1 cup) – Creates chocolate brown cats for more realistic color variations that represent different cat breeds.
Edible Silver Dust – Brushed on dried chocolate coating creates mystical, magical cats perfect for witch-themed Halloween decorations.
Assembly and Presentation:
Parchment Paper – Essential for setting chocolate-coated pretzels without sticking and for easy removal once set.
Toothpicks – Useful for positioning eyes precisely and creating small detail work like whiskers or nose features.
Small Offset Spatula – Helps with smooth chocolate application and professional finishing techniques.
Step-by-Step Instructions
1. Prepare Your Black Cat Assembly Station
Line several baking sheets with parchment paper and set aside space for your completed cats to dry. Organize all your decorating materials – eyes, broken pretzel pieces, and any detail elements – within easy reach for efficient assembly.
Separate your pretzels by type and inspect them for the best cat-body candidates. Look for pretzel twists that naturally suggest sitting cat poses and pretzel sticks that are straight and uniform for realistic tails.
2. Create Perfect Chocolate Coating
Melt your chosen coating (dark chocolate chips or black candy melts) using a double boiler method or microwave in 30-second intervals, stirring between each heating. The coating should be smooth and fluid but not hot enough to burn your fingers.
If using dark chocolate, add coconut oil one tablespoon at a time until you achieve a consistency that coats smoothly but isn’t too thin. The perfect coating should drip slowly from a spoon and level itself smoothly.
For deeper black color, add black gel food coloring drop by drop while chocolate is still warm, stirring thoroughly between additions until you achieve your desired black cat shade.
3. Form the Basic Cat Shapes
Working with one pretzel at a time, hold a mini pretzel twist in a position that resembles a sitting cat – the curves should suggest the cat’s back and belly. Dip completely in chocolate coating, allowing excess to drip off.
While the chocolate is still wet, gently insert a pretzel stick into the bottom curve to create the tail, positioning it at a natural cat tail angle. The wet chocolate will hold the tail in place as it sets.
Place the assembled cat on parchment paper, adjusting the tail position if needed before the chocolate begins to set. Work quickly but carefully to maintain clean lines and realistic proportions.
4. Add Cat Facial Features
While the chocolate coating is still slightly soft (about 2-3 minutes after placement), gently press candy eyes or white chocolate chips into position for the cat’s eyes. Press just deep enough to secure them without pushing through the pretzel.
For the most realistic look, position eyes slightly asymmetrically and at a subtle angle that suggests the alertness and intelligence characteristic of cats.
If adding nose details, use a toothpick to place a tiny dot of pink candy melt or create a small triangular nose shape while the base chocolate is still workable.
5. Create Realistic Cat Ears
Using broken pieces of pretzel rods or additional pretzel sticks, create pointed ears by inserting small triangular pieces into the top of the cat’s “head” area. The wet chocolate will hold them securely as it sets.
Angle the ears slightly forward and make them different sizes for natural variation that makes each cat unique and more lifelike.
6. Add Final Detail Touches
While all elements are still setting, use a toothpick dipped in melted white chocolate to create whiskers, chest markings, or paw details that enhance each cat’s personality and appearance.
Work quickly as the chocolate sets fairly rapidly once it begins to cool. If needed, gently rewarm your detail chocolate to maintain workability throughout the decorating process.
7. Perfect the Setting Process
Allow completed cats to set at room temperature for 30 minutes, or refrigerate for 15 minutes to speed the process. The chocolate should be completely firm before handling or storing.
Once set, carefully lift each cat from the parchment paper and inspect for any touch-ups needed. Small imperfections can be fixed with additional melted chocolate applied with a toothpick.
Tips and Variations
Professional Black Cat Techniques:
Temperature Control – Work in a cool room to prevent chocolate from setting too quickly while still allowing enough working time for assembly and details.
Consistent Coating – Tap pretzel gently after dipping to remove excess chocolate and create smooth, even coating without drips or thick spots.
Natural Positioning – Study real cat sitting positions to make your pretzel cats look more authentic and appealing rather than stiff or artificial.
Detail Timing – Add all decorative elements while base chocolate is still slightly soft but not wet to ensure proper adhesion without smearing.
Creative Cat Variations:
Orange Tabby Cats – Use orange candy melts as base coating with darker orange or brown stripes created with melted chocolate drizzled on before setting.
Calico Pretzel Cats – Create patches using different colored candy melts applied in sections while base coat is still soft, blending edges naturally.
Siamese Style Cats – Use light tan or beige base coating with dark brown ears, tail, and face details for authentic Siamese cat coloring.
Halloween Witch Cats – Add tiny pretzel stick “witch hats” and silver edible dust for mystical, magical cats perfect for witch-themed decorations.
Size and Shape Variations:
Kitten Versions – Use smaller pretzel pieces and shorter tail sticks to create adorable kitten variations that are perfect for children’s parties.
Large Cat Models – Use pretzel rods as base and create impressive large cats that serve as centerpiece decorations while still being completely edible.
Action Pose Cats – Create cats in different positions – stretching, playing, or walking – by varying pretzel and tail positioning creatively.
Flavor Enhancement Options:
Mint Chocolate Cats – Add peppermint extract to chocolate coating for refreshing mint flavor that complements the Halloween theme beautifully.
Peanut Butter Cats – Mix peanut butter chips into chocolate coating for rich, nutty flavor that appeals to peanut butter lovers.
Spiced Chocolate Cats – Add cinnamon, nutmeg, or pumpkin pie spice to chocolate for warm autumn flavors perfect for Halloween celebrations.
Make-Ahead and Storage Strategies:
Complete cats can be made up to one week ahead and stored in airtight containers at room temperature. Layer between parchment paper to prevent sticking and maintain perfect appearance until serving time.
Serving Suggestions
Adorable Halloween Displays:
Cat Colony Presentation – Arrange multiple black cats in groups on serving platters as if they’re a colony of Halloween cats gathered for the holiday.
Haunted House Scene – Position cats around miniature Halloween houses, fence pieces made from pretzel sticks, and autumn leaf decorations for complete scene.
Witch’s Familiars Setup – Display alongside witch-themed decorations like mini cauldrons, spell books, and magical potions for authentic witch’s familiar presentation.
Autumn Cat Garden – Surround with artificial autumn leaves, mini pumpkins, and orange flowers to create a seasonal cat garden display.
Interactive Serving Ideas:
Cat Adoption Station – Set up a “cat adoption” area where guests can choose their favorite pretzel cat to take home, complete with adoption certificates.
Black Cat Bingo – Create a game where guests try to find cats with specific eye colors or tail positions, making the treats part of party entertainment.
Cat Personality Matching – Give each cat a “personality” and let guests choose cats that match their own personalities for fun interaction.
Party Integration Concepts:
Halloween Buffet Accent – Use as decorative elements throughout your Halloween buffet table, positioning them to “watch over” other treats.
Take-Home Treats – Package individual cats in clear bags with Halloween ribbons as perfect take-home favors that guests will treasure.
Photo Props – Encourage guests to pose with their chosen cats for memorable Halloween photos that capture the fun spirit of your celebration.
Complementary Halloween Treats:
Pair with other Halloween snacks like orange cheese crackers, pumpkin cookies, or candy corn to create a complete Halloween snack spread that appeals to all ages and preferences.
Educational Opportunities:
For children’s parties, use as opportunity to discuss different cat breeds, cat care, or the historical connection between cats and Halloween traditions in a fun, engaging way.
Storage and Reheating Instructions
Optimal Storage Conditions:
Store completed Black Cat Pretzels in airtight containers at room temperature for up to one week. Layer between parchment paper or wax paper to prevent sticking and protect delicate decorative details.
Keep containers in cool, dry locations away from heat sources that could cause chocolate to soften or lose its glossy appearance.
Long-Term Storage Options:
These treats can be frozen for up to 2 months when properly wrapped. Freeze individual cats on baking sheets until solid, then transfer to freezer-safe containers with protective layering.
Thaw frozen cats at room temperature for 15-20 minutes before serving. The chocolate coating may develop slight condensation during thawing but will return to normal appearance once completely at room temperature.
Component Storage:
Uncoated Pretzels – Store in airtight containers for several weeks. Keep different pretzel shapes separated for easy access during assembly.
Melted Chocolate – Leftover coating can be refrigerated for up to two weeks and gently remelted for future use or other chocolate projects.
Decorative Elements – Store candy eyes and other decorating materials in cool, dry places according to package directions for maximum freshness.
Humidity Considerations:
In humid conditions, chocolate coating may become sticky or lose its shine. Add silica gel packets to storage containers or store in air-conditioned environments for best results.
Transportation Guidelines:
For transporting to parties, use rigid containers to protect delicate tails and decorative elements. Pack chocolate coating repair materials for any on-site touch-ups needed.
Refreshing Stored Cats:
If chocolate coating becomes dull over time, lightly brush with soft cloth or restore shine with brief exposure to gentle warm air from hair dryer held at safe distance.
Recipe Notes
Timing for Perfect Results:
Day Before Party – Complete all cats and allow to set completely. Store properly covered for stress-free party preparation.
Day of Party – Arrange on serving platters and add any final decorative touches or themed elements around display areas.
During Party – Replenish serving platters as needed and maintain cool serving environment to preserve chocolate coating quality.
Equipment Essentials:
Double Boiler or Microwave – For properly melting chocolate without burning or seizing, which would ruin coating consistency and appearance.
Multiple Spoons – Dedicated spoons for different coating colors prevent contamination and maintain clean color separation.
Toothpicks – Essential for precise placement of small decorative elements and creating fine detail work like whiskers.
Offset Spatula – Helpful for smooth chocolate application and professional finishing techniques that create bakery-quality appearance.
Quality Control Guidelines:
Consistent Proportions – Maintain similar sizes across batches for professional, uniform appearance that looks intentional rather than haphazard.
Color Intensity – Check black coating color in natural light to ensure sufficient darkness for authentic black cat appearance.
Secure Assembly – Test that tails and ears are firmly attached before coating sets to prevent pieces falling off during handling or transport.
Professional Finishing Tips:
- Work with completely dry pretzels to ensure proper chocolate adhesion
- Maintain consistent chocolate temperature throughout assembly process
- Allow adequate setting time before handling or decorating further
- Store finished cats in single layers to prevent damage during storage
Creative Problem-Solving:
Tails Won’t Stay – Dip tail end in extra chocolate before inserting to create stronger bond with cat body.
Eyes Sliding – Wait until chocolate is slightly more set before adding eyes, or use larger eyes that press deeper into coating.
Coating Too Thick – Warm chocolate slightly and add small amount of coconut oil to restore proper consistency.
Nutrition Information (Per Serving)
| Nutrient | Amount |
|---|---|
| Calories | 145 |
| Total Fat | 7g |
| Saturated Fat | 4g |
| Carbohydrates | 22g |
| Sugar | 14g |
| Fiber | 2g |
| Protein | 3g |
| Sodium | 280mg |
| Cholesterol | 2mg |
| Calcium | 25mg |
| Iron | 1mg |
Nutrition information is an estimate based on 20 pretzel cats and may vary based on specific chocolate coating and decorative ingredients used.
Recipe Card Summary
Course: Snack/Dessert
Cuisine: American/Halloween
Servings: 20 pretzel cats
Prep Time: 45 minutes
Total Time: 1 hour 15 minutes (including setting time)
Ingredients:
Base Elements:
- 4 cups mini pretzel twists
- 2 cups pretzel sticks
- 1 cup pretzel rods, broken into pieces
Coating:
- 3 cups dark chocolate chips OR 2 cups black candy melts
- 2 tablespoons coconut oil
- Black food coloring gel (if needed)
Decorations:
- 1/2 cup white chocolate chips or candy eyes
- 1/4 cup orange mini chocolate chips (optional)
- 1/4 cup pink candy melts (for noses)
Instructions:
- Line baking sheets with parchment paper and organize materials.
- Melt chocolate with coconut oil until smooth coating consistency.
- Add black food coloring if needed for deeper color.
- Dip pretzel twists in chocolate, allowing excess to drip off.
- Insert pretzel stick tails while chocolate is wet.
- Place on parchment and add candy eyes while coating is soft.
- Create ears using broken pretzel pieces.
- Add nose and detail work with toothpicks and colored melts.
- Allow to set 30 minutes at room temperature.
- Store in airtight containers between parchment layers.
Notes:
- Work quickly while chocolate coating remains workable
- Position decorative elements while coating is soft but not wet
- Can be made up to one week ahead and stored covered
- Customize colors and sizes for creative variations
Diet Tags
Vegetarian-Friendly: Made with standard ingredients suitable for vegetarian diets
Nut-Free Option: Can be made completely nut-free when using nut-free chocolate and checking all ingredient labels
Gluten-Free Alternative: Use gluten-free pretzels as base for those with gluten sensitivities
Kid-Safe Ingredients: All decorative elements are made from safe, edible materials appropriate for children
Make-Ahead Friendly: Perfect for busy schedules with excellent storage and make-ahead potential
Party-Perfect: Ideal size and presentation for Halloween parties and celebrations
Health Benefits
Portion Control: Individual treat size makes it easier to enjoy Halloween sweets in moderation while still feeling satisfied.
Creative Expression: Making these cats provides artistic outlet and stress relief through hands-on creative activity.
Social Connection: Sharing and creating these treats brings people together and creates positive social experiences.
Fine Motor Skills: Detailed assembly work helps develop and maintain fine motor coordination and precision.
Family Bonding: Perfect project for families to work on together, creating shared memories and Halloween traditions.
Balanced Indulgence: Combines sweet chocolate with salty pretzel for more satisfying treat that prevents overindulgence.
Frequently Asked Questions
1. What’s the best way to melt chocolate for coating without it seizing?
Use gentle, consistent heat whether using microwave or double boiler method. For microwave, use 30-second intervals and stir between each heating. For double boiler, ensure water barely simmers and no steam or water contacts the chocolate. Adding coconut oil helps create smooth, workable consistency and prevents seizing from minor temperature fluctuations.
2. How do I keep the pretzel stick tails from falling off?
Insert tails while the chocolate coating is still wet but not too thin. The chocolate acts as glue when it sets. If tails seem loose, dip the insertion end in extra melted chocolate before positioning. Allow adequate setting time before handling, and avoid moving cats until chocolate is completely firm.
3. Can I use different types of pretzels for variety?
Absolutely! Mini pretzel twists work best for classic cats, but you can use pretzel rods for larger cats, pretzel sticks for sleek, thin cats, or even pretzel nuggets for chunky, round cats. Each pretzel type will create different cat personalities and sizes, adding visual interest to your collection.
4. How far ahead can I make these for a Halloween party?
Complete cats can be made up to one week ahead and stored in airtight containers at room temperature. The chocolate coating actually improves with time as flavors meld. Store between parchment paper layers to prevent sticking and maintain perfect appearance until serving time.
5. What should I do if my chocolate coating is too thick or too thin?
If too thick, gently rewarm and add coconut oil or vegetable shortening one teaspoon at a time until proper consistency. If too thin, let it cool slightly or add more chocolate. Perfect coating should drip slowly from spoon and level itself smoothly on the pretzel surface without running off completely.
Final Thoughts
These Black Cat Pretzels represent the perfect fusion of Halloween charm and delicious snacking that creates joy for both makers and recipients. The combination of familiar pretzel crunch with smooth chocolate coating and adorable cat design makes them irresistible to Halloween celebrants of all ages, from young trick-or-treaters to sophisticated party guests.
What makes these treats particularly special is their ability to bring out creativity and playfulness in everyone who makes them. Each cat develops its own personality through slight variations in positioning, eye placement, and decorative details, making the creation process as enjoyable as the eating. The hands-on nature of assembling these cats provides a wonderful opportunity for family bonding and creative expression during the Halloween season.
The versatility of Black Cat Pretzels means they work beautifully in virtually any Halloween setting. They’re perfect for school parties where homemade treats are welcome, sophisticated enough for adult Halloween gatherings, and charming enough to serve as special surprises for neighborhood trick-or-treaters. The make-ahead potential removes stress from party planning while ensuring you have impressive treats ready for any Halloween occasion.
Don’t underestimate the social impact of these adorable cats at your Halloween celebrations. Guests naturally gravitate toward them, comparing different cats, choosing favorites, and sharing stories about their own feline friends. They become conversation starters and memory makers that enhance the overall Halloween experience for everyone involved.
The balance between cute and Halloween-appropriate makes these treats accessible for those who prefer charming over scary, while still maintaining the essential Halloween spirit that makes them perfect for spooky season celebrations. They prove that Halloween treats don’t have to be frightening to be festive and fun.
Whether you’re creating memories with children, impressing friends at adult parties, or simply wanting to add some handmade charm to your Halloween celebrations, these Black Cat Pretzels deliver exactly the right combination of adorability, deliciousness, and Halloween spirit. Give this recipe a try and prepare to watch as these charming chocolate cats steal the show at your next Halloween gathering – I’d love to hear about the creative variations and personalities you give your pretzel cat colony!