
Authentic Almond Hazelnut Biscotti Recipe – Traditional Italian Cookies
Introduction
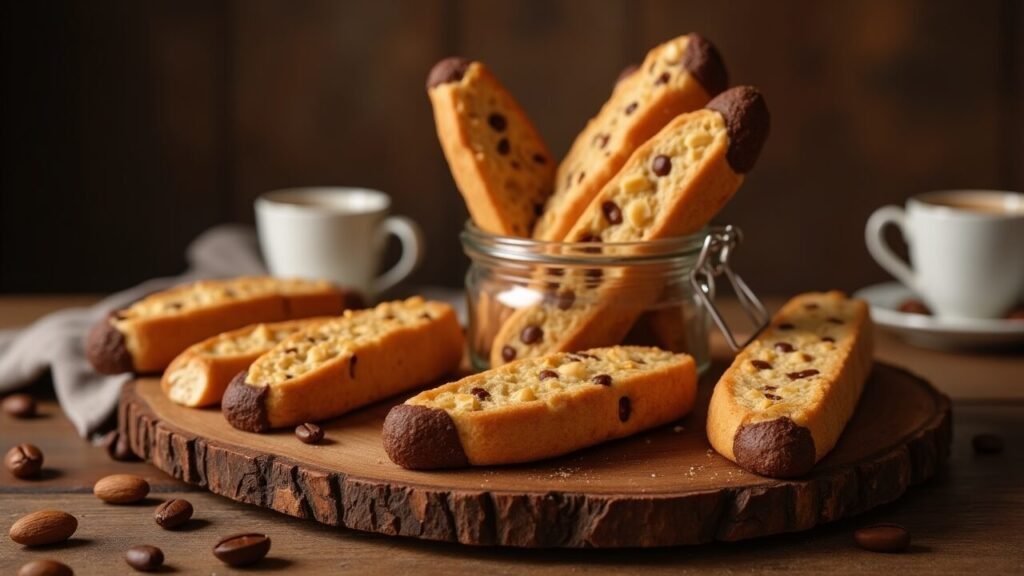
When you want to bring a touch of Italian elegance to your kitchen and create something that perfectly captures the essence of authentic European baking, these Almond and Hazelnut Biscotti deliver sophistication and tradition in every crispy, nut-studded bite. These aren’t just cookies – they’re a celebration of time-honored techniques that transform simple ingredients into something truly special.
What makes these biscotti absolutely irresistible is their perfect balance of textures and flavors. We’re talking about that ideal crispy crunch that holds up beautifully when dunked in coffee, espresso, or even dessert wine, combined with the rich, nutty complexity of toasted almonds and hazelnuts that adds depth and satisfaction to every bite. The twice-baking process creates that signature texture that’s both sturdy and delicate.
The beauty of authentic biscotti lies in their versatility and keeping quality. Unlike soft cookies that lose their appeal quickly, properly made biscotti actually improve with time and can be stored for weeks while maintaining their perfect texture. They’re equally at home on an elegant dessert platter or packed in tins as thoughtful gifts that show you’ve put time and care into creating something special.
In this comprehensive guide, you’ll discover how to create authentic Almond and Hazelnut Biscotti that rival those found in the finest Italian cafés. I’ll share traditional techniques for achieving that perfect twice-baked texture, the secrets to balancing nut flavors, and professional tips for shaping and storing these elegant cookies. Whether you’re an experienced baker or new to Italian baking traditions, this recipe delivers consistent, impressive results that will make you feel like a true artisan.
Ingredients Breakdown
Creating authentic Almond and Hazelnut Biscotti requires understanding how each ingredient contributes to the traditional texture, flavor, and appearance that defines these classic Italian cookies.
For the Biscotti Dough:
- 2 1/2 cups all-purpose flour – Provides the structure for the characteristic crisp texture. Use unbleached flour for the most authentic flavor and color.
- 1 cup granulated sugar – Creates sweetness and helps achieve the golden color during baking. The amount is perfectly balanced to complement the nuts without being overpowering.
- 1 teaspoon baking powder – Provides gentle lift for the proper texture – not too dense, not too airy.
- 1/2 teaspoon salt – Enhances all flavors and balances the sweetness while bringing out the nuttiness.
- 3 large eggs – Binds the dough and provides richness. Use room temperature eggs for easier incorporation.
- 1 teaspoon vanilla extract – Adds depth and warmth that complements the nuts beautifully.
- 1/2 teaspoon almond extract – Intensifies the almond flavor throughout the cookies, not just from the nuts.
For the Nut Components:
- 3/4 cup whole almonds, toasted – Provides classic biscotti flavor and satisfying crunch. Toasting enhances their nuttiness significantly.
- 3/4 cup hazelnuts, toasted and skinned – Adds rich, buttery flavor that pairs perfectly with almonds. Skinning removes bitterness and improves texture.
- Additional whole almonds for pressing on top – Traditional decoration that also adds extra almond flavor and visual appeal.
Optional Flavor Enhancements:
- 1 tablespoon anise seeds – For traditional Italian flavor variation
- Zest of 1 orange – Adds bright citrus notes that complement nuts beautifully
- 2 tablespoons amaretto liqueur – Intensifies almond flavor for adult version
- 1/4 cup dried cranberries – For color and chewy texture contrast
For Finishing:
- 1 egg, beaten – For egg wash to create golden, glossy finish
- Dark or white chocolate for dipping – Optional but elegant finishing touch
- Coarse sugar for sprinkling – Adds sparkle and extra sweetness
Nut Preparation Notes:
- Toast nuts in a 350°F oven for 8-10 minutes until fragrant and lightly golden
- For hazelnuts, rub in a clean kitchen towel while warm to remove skins
- Let nuts cool completely before incorporating into dough
- Roughly chop some nuts while leaving others whole for varied texture
Step-by-Step Instructions
Step 1: Prepare Your Nuts and Workspace
Begin by toasting your almonds and hazelnuts in a 350°F (175°C) oven for 8-10 minutes until fragrant and lightly golden. For hazelnuts, immediately transfer to a clean kitchen towel and rub vigorously to remove most of the skins – don’t worry about getting every bit off. Let nuts cool completely.
Set up your workspace with all ingredients at room temperature. Line a large baking sheet with parchment paper. This preparation ensures smooth workflow once you start mixing the dough.
Step 2: Create the Dry Foundation
In a large mixing bowl, whisk together flour, sugar, baking powder, and salt until well combined. Create a well in the center of the dry ingredients – this traditional technique helps ensure even mixing and prevents overworking the dough.
Make sure there are no lumps of baking powder and that all dry ingredients are evenly distributed throughout the mixture.
Step 3: Combine Wet Ingredients
In a separate bowl, whisk together eggs, vanilla extract, and almond extract until well combined and slightly frothy. This ensures the extracts are evenly distributed and the eggs are properly beaten for easy incorporation.
The mixture should be smooth and homogeneous with no streaks of egg white visible.
Step 4: Form the Traditional Dough
Pour the wet ingredients into the well in the dry ingredients. Using a wooden spoon or your hands, gradually incorporate the flour mixture until a slightly sticky dough forms. Don’t overwork it – the dough should just come together.
Add the cooled, toasted nuts and gently fold them in until evenly distributed throughout the dough. The dough will be softer and stickier than typical cookie dough – this is normal and correct for authentic biscotti.
Step 5: Shape the Traditional Logs
Divide the dough in half. On your parchment-lined baking sheet, shape each half into a log approximately 12 inches long and 3 inches wide. The logs should be evenly shaped with slightly flattened tops – they’ll spread slightly during the first bake.
Leave about 4 inches between the logs as they’ll expand during baking. Press additional whole almonds decoratively on top of each log, then brush with beaten egg for a beautiful golden finish.
Step 6: First Bake for Structure
Bake the logs at 350°F (175°C) for 25-30 minutes until they’re lightly golden and firm to the touch. They should spring back slightly when gently pressed in the center. Don’t overbake as they’ll continue cooking during the second bake.
Remove from oven and let cool on the baking sheet for 10 minutes – this cooling period is crucial for clean slicing without crumbling.
Step 7: Master the Diagonal Slice
Using a sharp serrated knife, cut each log diagonally into 1/2-inch thick slices. Cut with a gentle sawing motion to avoid crushing the nuts or creating ragged edges. Each log should yield about 20-24 slices.
Arrange the slices cut-side down on the same parchment-lined baking sheet. They can be placed close together as they won’t spread during the second bake.
Step 8: Second Bake for Perfect Crispness
Return to the oven and bake for 10-15 minutes, then flip each slice and bake for another 10-15 minutes until both sides are golden brown and crisp. The total second baking time depends on how crispy you prefer your biscotti.
The finished biscotti should be golden brown, completely crisp, and make a slight hollow sound when tapped. They’ll continue to crisp as they cool.
Tips and Variations
Expert Tips for Perfect Results:
- Toast nuts until fragrant – this step dramatically improves flavor and prevents soggy texture
- Don’t overbake during the first bake or biscotti will be too hard to slice cleanly
- Use a sharp serrated knife and gentle sawing motion for clean cuts
- Cool completely between first and second baking for easier handling
- Store in airtight containers to maintain crispness for weeks
Traditional Italian Variations:
- Anise Biscotti: Add 1 tablespoon anise seeds for classic Tuscan flavor
- Orange Almond: Include orange zest and replace almond extract with orange extract
- Chocolate Hazelnut: Add cocoa powder and mini chocolate chips for indulgent version
- Wine Biscotti: Replace one egg with sweet white wine for traditional preparation
- Pistachio Rose: Use pistachios and add rose water for elegant Middle Eastern influence
- Espresso Biscotti: Add instant espresso powder for coffee lovers
Serving Suggestions
These authentic Almond and Hazelnut Biscotti are perfect on their own, but here are ways to present them for maximum enjoyment and authentic Italian experience:
Traditional Italian Service:
- Serve with espresso or strong coffee for classic dunking experience
- Offer alongside dessert wines like Vin Santo or Moscato for evening enjoyment
- Present on simple white plates to showcase their rustic, artisanal beauty
- Arrange in tall glasses or jars for casual, café-style presentation
Elegant Entertaining Ideas:
- Create a dessert board with various biscotti flavors, nuts, and dried fruits
- Dip half of each biscotti in melted dark or white chocolate for sophisticated finish
- Serve with gelato or sorbet for textural contrast and temperature variety
- Package in cellophane bags tied with ribbons for elegant party favors
Gift and Holiday Presentations:
- Layer in decorative tins with parchment paper for beautiful homemade gifts
- Create biscotti gift baskets with specialty coffee and Italian treats
- Package with recipe cards for friends who want to recreate the magic
- Arrange on holiday cookie platters alongside other traditional treats
Casual Enjoyment Options:
- Keep in kitchen canisters for daily coffee companions and afternoon treats
- Pack for travel – they’re perfect airplane snacks that won’t get crushed
- Serve with afternoon tea for those who prefer lighter beverages
- Crumble over ice cream or yogurt for added texture and flavor
Storage and Reheating Instructions
Optimal Storage Conditions: Properly stored biscotti can maintain their perfect crispy texture for up to 3 weeks at room temperature. Store in airtight containers or tins, layering between parchment paper to prevent sticking and preserve their shape. Keep away from humidity which can soften the crisp texture.
Long-Term Storage: These biscotti freeze beautifully for up to 3 months when wrapped tightly in plastic wrap and stored in freezer bags. Thaw at room temperature for 30 minutes before serving – they’ll taste just as fresh as when first made.
Maintaining Crispness: If biscotti soften due to humidity, you can re-crisp them by placing on a baking sheet in a 300°F oven for 5-8 minutes. Let them cool completely before storing again – they’ll regain their perfect crispy texture.
Travel and Shipping: Biscotti are ideal for shipping as gifts because their sturdy texture prevents breaking. Pack carefully in rigid containers with padding, and they’ll arrive in perfect condition. Include storage instructions for recipients.
Quality Indicators: Fresh biscotti should be uniformly golden, completely crisp throughout, and make a slight hollow sound when tapped. Any soft spots or pale areas indicate underbaking, while overly dark areas suggest overbaking.
Recipe Notes
Traditional Techniques: Authentic biscotti require the twice-baking process – there are no shortcuts that produce the same texture. The first bake sets the structure, while the second creates the characteristic crispness.
Nut Quality: Use the freshest nuts possible and always toast them before incorporating. Stale nuts will compromise the entire batch, while properly toasted nuts provide rich, complex flavors that define great biscotti.
Dough Consistency: The dough should be soft and slightly sticky – don’t add extra flour to make it easier to handle. This soft texture is necessary for the proper final texture after twice-baking.
Slicing Success: Wait for the full 10-minute cooling period before slicing, and use a sharp serrated knife with gentle sawing motions. Rushing this step results in crumbly, broken cookies.
Flavor Development: Biscotti actually improve in flavor after a day or two as the flavors meld and develop. Don’t judge the final result immediately – patience is rewarded with deeper, more complex taste.
Nutrition Information (Per Serving)
Serves: 40
| Nutrient | Amount per Serving |
|---|---|
| Calories | 95 |
| Total Fat | 4g |
| Saturated Fat | 0.5g |
| Cholesterol | 15mg |
| Sodium | 45mg |
| Total Carbohydrates | 14g |
| Dietary Fiber | 1g |
| Total Sugars | 6g |
| Added Sugars | 5g |
| Protein | 3g |
| Calcium | 25mg |
| Iron | 0.8mg |
| Potassium | 85mg |
| Vitamin E | 2.1mg |
Nutrition information is an estimate and may vary based on specific nuts and ingredients used.
Recipe Card Summary
Course: Dessert/Cookie
Cuisine: Italian
Servings: 40
Prep Time: 30 minutes
First Bake: 25-30 minutes
Second Bake: 20-30 minutes
Total Time: 2 hours
Ingredients:
- 2 1/2 cups all-purpose flour
- 1 cup granulated sugar
- 1 teaspoon baking powder
- 1/2 teaspoon salt
- 3 large eggs
- 1 teaspoon vanilla extract
- 1/2 teaspoon almond extract
- 3/4 cup whole almonds, toasted
- 3/4 cup hazelnuts, toasted and skinned
- 1 egg for wash
Instructions:
- Toast nuts at 350°F for 8-10 minutes, cool completely
- Mix dry ingredients, create well in center
- Whisk eggs with extracts, add to flour mixture
- Fold in cooled nuts until evenly distributed
- Shape into 2 logs on parchment-lined sheet
- Brush with egg wash, bake 25-30 minutes
- Cool 10 minutes, slice diagonally 1/2-inch thick
- Bake slices 10-15 minutes per side until crisp
Notes: Store in airtight containers up to 3 weeks. Freeze up to 3 months. Perfect for dunking in coffee.
Diet Tags: Vegetarian
Health Benefits:
- High in vitamin E and healthy fats from nuts
- Good source of protein and fiber
- Contains antioxidants from almonds and hazelnuts
- Lower in fat than many cookies due to minimal butter
- Long shelf life reduces food waste
Frequently Asked Questions
1. Why do my biscotti crumble when I slice them? This usually happens when the logs aren’t cooled enough before slicing or when using a dull knife. Let logs cool for the full 10 minutes and use a sharp serrated knife with gentle sawing motions. The dough should also be soft enough initially – overly dry dough creates crumbly results.
2. Can I use different nuts in this recipe? Absolutely! Pistachios, walnuts, or pecans work beautifully. Maintain the same total amount (1 1/2 cups) and always toast them first. Each nut will bring its own unique flavor profile to the finished biscotti.
3. How do I know when the second baking is complete? Properly baked biscotti should be golden brown on both sides and completely crisp throughout. They should make a slight hollow sound when tapped and feel firm to the touch. If they’re still soft in the center, continue baking in 5-minute increments.
4. Can I make these ahead for gifts? Yes! Biscotti are perfect make-ahead treats. Store in airtight containers for up to 3 weeks or freeze for up to 3 months. Their sturdy texture makes them ideal for shipping and gift-giving without worry about breakage.
5. Why are my biscotti too hard or too soft? Too hard usually means overbaking, especially during the first bake. Too soft indicates underbaking during the second phase. The key is achieving golden color without going too dark, and ensuring complete crispness throughout during the final baking.
Final Thoughts
There’s something deeply satisfying about creating authentic Italian biscotti that connects us to generations of bakers who have perfected these techniques over centuries. These Almond and Hazelnut Biscotti represent more than just cookies – they’re edible history, carrying forward the traditions of Italian café culture and the art of transforming simple ingredients into something truly special through time-honored methods.
What makes this recipe particularly rewarding is how it teaches patience and technique while delivering results that improve with time. Unlike many baked goods that are best enjoyed immediately, these biscotti actually develop deeper, more complex flavors as they rest, making them perfect for the thoughtful baker who loves to plan ahead and create gifts that show genuine care and effort.
These biscotti have become treasured staples in my kitchen, equally at home in elegant gift tins and everyday cookie jars. They represent the best of artisanal baking – techniques that anyone can master with practice, ingredients that celebrate quality over complexity, and results that bring people together over shared cups of coffee and conversation.
I’d love to hear about your biscotti-making adventures! What nuts did you choose? Did you try any of the traditional variations? How did your family and friends react to these authentic Italian treats? Share your photos and stories in the comments below – there’s nothing I enjoy more than seeing how you embrace these time-honored techniques and create your own delicious traditions. Here’s to the art of twice-baked perfection and the simple pleasure of cookies made with patience, skill, and love!