
Terrifyingly Tasty Creepy Eyeball Cake
1. Introduction
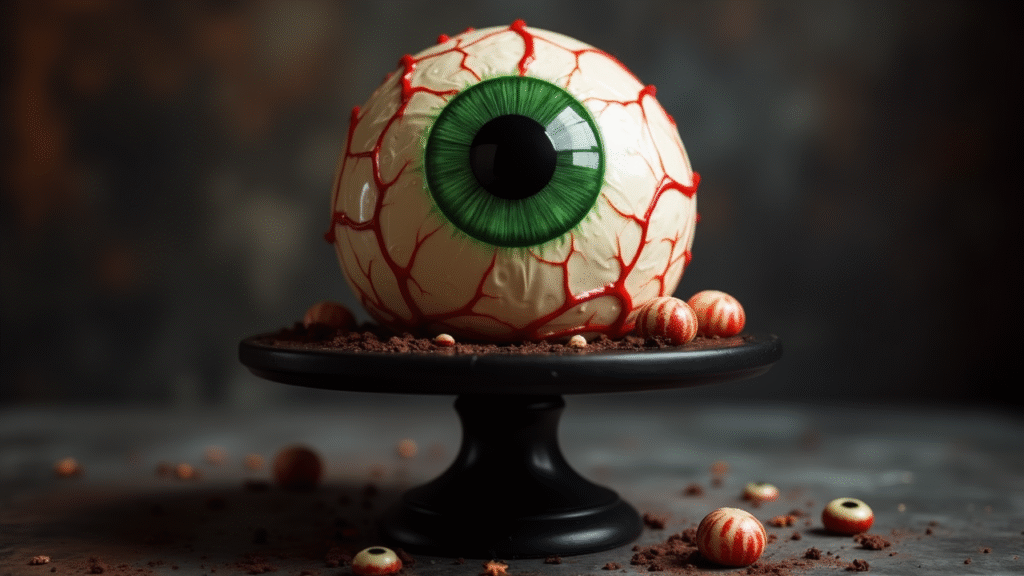
Halloween is the perfect time to get creative in the kitchen, and nothing makes a statement quite like a Creepy Eyeball Cake staring back at your guests. This dessert is not only spooky and fun, but it’s also surprisingly easy to make — even for beginner bakers. The glossy, realistic iris and eerie red veins give it that wow factor, while the soft, moist cake beneath ensures it tastes as good as it looks.
In this recipe, you’ll learn exactly how to make a stunning eyeball effect using simple cake-decorating techniques, buttercream, and food coloring. You can customize it to any eye color, adjust the size, or even add edible “blood” for an extra fright factor. Whether you’re hosting a Halloween party, preparing a treat for a horror movie marathon, or simply want to surprise your friends, this cake is sure to be the centerpiece of your spooky spread.
2. Ingredients Breakdown
For the Cake:
- All-purpose flour – The base for your sponge cake. You can swap for gluten-free flour if needed.
- Sugar – Granulated white sugar gives the cake its sweetness and structure.
- Unsalted butter – Adds richness and flavor. You can substitute with vegan butter for dairy-free.
- Eggs – Helps bind and add moisture. For a vegan option, use flax eggs.
- Baking powder – Ensures the cake rises evenly.
- Whole milk – Keeps the cake moist. Almond or oat milk works as a dairy-free alternative.
- Vanilla extract – Adds flavor depth to the cake base.
For the Decoration:
- Buttercream frosting – Smooth and easy to tint with food coloring.
- Gel food coloring – Essential for creating a vivid iris, pupil, and veins.
- Black fondant – Used for the pupil for a clean, realistic look.
- Corn syrup glaze – Gives the “wet” eyeball effect.
- Red piping gel or icing – For creating bloodshot veins.
Optional Extras:
- Edible glitter – For a magical or alien-style eye.
- Cake dowels – For structure if making a larger, multi-layer eyeball.
3. Step-by-Step Instructions
1. Bake the Cake Layers
Preheat your oven to 350°F (175°C). Grease two hemisphere cake pans or two round pans if you don’t have hemisphere molds. In a large mixing bowl, cream butter and sugar until fluffy, then beat in eggs and vanilla. Sift in flour and baking powder, alternating with milk, until fully combined. Divide batter into pans and bake for 25–30 minutes (round pans may take longer).
2. Cool and Level the Cakes
Let cakes cool completely. If using round pans, carve them into domes to create the eyeball shape. Trim any uneven edges for a clean fit.
3. Prepare the Buttercream
Whip butter until pale and creamy, then gradually add powdered sugar, a splash of milk, and vanilla extract. Separate into small bowls to mix your iris color, white sclera, and any shading effects.
4. Assemble the Eyeball
Spread a thin layer of buttercream between cake halves, then stack them to form a sphere. Apply a crumb coat (thin frosting layer) and chill for 20 minutes to set.
5. Decorate the Sclera and Iris
Frost the entire cake with white buttercream for the sclera. For the iris, use a circular stencil or freehand paint with gel food coloring in your chosen eye color. Add black fondant or piped black icing for the pupil.
6. Add Veins and Gloss
Use red piping gel or a fine brush dipped in red food coloring to draw veins radiating from the iris. Brush a thin layer of corn syrup glaze over the iris and pupil to give it a wet, realistic shine.
7. Final Touches
Place your eyeball cake on a black cake stand and scatter candy eyeballs or fake cobwebs around for extra spook factor.
4. Tips and Variations
- Flavor Swap: Try chocolate cake for a “dark soul” eyeball or red velvet for a gory surprise inside.
- Filling Ideas: Add raspberry jam for a “bloody” effect when sliced.
- Color Variations: Use purple, cat-eye green, or even glowing yellow for a fantasy-style monster eye.
- Gluten-Free: Use a 1:1 gluten-free flour blend.
- Vegan-Friendly: Use plant-based milk, vegan butter, and flax eggs.
5. Serving Suggestions
- Sides: Serve alongside Halloween-themed cupcakes, caramel apples, or pumpkin cookies.
- Garnishes: Sprinkle cocoa powder “dust” around the cake board or add dripping red icing for extra creepiness.
- Drinks: Pair with hot chocolate, mulled cider, or a spooky punch.
- Theme Night: Perfect centerpiece for a horror movie night or haunted house party.
6. Storage and Reheating Instructions
- Fridge: Store in an airtight container for up to 4 days.
- Freezer: Wrap slices in cling film and foil, then freeze for up to 1 month.
- Reheating: If serving warm, microwave a slice for 15–20 seconds. If reheating the whole cake, let it come to room temperature instead to avoid melting decorations.
7. Recipe Notes
- Can be prepped ahead of time and decorated on the day of serving.
- Best results come from using gel food coloring rather than liquid.
- For large cakes, use a 6-quart stand mixer for easy batter preparation.
8. Nutrition Information (Per Serving)
| Nutrient | Amount |
|---|---|
| Calories | 420 kcal |
| Fat | 18 g |
| Saturated Fat | 10 g |
| Carbs | 60 g |
| Sugar | 45 g |
| Fiber | 1 g |
| Protein | 4 g |
| Sodium | 180 mg |
| Cholesterol | 70 mg |
| Calcium | 80 mg |
| Iron | 1.5 mg |
Nutrition information is an estimate and may vary based on specific ingredients used.
9. Recipe Card Summary
Course: Dessert
Cuisine: Halloween Party Food
Servings: 12
Prep Time: 30 minutes
Cook Time: 30 minutes
Total Time: 1 hour
Ingredients:
- 2½ cups all-purpose flour
- 1½ cups sugar
- 1 cup unsalted butter
- 4 eggs
- 2½ tsp baking powder
- 1 cup milk
- 1 tsp vanilla extract
- Buttercream frosting
- Gel food coloring (eye color + red)
- Black fondant
- Corn syrup glaze
Instructions:
- Preheat oven to 350°F (175°C) and prepare pans.
- Cream butter and sugar, then beat in eggs and vanilla.
- Add flour and baking powder, alternating with milk.
- Bake for 25–30 mins; cool completely.
- Shape cakes into a sphere, crumb coat, and chill.
- Frost white sclera, paint iris, and add pupil.
- Draw veins, glaze, and decorate.
Notes:
- For the gloss effect, always apply glaze last.
- Works well with red velvet for a spooky surprise.
Nutrition: See table above.
🏷️ Diet Tags: Vegetarian, Can Be Made Gluten-Free, Can Be Made Vegan
🌿 Health Benefits: While this is a treat, making it at home means fewer preservatives than store-bought cakes.
FAQs:
- Can I make this the night before? Yes, store in the fridge and add glaze on the day.
- What’s the best food coloring for this? Gel-based colors give richer tones without thinning the frosting.
- Can I skip the fondant? Yes, you can pipe the pupil with black icing instead.
10. Final Thoughts
Whether you’re feeding a crowd of ghouls or just looking to make Halloween unforgettable, this Creepy Eyeball Cake delivers both shock value and sweetness. It’s a conversation starter, a showstopper, and most importantly — delicious. If you give it a try, I’d love to hear how it turned out for you. Leave a comment or share your spooky cake photos — I’m dying to see them!