
Gruesome Bloody Popcorn Balls Recipe for Halloween
Introduction
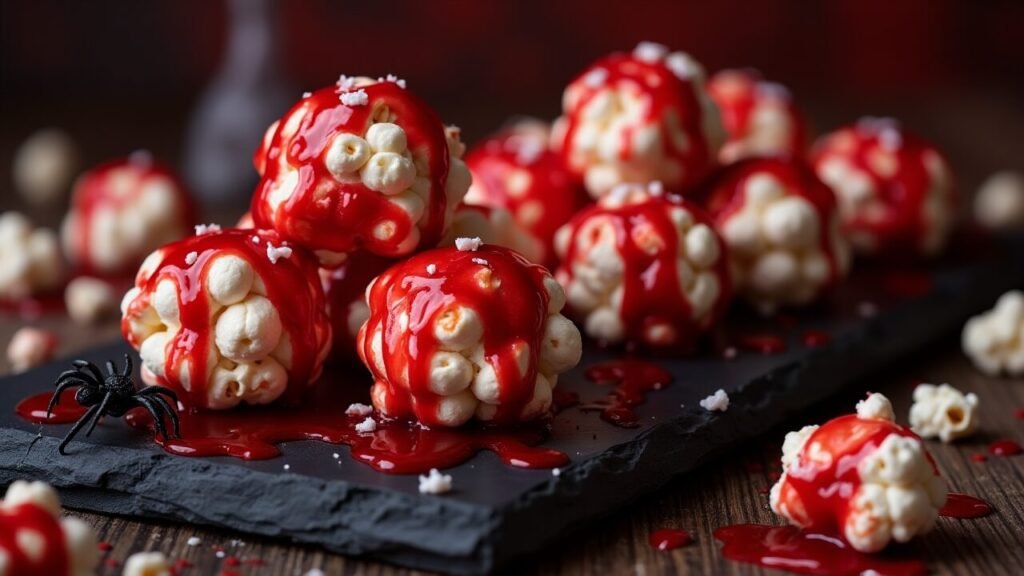
Transform innocent popcorn into the most disturbingly delicious Halloween treats with these spine-chilling Bloody Popcorn Balls that look disturbingly realistic while delivering surprisingly sweet satisfaction. These ghoulish spheres combine the classic appeal of traditional popcorn balls with dramatic “blood” effects that create genuine shock value, making them perfect centerpieces for horror-themed Halloween celebrations.
What makes these Bloody Popcorn Balls so effectively terrifying is their masterful use of contrast – the familiar, comforting white popcorn base becomes genuinely unsettling when coated with glossy red “blood” that drips and pools with disturbing realism. The juxtaposition of something so wholesome transformed into something so gruesome creates the perfect Halloween cognitive dissonance that delights guests while satisfying their sweet cravings.
These treats represent the pinnacle of Halloween shock-value desserts, designed specifically for hosts who want to create genuine “wow” moments that have guests doing double-takes and reaching for their cameras. The realistic blood effects are achieved through carefully crafted fruit-based sauces that taste as delicious as they look disturbing, ensuring that the horror is purely visual while the eating experience remains completely enjoyable.
The genius of Bloody Popcorn Balls lies in their ability to serve dual purposes as both impressive party decorations and genuinely tasty treats. They naturally become conversation starters and photo opportunities while providing substantial snacking satisfaction that keeps guests coming back despite their initially shocking appearance. The individual ball format makes them perfect for parties where guests are mingling and need handheld treats.
In this comprehensive guide, you’ll master the art of creating perfectly formed popcorn balls that hold together beautifully, learn professional techniques for achieving realistic blood drip effects that photograph dramatically, and discover presentation ideas that maximize the horror factor while maintaining food safety. We’ll also cover variations and storage methods that keep your bloody creations looking their most gruesome throughout Halloween festivities.
Ingredients Breakdown
Popcorn Ball Foundation:
Plain Popped Popcorn (12 cups) – Use freshly popped corn for best texture and binding. Air-popped or lightly salted oil-popped works best, avoiding heavily flavored varieties that would compete with blood effects.
Light Corn Syrup (1 cup) – Creates the sticky binding that holds popcorn balls together while providing subtle sweetness. Light corn syrup maintains the white color better than dark varieties.
Granulated Sugar (1/2 cup) – Provides structure and sweetness to the binding syrup. The sugar also helps create the glossy finish that makes blood effects more realistic.
Water (1/4 cup) – Thins the syrup mixture to proper consistency for coating popcorn evenly without becoming too thick to work with effectively.
Butter (3 tablespoons) – Adds richness and helps prevent syrup from becoming too hard when cooled. Unsalted butter allows better flavor control.
Vanilla Extract (1 teaspoon) – Enhances overall flavor without affecting the color scheme needed for effective blood contrast.
Salt (1/2 teaspoon) – Balances sweetness and enhances popcorn flavor while helping bind all elements together harmoniously.
Realistic Blood Effects:
Strawberry Jam or Preserves (1 cup) – The foundation for realistic blood color and texture. Choose smooth varieties without large fruit pieces for best dripping effects.
Corn Syrup (1/4 cup) – Mixed with jam creates perfect dripping consistency and adds glossy shine that mimics fresh blood convincingly.
Red Food Coloring Gel (few drops) – Intensifies blood color for more dramatic, realistic appearance. Gel coloring provides vibrant color without thinning consistency.
Lemon Juice (1 tablespoon) – Adds brightness and prevents blood mixture from being overly sweet while maintaining fruit flavor.
Alternative Blood Formulations:
Cherry Preserves (1 cup) – Creates darker, more realistic blood color with different flavor profile that some prefer over strawberry.
Raspberry Jam (3/4 cup) – Provides deep red color with slightly tart flavor that balances sweetness effectively.
Grenadine Syrup (1/2 cup) – Mixed with corn syrup creates bright red blood with pomegranate flavor and perfect consistency.
Cranberry Sauce (1/2 cup, strained) – Seasonal alternative that creates authentic blood color with tart autumn flavor.
Texture Enhancement Elements:
Mini Marshmallows (1 cup) – Mixed into popcorn adds chewy texture contrast and helps create more irregular, realistic ball shapes.
Broken Pretzel Pieces (1/2 cup) – Adds salty crunch and creates more interesting texture while maintaining color scheme.
White Chocolate Chips (1/2 cup) – Provides sweet bursts and color contrast that shows through blood effects dramatically.
Horror Presentation Enhancements:
Black Food Coloring – For creating “old blood” effects or adding dark accents that suggest dried blood areas.
Edible Red Glitter – Sprinkled into wet blood creates sparkly, fresh blood appearance that catches light dramatically.
Red Sanding Sugar – Rolled over blood effects adds texture that suggests coagulated blood for more realistic horror effects.
Optional Flavor Variations:
Cinnamon (1/2 teaspoon) – Adds warm spice that complements fruit blood flavors while maintaining Halloween appropriateness.
Almond Extract (1/4 teaspoon) – Subtle flavor enhancement that adds sophistication without affecting color or horror theme.
Orange Zest (1 teaspoon) – Citrus brightness that complements berry blood flavors while adding seasonal autumn notes.
Step-by-Step Instructions
1. Prepare Your Horror Laboratory
Line baking sheets with parchment paper and lightly grease your hands with butter or cooking spray. This prevents sticking during ball formation and makes handling much easier.
Set up cooling racks over additional parchment paper for draining blood effects. Organization is crucial when working with hot syrup and messy blood applications.
Have all blood effect ingredients measured and ready, as timing will be important for achieving proper consistency and realistic dripping effects.
2. Create Perfect Popcorn Ball Base
In a heavy-bottomed saucepan, combine corn syrup, sugar, water, and butter over medium heat. Stir until sugar dissolves completely, then stop stirring to prevent crystallization.
Cook mixture until it reaches 250°F (hard ball stage) on candy thermometer. This temperature ensures proper binding without making balls too hard to eat comfortably.
Remove from heat immediately and stir in vanilla and salt. The mixture should be smooth and glossy with no grittiness from undissolved sugar.
3. Form Your Ghoulish Spheres
Pour hot syrup over popped popcorn in large bowl, stirring quickly with wooden spoon to coat evenly. Work fast as mixture begins setting as it cools.
With greased hands, quickly form mixture into baseball-sized balls while still warm and pliable. Press firmly enough to hold together but not so hard you crush popcorn.
Place formed balls on prepared parchment paper and allow to cool completely, about 30 minutes. They should hold their shape firmly without being rock-hard.
4. Craft Realistic Blood Effects
In medium bowl, combine your chosen jam or preserves with corn syrup, stirring until smooth and uniform. The mixture should flow like thick cream but not be watery.
Add red food coloring gradually until you achieve convincing blood color – darker is usually more realistic than bright red for horror effects.
Test consistency by lifting spoon and observing drip pattern. Perfect blood should drip steadily but not run off completely when applied.
5. Apply Gruesome Blood Coating
Working with one ball at a time, spoon blood mixture over top, allowing it to drip naturally down sides. Don’t try to control drips too much – random patterns look most realistic.
Use back of spoon to create pooling effects at base and add additional drips for maximum horror impact. Layer different amounts for varied appearances.
Allow some white popcorn to show through for contrast that makes blood effects more dramatic and visually disturbing.
6. Perfect the Horror Presentation
While blood effects are still wet, add any texture elements like red sanding sugar or edible glitter for enhanced realism and light reflection.
Create pooled blood effects around base by allowing excess to drip onto parchment, then carefully transfer balls to final presentation location.
Work efficiently as blood effects begin setting within 15-20 minutes, limiting your working time for optimal appearance.
7. Final Gruesome Assembly
Arrange finished bloody balls on serving platters with strategic spacing to prevent blood effects from merging together and losing individual impact.
Add final horror touches like plastic spiders, fake spider webs, or gothic decorations that enhance the gruesome atmosphere without touching food directly.
Allow all effects to set completely before handling or covering for transport to Halloween events.
Tips and Variations
Professional Blood Effect Techniques:
Layered Blood Applications – Apply base layer, let partially set, then add fresh drips for more complex, realistic blood patterns that suggest different bleeding times.
Temperature Control – Work with blood mixture at room temperature for best flow characteristics. Too cold and it won’t drip; too warm and it runs too fast.
Realistic Drip Patterns – Study real blood drip patterns in horror movies or special effects references for most convincing application techniques.
Color Variation – Mix different shades of red in single batch to suggest blood at different stages of freshness for more sophisticated horror effects.
Creative Horror Variations:
Zombie Brain Balls – Add pink food coloring to some sections and create brain-like texture patterns with fork or knife for zombie apocalypse theme.
Vampire Bite Balls – Create two small holes in each ball before blood application to suggest vampire puncture wounds with fresh bleeding.
Mutant Popcorn – Use colored popcorn or add food coloring to base for alien or supernatural horror themes with otherworldly blood colors.
Ancient Sacrifice Balls – Use darker, more burgundy blood colors with gold accents for ritualistic horror themes appropriate for gothic celebrations.
Intensity Level Adjustments:
Mild Horror Version – Use lighter red colors and less dramatic dripping for family-friendly Halloween that’s spooky without being truly gruesome.
Maximum Gore – Layer multiple blood applications, add texture elements, and create pooling effects for adult horror parties where maximum shock value is desired.
Elegant Gothic – Use deep burgundy colors with gold accents for sophisticated Halloween entertaining that’s classy but still effectively spooky.
Flavor Enhancement Options:
Adult Horror – Add small amount of bourbon or rum to blood mixture for grown-up flavor complexity that complements fruit base beautifully.
Tropical Blood – Use tropical fruit preserves like mango or passion fruit with red coloring for exotic horror twist with unique flavor profiles.
Spiced Autumn Blood – Include cinnamon and nutmeg in blood mixture for warm seasonal flavors that bridge horror with autumn comfort.
Make-Ahead Strategies:
Form popcorn balls up to 3 days ahead and store covered. Apply blood effects day of serving for optimal appearance and texture.
Serving Suggestions
Horror Movie Theater Setup:
Gothic Laboratory Display – Arrange bloody balls in glass specimen jars or scientific containers with labels describing fictional gruesome experiments.
Vampire’s Feast – Present on antique silver platters surrounded by red roses, wine glasses filled with red liquid, and gothic candelabras.
Crime Scene Presentation – Use police tape, evidence markers, and forensic-style documentation to create realistic crime scene around bloody treats.
Haunted Hospital – Display on medical trays with surgical instruments, IV bags filled with red liquid, and hospital equipment for medical horror theme.
Interactive Horror Experiences:
Autopsy Table Setup – Let guests “examine” bloody evidence while discussing fictional gruesome details in character as forensic investigators.
Horror Movie Trivia – Use bloody balls as prizes for guests who correctly identify classic horror movie blood scenes or special effects.
Fear Factor Challenge – Create eating contests where guests must consume bloody balls while maintaining composure for entertainment value.
Themed Party Integration:
Zombie Apocalypse – Present as “fresh kills” or survival food in post-apocalyptic setting with appropriate props and atmospheric elements.
Witch’s Ingredients – Display as magical potion components in witch’s kitchen alongside spell books and mystical brewing equipment.
Haunted Carnival – Serve from carnival-style containers with vintage horror show banners and sideshow atmospheric elements.
Photography and Social Media:
The dramatic visual impact makes these perfect for horror-themed social media content. Use dramatic lighting and close-up shots to capture realistic blood effects.
Safety and Sensitivity:
While designed for maximum shock value, consider your audience and provide warnings for squeamish guests or those with blood phobias.
Storage and Reheating Instructions
Optimal Storage Conditions:
Store bloody popcorn balls in single layers on parchment paper in airtight containers at room temperature for up to 5 days. The blood effects may lose some glossiness but maintain flavor and visual impact.
Keep containers in cool, dry locations to prevent blood effects from becoming sticky or losing their realistic appearance.
Blood Effect Maintenance:
Blood effects will naturally set and lose some glossiness over time. For events longer than 4 hours, prepare touch-up blood mixture for refreshing appearance as needed.
Store extra blood mixture covered in refrigerator for up to one week, bringing to room temperature before applying touch-ups.
Long-Term Storage:
Uncoated popcorn balls can be made up to one week ahead and stored covered at room temperature. Apply blood effects within 24 hours of serving for optimal appearance.
Transportation Guidelines:
For transporting to horror parties, pack balls in rigid containers with dividers to prevent blood effects from smearing or balls from sticking together during movement.
Component Storage:
Blood Mixture – Store prepared blood effects covered in refrigerator for up to one week. Consistency may thicken slightly but can be thinned with small amounts of corn syrup.
Popcorn Balls – Undecorated balls keep excellent texture for 5-7 days when stored properly covered at room temperature.
Refreshing Stored Balls:
If blood effects become dull, lightly brush with fresh corn syrup or add small amounts of fresh blood mixture to restore glossy, wet appearance.
Quality Indicators:
Properly stored bloody balls should maintain firm texture without becoming hard. Blood effects should remain slightly glossy and not completely matte or cracked.
Recipe Notes
Critical Success Factors:
Syrup Temperature – Accurate candy thermometer reading ensures proper binding without creating balls too hard to eat comfortably.
Working Time – Move quickly when forming balls and applying blood effects as both components have limited working time before setting.
Blood Consistency – Proper thickness is crucial for realistic dripping without running off completely or being too thick to flow naturally.
Equipment Recommendations:
Candy Thermometer – Essential for achieving proper syrup temperature that creates ideal texture for popcorn ball formation and eating.
Large Mixing Bowl – Adequate space for coating popcorn evenly with hot syrup without spilling or burning yourself.
Heavy-Bottomed Saucepan – Prevents hot spots and burning during syrup preparation, ensuring smooth, professional results.
Parchment Paper – Multiple sheets for forming, cooling, and presenting balls while protecting surfaces from sticky blood effects.
Timing for Perfect Results:
Day Before Party – Form popcorn balls and store covered. Prepare blood mixture and refrigerate for next-day application.
Day of Party – Apply blood effects 2-4 hours before serving to allow proper setting while maintaining optimal appearance.
During Party – Touch up blood effects as needed and replenish serving displays to maintain maximum horror impact.
Quality Control Standards:
Consistent Sizing – Maintain similar ball sizes for professional appearance that suggests intentional horror creation rather than random results.
Realistic Effects – Study reference materials for convincing blood patterns that enhance rather than cartoonify the horror theme.
Food Safety – Ensure all blood mixture ingredients are food-grade and safe for consumption despite gruesome appearance.
Troubleshooting Common Issues:
Balls Won’t Hold Together – Syrup wasn’t hot enough or cooled too much before forming. Rewarm slightly and reform while pliable.
Blood Too Runny – Add more jam or preserves to thicken consistency. Test on one ball before applying to entire batch.
Blood Too Thick – Thin with small amounts of corn syrup or lemon juice until proper dripping consistency is achieved.
Uneven Blood Distribution – Work more quickly while mixture is optimal consistency, or prepare smaller batches for better control.
Nutrition Information (Per Serving)
| Nutrient | Amount |
|---|---|
| Calories | 245 |
| Total Fat | 3g |
| Saturated Fat | 1g |
| Carbohydrates | 58g |
| Sugar | 42g |
| Fiber | 3g |
| Protein | 3g |
| Sodium | 145mg |
| Cholesterol | 5mg |
| Calcium | 15mg |
| Iron | 1mg |
Nutrition information is an estimate based on 12 balls and may vary based on specific blood mixture ingredients and application amounts.
Recipe Card Summary
Course: Dessert/Snack
Cuisine: American/Horror
Servings: 12 balls
Prep Time: 30 minutes
Cook Time: 15 minutes
Total Time: 45 minutes (plus setting time)
Ingredients:
Popcorn Ball Base:
- 12 cups plain popped popcorn
- 1 cup light corn syrup
- 1/2 cup granulated sugar
- 1/4 cup water
- 3 tablespoons butter
- 1 teaspoon vanilla extract
- 1/2 teaspoon salt
Blood Effects:
- 1 cup strawberry jam or preserves
- 1/4 cup corn syrup
- Red food coloring gel
- 1 tablespoon lemon juice
Optional Enhancements:
- Red sanding sugar
- Edible red glitter
- Mini marshmallows or pretzel pieces
Instructions:
- Line baking sheets with parchment and grease hands.
- Combine corn syrup, sugar, water, and butter in heavy saucepan.
- Cook to 250°F (hard ball stage) without stirring.
- Remove from heat, add vanilla and salt, stir until smooth.
- Pour over popcorn and mix quickly to coat evenly.
- Form into balls with greased hands while mixture is warm.
- Cool completely on parchment paper, about 30 minutes.
- Mix jam, corn syrup, food coloring, and lemon juice for blood.
- Spoon blood mixture over balls, allowing realistic drips.
- Let set completely before serving or transporting.
Notes:
- Work quickly while syrup and blood mixture are optimal consistency
- Test blood consistency on one ball before coating entire batch
- Store uncoated balls up to 1 week, apply blood effects day of serving
- Use candy thermometer for accurate temperature readings
Diet Tags
Gluten-Free: Made with naturally gluten-free popcorn and standard ingredients
Vegetarian-Friendly: Contains no meat products, suitable for vegetarian diets
Nut-Free Option: Can be made completely nut-free by checking all ingredient labels
Egg-Free: Contains no eggs, safe for those with egg allergies
Horror-Themed: Specifically designed for maximum visual shock value at Halloween parties
Individual Portions: Perfect serving size for party guests and trick-or-treaters
Health Benefits
Whole Grain Benefits: Popcorn provides whole grain nutrition and fiber that supports digestive health and sustained energy.
Portion Control: Individual ball format helps manage treat consumption while providing satisfying sweetness.
Social Entertainment: Interactive shock value encourages conversation and shared experiences at horror-themed celebrations.
Creative Expression: Making these treats provides artistic outlet through horror-themed food craft and presentation.
Vitamin C Content: Fruit-based blood effects contribute vitamin C from strawberry or other fruit preserves used.
Energy Source: Combination of complex carbohydrates and natural fruit sugars provides sustained energy for Halloween activities.
Frequently Asked Questions
1. How do I prevent the popcorn balls from falling apart?
Make sure your corn syrup mixture reaches exactly 250°F (hard ball stage) for proper binding. Form the balls while the mixture is still warm and pliable, pressing firmly but not so hard that you crush the popcorn. If balls are crumbling, your syrup may not have been hot enough or may have cooled too much before forming.
2. Can I make the blood effects look more realistic?
Study reference photos of real blood drip patterns for authentic application techniques. Layer different shades of red, allow some areas to pool naturally, and don’t make the drips too uniform or symmetrical. Adding texture with red sanding sugar or creating dried blood areas with darker colors enhances realism significantly.
3. How far ahead can I make these for a Halloween party?
Form the popcorn balls up to 1 week ahead and store covered at room temperature – they actually improve in texture over the first day or two. However, apply the blood effects only on the day of serving, ideally 2-4 hours before the party, to maintain the glossy, wet appearance that makes them most effective.
4. What’s the best way to transport these without ruining the blood effects?
Pack them in rigid containers with dividers or individual compartments to prevent the balls from touching each other. Line containers with parchment paper and avoid stacking. Transport in a cool environment to prevent the blood mixture from becoming too soft or sticky.
5. Can I make these less scary for younger children?
Absolutely! Use lighter red colors, apply less dramatic blood effects, or even use different colored “slime” effects with green food coloring. You can also focus more on the fun, silly aspect rather than genuine horror, making them spooky rather than truly gruesome for family-friendly Halloween celebrations.
Final Thoughts
These Bloody Popcorn Balls represent the ultimate in Halloween shock-value treats, masterfully combining the comfort of familiar popcorn with genuinely disturbing visual effects that create unforgettable party moments. The realistic blood drips achieve that perfect balance between horrifying and delicious that makes guests simultaneously repulsed and irresistibly drawn to these gruesome creations.
What makes these treats particularly effective is their ability to transform something as innocent and wholesome as popcorn balls into genuine horror props that double as delicious desserts. The cognitive dissonance between appearance and taste creates exactly the kind of memorable experience that makes Halloween celebrations truly special and conversation-worthy long after the party ends.
The theatrical impact of these bloody balls cannot be overstated – they naturally become centerpieces and photo opportunities that capture the essence of Halloween horror while providing substantial snacking satisfaction. Guests will find themselves both impressed by your creative daring and surprised by how genuinely tasty these disturbing-looking treats actually are.
Don’t underestimate the social bonding that occurs around shared “gross-out” experiences like these. Adults and older children especially appreciate the artistry and humor involved in creating something so realistically gruesome from harmless ingredients, leading to conversations about special effects, horror movies, and creative food presentation that bring people together.
The make-ahead potential and dramatic presentation value make these perfect for hosts who want to create maximum impact without overwhelming complexity. The techniques you’ll master while creating realistic blood effects will serve you well in future horror-themed entertaining, establishing you as the person who creates the most memorable and effective Halloween treats.
Whether you’re hosting an adult horror movie marathon, a teenager’s Halloween party, or contributing to a community Halloween event where shock value is appreciated, these Bloody Popcorn Balls deliver exactly the right combination of visual horror and delicious satisfaction. Give this recipe a try and prepare to watch as your gruesome creations become the most photographed and talked-about treats at every Halloween gathering – I’d love to hear about the creative blood effects and horror presentations you develop for your own bloody Halloween celebrations!