
Spider Web Cheesecake Recipe – Creamy Halloween Dessert
Introduction
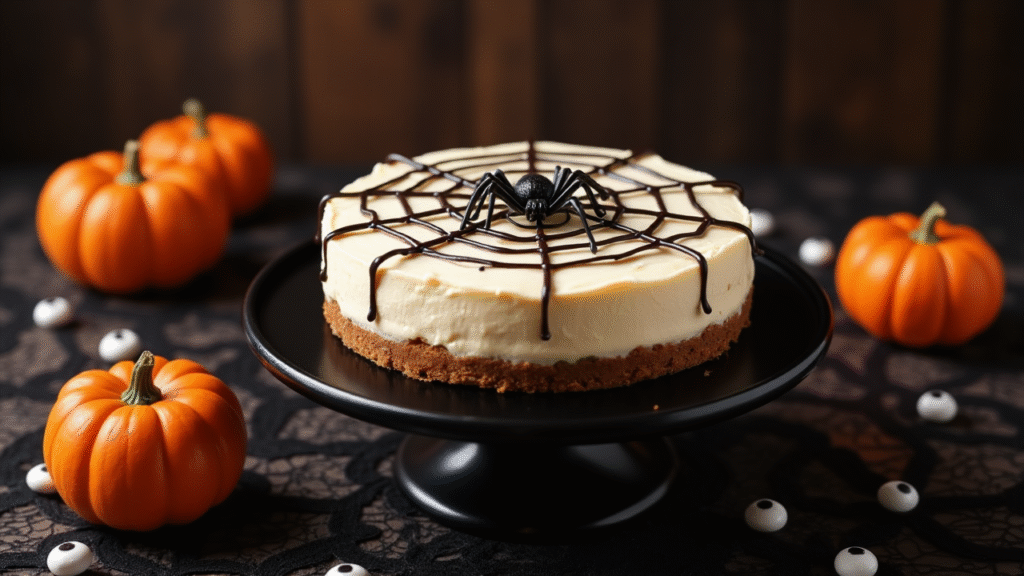
Looking to wow your guests at this year’s Halloween party? This Spider Web Cheesecake is a show-stopping dessert that’s as delicious as it is spooky. With its creamy vanilla cheesecake base, crunchy cookie crust, and a haunting chocolate spider web design, it’s perfect for Halloween gatherings, dessert tables, or a creepy-sweet surprise.
⏲ Prep & Chill Time
- Prep Time: 25 minutes
- Cook Time: 55 minutes
- Chill Time: 4 hours or overnight
- Total Time: ~5.5 hours
- Servings: 12 slices
🍰 Ingredients
For the Crust:
- 1 ½ cups chocolate cookie crumbs (Oreos without filling)
- 5 tbsp unsalted butter, melted
For the Cheesecake Filling:
- 3 (8 oz) packages cream cheese, softened
- 1 cup granulated sugar
- 1 tsp vanilla extract
- 3 large eggs
- ¾ cup sour cream
- ¼ cup all-purpose flour
For the Spider Web Topping:
- ½ cup semi-sweet chocolate chips
- 1 tsp coconut oil or butter
- 1 small plastic spider or candy spider for decoration (optional)
🧑🍳 Instructions
1. Prepare the Crust
Preheat your oven to 325°F (163°C). Mix the chocolate cookie crumbs with melted butter until fully combined. Press the mixture into the bottom of a 9-inch springform pan. Bake for 10 minutes, then remove and let cool.
2. Make the Cheesecake Filling
In a large mixing bowl, beat the softened cream cheese until smooth. Add sugar and vanilla, mixing until combined. Add eggs one at a time, beating well after each addition. Mix in sour cream and flour until smooth and creamy.
3. Assemble and Bake
Pour the cheesecake filling over the crust in the springform pan. Tap the pan gently on the counter to release any air bubbles. Bake for 50–55 minutes, or until the center is just slightly jiggly. Let cool at room temperature, then refrigerate for at least 4 hours or overnight.
4. Create the Chocolate Spider Web
Melt chocolate chips with coconut oil in a microwave-safe bowl in 20-second increments, stirring until smooth. Transfer melted chocolate to a piping bag or zip-top bag with the tip snipped off.
5. Decorate with the Web
Once the cheesecake is chilled, pipe concentric circles on the top surface using the melted chocolate. Use a toothpick to drag lines from the center outward, creating a spider web effect. Add a plastic spider or chocolate one in the center for spooky flair.
🎨 Suggested Add-ons or Variations
- Add a layer of raspberry jam under the cheesecake for a “bloody” surprise
- Use pumpkin cheesecake filling for a seasonal twist
- Garnish the base with crushed chocolate cookies for extra texture
- Top with candy eyes or mini spiders for extra creepiness
💡 Health Benefits
While this is a decadent dessert, using Greek yogurt instead of sour cream or a reduced-fat cream cheese can lighten it slightly without sacrificing creaminess.
❓ FAQs
Q: Can I make this cheesecake ahead of time?
A: Yes! This cheesecake is best when made a day in advance so it has time to chill fully.
Q: Do I need a water bath?
A: It’s not required for this recipe, but if you want an extra smooth top without cracks, wrap the pan in foil and bake it in a water bath.
Q: Can I freeze Spider Web Cheesecake?
A: Yes, freeze without the web topping. Add the web after thawing for best presentation.
📊 Nutritional Information (Per Slice Approx.)
| Nutrient | Amount |
|---|---|
| Calories | 420 kcal |
| Carbs | 30 g |
| Sugars | 22 g |
| Fat | 30 g |
| Protein | 6 g |
| Fiber | 1 g |
🏷️ Diet Tags or Labels
Vegetarian • Halloween • Party Dessert • Baked
🎃 Final Thoughts
Whether you’re serving it at a Halloween bash or just want something festive for dessert, this Spider Web Cheesecake delivers. With its rich texture, bold chocolate decoration, and spooky style, it’s a guaranteed crowd-pleaser. Don’t forget to snap a photo before the first slice disappears!
