
Spooky Graveyard Cake Recipe – Perfect Halloween Dessert
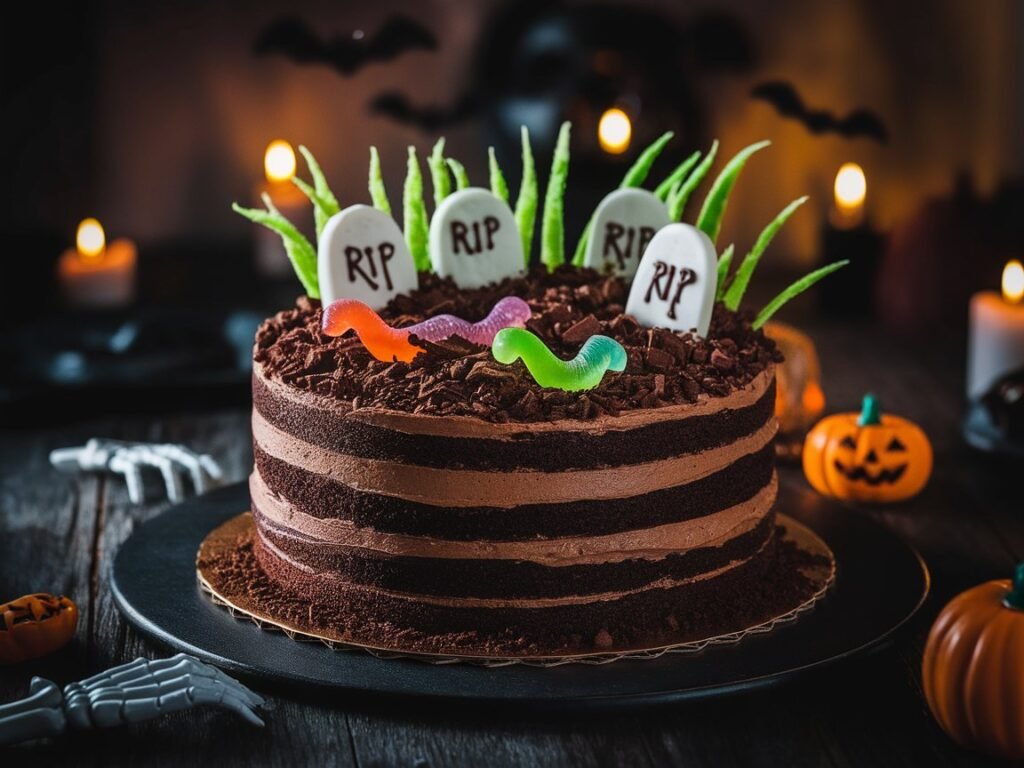
Picture the look of pure delight on your guests’ faces when you present a cake that looks like it came straight from a haunted cemetery, complete with tombstones, dirt, and creepy crawlers emerging from the ground. This Graveyard Cake is the ultimate showstopper dessert that combines rich, decadent chocolate cake with playful Halloween decorating that’s surprisingly achievable for home bakers of all skill levels.
What makes this cake truly special isn’t just its dramatic appearance – though that certainly steals the show – but how it perfectly balances impressive visual impact with delicious, crowd-pleasing flavors. The foundation is a moist, rich chocolate cake that serves as the perfect backdrop for layers of chocolate frosting and crushed cookie “dirt” that actually enhance the dessert’s taste rather than just serving as decoration.
The genius of this recipe lies in its forgiving nature and endless customization possibilities. You can start with a simple box cake mix for convenience or go completely from scratch if you’re feeling ambitious. The decorating techniques use everyday ingredients like chocolate cookies, candy, and simple fondant work that anyone can master. You’ll discover how to create realistic-looking tombstones, achieve the perfect “dirt” texture, and add spooky elements that will have everyone talking about your baking skills long after Halloween is over.
Ingredients Breakdown
For the Chocolate Cake Base:
- 2 boxes chocolate cake mix (18.25 oz each) – Using box mix ensures consistent results and saves time for decorating. Choose a high-quality brand like Duncan Hines or Betty Crocker for the best flavor and texture. You can substitute with your favorite from-scratch chocolate cake recipe if preferred.
- 6 large eggs – Eggs provide structure and richness. Room temperature eggs incorporate more easily into the batter, so remove them from the refrigerator 30 minutes before baking.
- 1 1/3 cups vegetable oil – Creates moisture and tender crumb. You can substitute with melted butter for richer flavor, though the texture will be slightly denser.
- 2 2/3 cups water – Some bakers substitute coffee for half the water to enhance chocolate flavor, but plain water works perfectly for this spooky creation.
For the Chocolate Buttercream:
- 1 cup unsalted butter, softened – The foundation of smooth, creamy frosting. Properly softened butter should give slightly to pressure but not be melted or oily.
- 3/4 cup unsweetened cocoa powder – Choose high-quality cocoa like Hershey’s Special Dark for intense chocolate flavor and rich color that mimics real soil.
- 6 cups powdered sugar – Provides sweetness and structure. Sift if lumpy to ensure smooth frosting without grittiness.
- 2/3 cup milk or heavy cream – Heavy cream creates richer frosting, while milk produces a lighter texture. Add gradually to achieve perfect consistency.
- 2 teaspoons vanilla extract – Enhances the chocolate flavor and adds depth to the overall taste profile.
For the Graveyard Decorations:
- 2 packages chocolate sandwich cookies (like Oreos) – These create the perfect “dirt” when crushed. The cream filling adds texture variation that looks remarkably realistic.
- 8 oz white chocolate or vanilla fondant – For creating tombstones. White chocolate is easier to work with and tastes better, while fondant holds shapes more precisely.
- Black food gel or edible marker – For writing “RIP” and other spooky messages on tombstones. Gel food coloring provides better coverage than liquid varieties.
- Green coconut flakes – Mix with green food coloring to create realistic-looking grass around tombstones.
- Gummy worms and Halloween candy – Choose candy that complements the chocolate flavors while adding visual interest and fun surprises.
Optional Enhancements:
- Chocolate pudding – Can be layered between cake layers for extra richness and “muddy” appearance when cake is sliced.
- Cream cheese – Adding 4 oz softened cream cheese to the buttercream creates tangier, more stable frosting.
Common Substitutions: For gluten-free versions, use gluten-free chocolate cake mix and ensure all decorations are gluten-free certified. Those avoiding dairy can substitute plant-based butter and milk alternatives, though frosting texture may vary slightly. Sugar-conscious bakers can reduce powdered sugar by up to 1 cup and add extra cocoa for flavor compensation.
Step-by-Step Instructions
Step 1: Prepare and Bake the Cake Layers Preheat oven to 350°F and grease two 9-inch round cake pans, then dust with cocoa powder instead of flour for better color consistency. In a large bowl, combine both boxes of cake mix, then add eggs, oil, and water. Beat with electric mixer on medium speed for 2 minutes until well combined and smooth. Divide batter evenly between prepared pans and bake for 28-35 minutes, or until a toothpick inserted in center comes out with just a few moist crumbs. Cool in pans for 10 minutes before turning out onto wire racks to cool completely.
Step 2: Create the Chocolate Buttercream In a large bowl, beat softened butter with electric mixer until light and fluffy, about 3-4 minutes. Gradually add cocoa powder, beating until well combined. Alternately add powdered sugar and milk, beginning and ending with powdered sugar, beating well after each addition. Beat in vanilla extract and continue mixing until frosting reaches spreadable consistency. If too thick, add milk one tablespoon at a time; if too thin, add more powdered sugar gradually.
Step 3: Assemble the Base Cake Place one cake layer on serving plate and spread about 1 cup frosting evenly over the top. Add second layer and apply a thin “crumb coat” of frosting over entire cake to seal in crumbs. Refrigerate for 30 minutes to set, then apply remaining frosting in a smooth, even layer. The frosting doesn’t need to be perfectly smooth since it will be covered with “dirt.”
Step 4: Create the Dirt and Grass Effects Place chocolate sandwich cookies in a food processor and pulse until you achieve a mixture of fine crumbs and some larger chunks – this variation creates the most realistic dirt appearance. If you don’t have a food processor, place cookies in a sealed plastic bag and crush with a rolling pin. Sprinkle the cookie crumbs generously over the entire top and sides of the frosted cake, pressing gently to adhere.
Step 5: Make Tombstones and Decorations If using white chocolate, melt according to package directions and pour into tombstone-shaped molds, or spread on parchment paper and cut into tombstone shapes while still soft. For fondant tombstones, roll to 1/4-inch thickness and cut with knife or cookie cutters. Allow to dry for at least 2 hours before decorating. Use black food gel or edible markers to write “RIP,” names, or spooky messages on each tombstone.
Step 6: Add Final Spooky Details Create green “grass” by placing coconut flakes in a bowl with a few drops of green food coloring and mixing until evenly tinted. Sprinkle around the base of tombstones for realistic grass effects. Strategically place gummy worms so they appear to be crawling out of the dirt. Add other Halloween decorations like plastic skeleton hands, small pumpkins, or candy spiders to complete the graveyard scene.
Step 7: Final Assembly and Presentation Carefully insert tombstones into the cake by making small slits in the frosting and gently pressing them in place. Arrange additional decorations around the cake base and serving area to create a complete graveyard atmosphere. Refrigerate the completed cake for at least 1 hour before serving to ensure all elements are set and secure.
Tips and Variations
Professional Decorating Tips: The key to realistic-looking dirt is achieving the right texture with your cookie crumbs. Aim for mostly fine crumbs with some larger pieces for authenticity. Press the crumbs gently into the frosting to ensure they stick but don’t compact too much. For tombstones that stand upright reliably, insert toothpicks into the cake first, then slide tombstones down over them for extra support.
When working with white chocolate for tombstones, add a small amount of coconut oil or shortening to make it more pliable and easier to shape. Work quickly as chocolate sets fast once it begins cooling.
Creative Variations: Transform this into a zombie apocalypse cake by adding red gel food coloring to create “blood” drips on tombstones and using green-tinted coconut more liberally. For a more elegant gothic approach, use dark chocolate for tombstones and add edible silver dust for an aged, weathered appearance.
Create individual graveyard cupcakes using the same decorating principles on a smaller scale. This works wonderfully for classroom parties or when you need portion control.
Flavor Enhancements: Layer chocolate pudding between cake layers for extra richness and a “muddy” cross-section when sliced. Adding espresso powder to the cake batter intensifies the chocolate flavor without adding coffee taste.
For adults-only versions, brush cake layers with coffee liqueur or bourbon before frosting for sophisticated depth. Orange zest in the frosting creates subtle Halloween flavor that complements the chocolate beautifully.
Make-Ahead Strategies: Bake cake layers up to three days ahead and wrap tightly in plastic wrap at room temperature, or freeze for up to one month. Make tombstones several days in advance and store in airtight containers. The assembled cake keeps well for two days in the refrigerator, making it perfect for party planning.
Dietary Modifications: For egg-free versions, substitute each egg with 1/4 cup applesauce or commercial egg replacer. Vegan versions work well with plant-based butter and milk alternatives, though you may need to adjust quantities for proper consistency.
Serving Suggestions
Presentation Ideas: Serve this dramatic cake as the centerpiece of your Halloween dessert table, surrounded by dry ice for extra spooky atmosphere (ensure dry ice doesn’t contact food directly). Individual plates can be dusted with additional cookie crumbs to extend the graveyard theme to each serving.
Create a complete spooky dessert experience by dimming lights and using candles or colored lighting to enhance the eerie atmosphere. Serve with Halloween-themed napkins and plates to maintain the theme throughout the presentation.
Portion and Pairing Suggestions: This rich cake serves 12-16 people generously. The intense chocolate flavor pairs beautifully with vanilla ice cream or whipped cream to balance the richness. For beverages, consider spiced apple cider, hot chocolate, or Halloween-themed punches that complement the autumn season.
For adult parties, pair with coffee liqueurs, red wine, or bourbon-based cocktails that enhance the chocolate flavors while maintaining the sophisticated spooky atmosphere.
Interactive Serving Ideas: Let guests discover hidden gummy worms and candy surprises as they eat – this adds an element of fun discovery that delights both children and adults. Consider hiding different types of Halloween candy throughout the layers for varied surprises in each slice.
Create a “dig for treasure” experience by burying small wrapped candies in the cookie dirt before serving, allowing guests to excavate their own treats.
Photography and Memory Making: This cake photographs beautifully and makes an excellent centerpiece for Halloween party photos. The dramatic appearance creates natural conversation starters and memorable moments that guests will talk about long after the party ends.
Storage and Reheating Instructions
Short-Term Storage: Store the completed cake covered in the refrigerator for up to 4 days. The cookie crumb topping may soften slightly but remains delicious and maintains its visual appeal. Cover with a cake dome or loosely tent with foil to prevent the decorations from being disturbed.
For optimal freshness, store at room temperature for up to 2 days if your kitchen isn’t too warm, as the frosting may soften in heat.
Freezing Instructions: The unfrosted cake layers freeze beautifully for up to 3 months when wrapped tightly in plastic wrap and aluminum foil. Thaw overnight in the refrigerator before decorating.
The completed decorated cake can be frozen, though some decorations may lose their appearance quality. Freeze uncovered for 2 hours to set, then wrap carefully and freeze for up to 1 month.
Serving After Storage: Remove from refrigerator 30 minutes before serving to allow frosting to soften to ideal texture. If cookie crumbs have absorbed moisture, refresh the appearance by sprinkling additional crushed cookies over the surface just before serving.
Component Storage: Store extra frosting in the refrigerator for up to 1 week or freeze for up to 3 months. Bring to room temperature and rewhip before using. Tombstones can be stored in airtight containers at room temperature for up to 2 weeks, making them perfect for advance preparation.
Recipe Notes
Equipment Essentials: Two 9-inch round cake pans are standard, but you can adapt this recipe to different pan sizes by adjusting baking times. A food processor makes quick work of crushing cookies, though a rolling pin and sealed plastic bag work just as well.
An offset spatula makes frosting application much easier and creates smoother results. If you don’t have one, a regular butter knife works, though it requires more patience and care.
Timing Considerations: Allow at least 4 hours total time from start to finish, including cooling and setting time. Most of this is hands-off time, making it manageable even with busy schedules. The actual active working time is about 90 minutes.
Ingredient Quality Impact: Higher quality cocoa powder significantly impacts the final flavor and appearance. Dutch-processed cocoa creates darker, richer color and smoother flavor, while natural cocoa provides more intense chocolate taste.
Fresh eggs and real butter make noticeable differences in texture and flavor compared to substitutes, though the recipe works well with alternatives when needed.
Troubleshooting Common Issues: If frosting becomes too soft, refrigerate for 15-20 minutes then rewhip. If too stiff, add milk one teaspoon at a time until desired consistency is reached.
Cracking cake layers usually indicate overbaking – reduce time by 2-3 minutes next time. Sunken centers suggest expired leavening agents in the cake mix or incorrect oven temperature.
Scaling the Recipe: This recipe doubles well for larger crowds, though you may need to bake in batches depending on your oven size. Half recipes work for smaller gatherings, using 8-inch pans and adjusting baking time to 20-25 minutes.
Nutrition Information
| Nutrient | Per Serving (1/14 cake) |
|---|---|
| Calories | 485 |
| Total Fat | 18g |
| Saturated Fat | 8g |
| Carbohydrates | 82g |
| Sugar | 68g |
| Fiber | 4g |
| Protein | 6g |
| Sodium | 465mg |
| Cholesterol | 65mg |
| Calcium | 95mg |
| Iron | 2.8mg |
Nutrition information is an estimate and may vary based on specific ingredients used.
Recipe Card Summary
Course: Dessert Cuisine: American Servings: 14 Prep Time: 45 minutes Cook Time: 35 minutes Total Time: 4 hours (including cooling and decorating)
Ingredients:
- 2 boxes chocolate cake mix
- 6 large eggs
- 1 1/3 cups vegetable oil
- 2 2/3 cups water
- 1 cup unsalted butter, softened
- 3/4 cup cocoa powder
- 6 cups powdered sugar
- 2/3 cup milk
- 2 teaspoons vanilla extract
- 2 packages chocolate sandwich cookies
- 8 oz white chocolate or fondant
- Black food coloring
- Green coconut flakes
- Gummy worms and Halloween candy
Instructions:
- Bake cake layers according to package directions and cool completely
- Make chocolate buttercream by beating butter, cocoa, powdered sugar, milk, and vanilla
- Layer and frost cake, applying crumb coat first
- Crush cookies for “dirt” and sprinkle over frosted cake
- Create tombstones from white chocolate or fondant, decorate with black writing
- Add green coconut “grass” and place tombstones
- Finish with gummy worms and Halloween decorations
Notes: Can be made 2 days ahead. Store covered in refrigerator. Tombstones can be made several days in advance.
Diet Tags
Vegetarian: Yes Gluten-Free: Use gluten-free cake mix and check all decorations Nut-Free: Yes (check candy ingredients) Dairy: Contains butter and milk (can substitute with plant-based alternatives)
Health Benefits
While this is definitely an indulgent treat, it does provide some benefits. Dark cocoa contains antioxidants and may support heart health. The cake provides carbohydrates for energy, and when shared at parties, it offers the psychological benefits of celebration and social connection.
The homemade nature allows control over ingredients and quality, avoiding preservatives found in many commercial cakes. Portion control is easier when serving a dramatically decorated cake that encourages mindful enjoyment rather than mindless snacking.
Frequently Asked Questions
1. Can I make this cake without eggs for those with allergies? Yes, substitute each egg with 1/4 cup applesauce, mashed banana, or commercial egg replacer. The texture will be slightly different but still delicious. Applesauce creates the most neutral flavor, while banana adds subtle sweetness that complements chocolate well.
2. How far in advance can I make the decorative elements? Tombstones made from white chocolate or fondant can be created up to two weeks ahead and stored in airtight containers at room temperature. Cookie crumbs can be made up to one week ahead and stored in sealed containers. The green coconut grass keeps for several days in the refrigerator.
3. What’s the best way to transport this cake to a party? Assemble the cake completely at your destination if possible, bringing components separately. If you must transport assembled, use a large, covered cake carrier and drive very carefully. Remove any tall decorations and reattach upon arrival to prevent damage during transport.
4. Can I use a different flavor cake base instead of chocolate? While chocolate provides the best “dirt” illusion, vanilla or yellow cake work well too. You might want to add cocoa powder to vanilla frosting regardless of cake flavor to maintain the dirt appearance. Spice cake or carrot cake create interesting “earthy” variations that suit the graveyard theme.
5. How do I fix frosting that’s too sweet or too bitter? For overly sweet frosting, add more cocoa powder gradually until balanced. For bitter frosting, add powdered sugar or a small amount of vanilla extract. You can also balance bitter frosting by adding a pinch of salt, which enhances sweetness perception without adding sugar.
Final Thoughts
Creating a Graveyard Cake is one of those magical baking experiences where the joy lies as much in the making as in the eating. This recipe brings together the satisfaction of baking a delicious chocolate cake with the pure fun of creative decorating, resulting in a dessert that serves as both conversation starter and crowd-pleaser at any Halloween gathering.
The beauty of this cake extends far beyond its spooky appearance – it’s a recipe that brings families together in the kitchen, encourages creativity and playfulness, and creates lasting memories around the Halloween season. Children love helping with the decorating process, and adults appreciate both the impressive visual impact and the rich, satisfying flavors that make every bite as good as the cake looks.
What makes this recipe truly special is its perfect balance of achievable techniques and dramatic results. You don’t need professional pastry skills or specialized equipment to create something that looks like it came from a high-end bakery. The forgiving nature of the decorating process means that even imperfections add to the realistic, weathered graveyard appearance.
Whether you’re hosting a Halloween party, contributing to a school event, or simply want to celebrate the season with something special, this Graveyard Cake delivers on every level. The combination of moist chocolate cake, rich buttercream, and playful decorations creates a dessert experience that satisfies both the eyes and the palate while bringing a healthy dose of Halloween magic to any occasion.
Give this recipe a try for your next spooky celebration and prepare to become the baker everyone remembers. The smiles, gasps of delight, and requests for the recipe will make every minute of preparation worthwhile. Share your creations and let me know what creative touches you add to make this graveyard cake uniquely yours – I’d love to see how you bring your own spooky vision to life!