
Decadent Tiramisu Cupcakes – A Coffee-Infused Italian Treat
1. Introduction
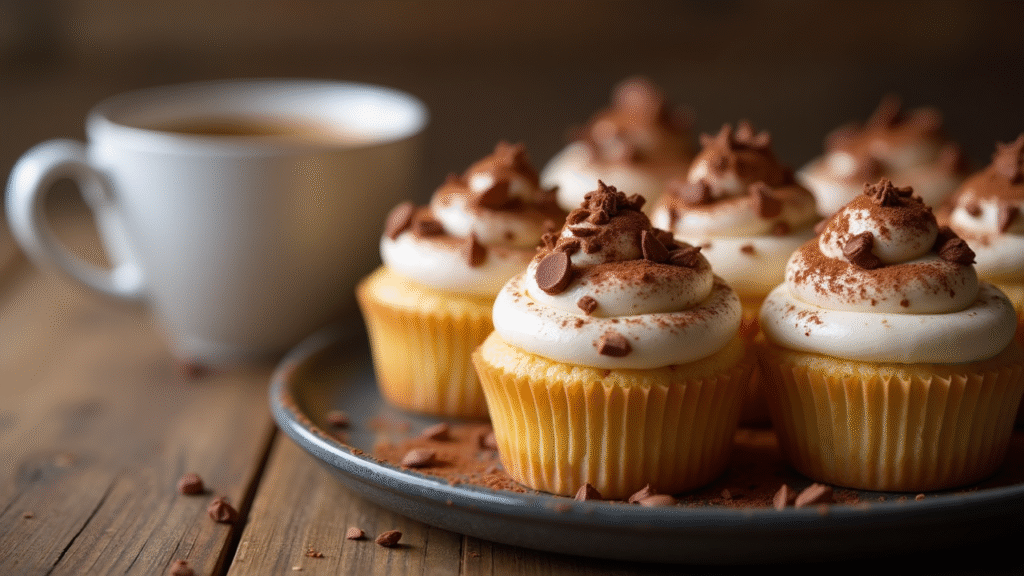
If you love the creamy, coffee-infused decadence of traditional tiramisu, these Tiramisu Cupcakes are about to become your new favorite dessert. Imagine soft, fluffy cupcakes soaked lightly with espresso, topped with a velvety mascarpone cream frosting, and finished with a dusting of cocoa powder. It’s all the indulgence of tiramisu, but in a cute, portable cupcake form.
The best part? They’re surprisingly easy to make and don’t require any complicated pastry skills. With a few pantry staples and some simple techniques, you can whip these up for a dinner party, a romantic date night, or even as a weekend treat. In this recipe, you’ll learn exactly how to prepare the cupcakes, make the signature tiramisu cream, assemble them for maximum flavor, and store them for later.
2. Ingredients Breakdown
For the Cupcakes
- All-Purpose Flour – Gives structure to the cupcakes. You can substitute with cake flour for a softer crumb.
- Baking Powder – Helps the cupcakes rise and become fluffy.
- Salt – Balances the sweetness and enhances flavor.
- Unsalted Butter – For rich flavor; if using salted butter, reduce added salt slightly.
- Granulated Sugar – Sweetens and adds structure.
- Eggs – Provide moisture and stability. Room temperature eggs blend better.
- Vanilla Extract – Adds depth to the flavor profile.
- Whole Milk – Keeps cupcakes moist; can use almond milk or oat milk for dairy-free.
For the Espresso Syrup
- Strong Brewed Espresso – Traditional tiramisu flavor base. For a caffeine-free version, use decaf espresso or strong instant coffee.
- Coffee Liqueur (Optional) – Enhances flavor; omit for kid-friendly version.
- Sugar – Balances the bitterness of coffee.
For the Mascarpone Frosting
- Mascarpone Cheese – Smooth, creamy, and slightly tangy; cream cheese can be used for a different but still delicious result.
- Heavy Whipping Cream – Whips into a light, airy texture.
- Powdered Sugar – Sweetens and stabilizes frosting.
- Vanilla Extract – Adds warmth to the cream.
Garnish
- Unsweetened Cocoa Powder – For the classic tiramisu dusting.
- Chocolate Shavings – Optional but adds elegance and texture.
3. Step-by-Step Instructions
Step 1 – Preheat & Prepare
Preheat your oven to 350°F (175°C). Line a 12-cup muffin tin with cupcake liners.
Step 2 – Make the Cupcake Batter
In a bowl, whisk together flour, baking powder, and salt. In another bowl, cream the butter and sugar until light and fluffy. Beat in eggs one at a time, then add vanilla. Alternate adding dry ingredients and milk, mixing until just combined.
Step 3 – Bake the Cupcakes
Divide batter evenly among liners (about 2/3 full). Bake for 18–20 minutes or until a toothpick inserted comes out clean. Cool completely before assembly.
Step 4 – Prepare Espresso Syrup
While cupcakes bake, mix espresso, sugar, and coffee liqueur (if using). Let cool to room temperature.
Step 5 – Make the Mascarpone Frosting
In a chilled bowl, whip heavy cream until soft peaks form. In another bowl, beat mascarpone, powdered sugar, and vanilla until smooth. Gently fold whipped cream into mascarpone mixture until fully combined.
Step 6 – Assemble the Cupcakes
Use a toothpick or skewer to poke holes in the tops of cooled cupcakes. Spoon about 1–2 teaspoons of espresso syrup over each cupcake, letting it soak in.
Step 7 – Frost & Garnish
Pipe or spread mascarpone frosting generously on top. Dust with cocoa powder and add chocolate shavings if desired.
4. Tips and Variations
- For a Kid-Friendly Version: Use decaf coffee and skip liqueur.
- Extra Coffee Kick: Brush cupcakes twice with espresso syrup.
- Chocolate Twist: Add mini chocolate chips to the batter.
- Gluten-Free Option: Use a gluten-free flour blend.
- Lighter Version: Use half cream and half Greek yogurt in the frosting.
5. Serving Suggestions
- Best Paired With: A cup of espresso, cappuccino, or dessert wine.
- Perfect for Occasions: Dinner parties, birthdays, or holiday gatherings.
- Add a Decorative Touch: Top with chocolate curls or edible gold leaf for an upscale presentation.
6. Storage and Reheating Instructions
- Refrigerator: Store in an airtight container for up to 3 days.
- Freezer: Unfrosted cupcakes can be frozen for up to 2 months. Thaw before assembling.
- Reheating: Not necessary; serve chilled or at room temperature.
7. Recipe Notes
- Can be made a day ahead for deeper flavor.
- Best with freshly brewed espresso.
- If mascarpone is too soft, chill before whipping.
8. Nutrition Information (Per Serving)
| Nutrient | Amount |
|---|---|
| Calories | 310 |
| Fat | 18g |
| Saturated Fat | 11g |
| Carbohydrates | 34g |
| Sugar | 20g |
| Fiber | 1g |
| Protein | 5g |
| Sodium | 160mg |
| Cholesterol | 80mg |
| Calcium | 60mg |
| Iron | 1.2mg |
Nutrition information is an estimate and may vary based on specific ingredients used.
9. Recipe Card Summary
Course: Dessert
Cuisine: Italian-Inspired
Servings: 12
Prep Time: 20 minutes
Cook Time: 20 minutes
Total Time: 40 minutes
Ingredients:
- 1 ½ cups all-purpose flour
- 1 ½ tsp baking powder
- ¼ tsp salt
- ½ cup unsalted butter
- 1 cup granulated sugar
- 2 large eggs
- 1 tsp vanilla extract
- ½ cup whole milk
- ½ cup brewed espresso
- 2 tbsp coffee liqueur (optional)
- 1 tbsp sugar (for syrup)
- 8 oz mascarpone cheese
- 1 cup heavy whipping cream
- ½ cup powdered sugar
- Cocoa powder for dusting
Instructions:
- Preheat oven to 350°F (175°C) and line muffin tin.
- Mix dry ingredients; cream butter and sugar separately.
- Add eggs, vanilla, then alternate dry mix and milk.
- Bake 18–20 minutes; cool completely.
- Prepare espresso syrup.
- Whip cream; fold into mascarpone mixture.
- Soak cupcakes with syrup, frost, and garnish.
Notes: Best served the same day for ultimate freshness.
🏷️ Diet Tags: Vegetarian, Coffee-Flavored, Dessert, Party Treat
🌿 Health Benefits: Contains calcium from dairy, provides antioxidants from cocoa and coffee.
10. Final Thoughts
Whether you’re serving them at a dinner party or treating yourself on a quiet afternoon, these Tiramisu Cupcakes are the perfect balance of rich flavor and light texture. They’re elegant, indulgent, and sure to impress anyone who takes a bite. Try them once, and you might just find yourself making them for every special occasion. If you give this recipe a go, share your experience in the comments — I’d love to hear how they turned out for you!